
WordPressにReactを埋め込む方法 - カスタム投稿で複数アプリを公開する

今回は一般的なWordPress上で、Reactをアプリをリリース・管理するにはどうすればよいのか、方法をご紹介したいと思います。
要件は以下のような形です。
WordPressの1つの記事にReactのアプリを1つずつリリースできるようにする
リリースするReactのアプリは1つ1つ別アプリ(react routerは利用しない)
NginxやApacheでルーティングしない
この記事では、複数のReactアプリを管理する方法を説明します。例として、'applist-001'と'applist-002'という2つのReactアプリを想定して説明を進めていきます。
方針としては、まず各アプリのディレクトリを作り、そのディレクトリ名をWordPressのカスタムフィールドで設定します。
それによって、各投稿で別々のReactアプリケーションを読み込ませる……という形です。
以下が実際の手順になります。
WordpressでのReact用カスタム投稿作成手順
1. カスタム投稿タイプの登録
まずはfunctions.phpに以下のコードを追加し、カスタム投稿タイプを登録します。
function create_react_app_post_type() {
    register_post_type('react_app',
        array(
            'labels' => array(
                'name' => __('React Apps'),
                'singular_name' => __('React App')
            ),
            'public' => true,
            'has_archive' => true,
            'supports' => array('title', 'editor', 'custom-fields'),
            'rewrite' => array('slug' => 'react-app'),
            'show_in_rest' => true,
        )
    );
}
add_action('init', 'create_react_app_post_type');
上記のように設定することで、後ほどexample.com/react-app/ 配下からReactアプリを参照できます。
'rewrite' => array('slug' => 'applist'),そしてその後の記述により、example.com/applist/ でアプリを配信できます。
2. Reactアプリケーションのビルドと配置
Create React Appで複数のReactアプリケーションを作成し、それぞれをビルドしましょう。
npx create-react-app react-app-001
cd react-app-001
npm run build

cd ..
npx create-react-app react-app-002
cd react-app-002
npm run build
ビルドされた各ReactアプリケーションをWordPressテーマの適切なディレクトリにコピーしてください。
なお、今回はテーマの下にReactアプリをデプロイします。
cp -r react-app-001/build/* /path/to/your-wordpress-theme/react-app-001/
cp -r react-app-002/build/* /path/to/your-wordpress-theme/react-app-002/
3. 共通のテンプレートファイルを作成
WordPressテーマのディレクトリ内に、共通のテンプレートファイルを作成します。例えば、single-react_app.phpという名前のファイルを作成します。
1~5行目のコメントは、wordpress側でテーマファイルを識別するために必要です。
<?php
/*
Template Name: Single React App
*/
?>
<!DOCTYPE html>
<html <?php language_attributes(); ?>>
<head>
    <meta charset="<?php bloginfo( 'charset' ); ?>">
    <meta name="viewport" content="width=device-width, initial-scale=1">
    <?php wp_head(); ?>
</head>
<body <?php body_class(); ?>>
    <div id="root"></div>
    <?php wp_footer(); ?>
</body>
</html>
4. Reactアプリケーションのスクリプトを動的に読み込む
functions.phpに下記のような記載を行い、スクリプトを読み込みます。
function enqueue_react_app() {
    if (is_singular('react_app')) {
        $post_id = get_the_ID();
        $react_app_directory = get_post_meta($post_id, 'react_app_directory', true);
        if ($react_app_directory) {
            wp_enqueue_style('react-app', get_template_directory_uri() . '/' . $react_app_directory . '/static/css/main.css');
            wp_enqueue_script('react-app', get_template_directory_uri() . '/' . $react_app_directory . '/static/js/main.js', array(), null, true);
        }
    }
}
add_action('wp_enqueue_scripts', 'enqueue_react_app');
もし子テーマを使っているなら、子テーマのfunctions.phpに下記を書き込んでください。
function enqueue_react_app() {
    if (is_singular('react_app')) {
        $post_id = get_the_ID();
        $react_app_directory = get_post_meta($post_id, 'react_app_directory', true);
        if ($react_app_directory) {
            wp_enqueue_style('react-app', get_stylesheet_directory_uri() . '/' . $react_app_directory . '/index.css');
            wp_enqueue_script('react-app', get_stylesheet_directory_uri() . '/' . $react_app_directory . '/index.js', array(), null, true);
        }
    }
}
add_action('wp_enqueue_scripts', 'enqueue_react_app');
この際get_template_directory_uriとget_stylesheet_directory_uriの違いに注意しましょう。
なお今回はテーマの下のディレクトリにtoolsを作成して、tools/react-app-001, tools/react-app-001 とbuildしたファイルを分けています。
5.カスタムフィールド名の有効化
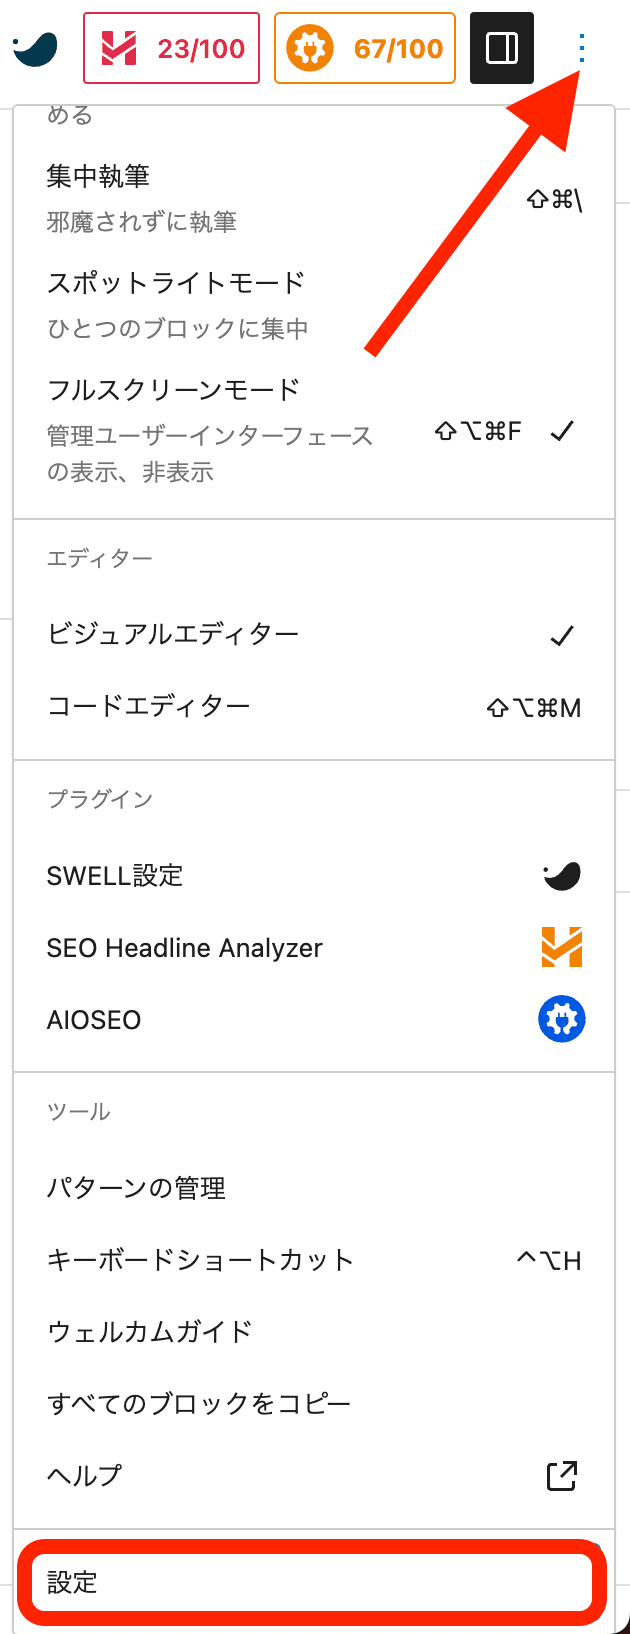
まずはカスタムフィールドの編集欄を表示させます。
投稿画面右上から設定を開き、カスタムフィールドの表示をONにしてください。

6. カスタム投稿を作成
1.の工程で追加したコードにより、管理画面のサイドバーへ『ReactApp』というメニューが追加されていると思います。

そこから新規投稿をしてみましょう。
追加が終わったら以下の手順を参考にしてカスタムフィールドを設定します。
1つ前の工程で行った作業により、投稿編集画面の下(or右下)に「カスタムフィールド」というメタボックスが表示されています。
「新規追加」ボタンをクリックします。
カスタムフィールドの「名前」にreact_app_directoryと入力します。
カスタムフィールドの「値」に対応するReactアプリケーションのディレクトリ名を入力します(例: react-app-001)。
「追加」ボタンをクリックします。
投稿を更新して保存します。

6. パーマリンクをリフレッシュ
今回は新規でカスタム投稿タイプを追加したので、パーマリンク設定をリフレッシュする必要があります。
下記手順でリフレッシュしましょう。
WordPress管理画面にログインします。
「設定」 > 「パーマリンク」に移動します。
何も変更せずに「変更を保存」ボタンをクリックします。
これで設定が完了です。
あとはアプリに合わせてcss等を設定しましょう。
Libprocのサイトでも、上記のような手順でReactアプリを公開しております。ぜひこちらも御覧ください!
お問合せ&各種リンク
お問合せ:GoogleForm
ホームページ:https://libproc.com
運営会社:TodoONada株式会社
presented by

サポートしていただくと、筆者のやる気がガンガンアップします!