Google ColabとChatGPTで画像の情報をJSON形式で取得する方法

はじめに
こんにちは。この記事では、Google ColabとOpenAIのChatGPTを使用して、画像から特定の情報を自動的に判定し、JSON形式で出力する方法について解説します。この方法を利用すれば、例えばアパレル業界での商品分類や画像データベースの管理に役立ちます。以下の手順を通して、画像解析の基本的なプロセスを理解し、実際に試してみることができます。
実際にできること
画像の判定:アップロードした衣服の画像から、特定の情報(例:男性用、女性用、ユニセックスなど)を判定します。
画像の色判定:画像から指定された色の中で最も適合する色を判定します。
JSON形式での情報出力:判定された情報をJSON形式で出力し、他のシステムやプロセスでの利用を容易にします。
この記事の対象者:
画像解析に興味があるエンジニア
OpenAIのAPIを利用したプロジェクトに取り組んでいる方
画像データから自動的に情報を抽出したい方
手順① 必要なライブラリのインストール
まず、Google Colab上で必要なライブラリをインストールします。以下のコマンドをColabのセルに入力して実行してください。
!pip install openai
!pip install requests
手順② OpenAI APIキーの取得
次に、OpenAI APIを利用するためにAPIキーを取得します。以下の手順で進めてください。
OpenAIのAPIキーのサイトにアクセスします。
「新しいAPIキーを作成」ボタンをクリックしてAPIキーを取得します。
取得したAPIキーをメモしておき、後でコード内に追加します。
手順③ コードのセットアップ
次に、画像の性別と色を判定するためのPythonコードを説明します。このコードは、OpenAIのAPIを使用して、アップロードした画像の情報を取得します。
`YOUR_OPENAI_API_KEY`に、実際に手順②で取得したAPIキーを貼り付けます。
import openai
import requests
import json
from google.colab import files
from IPython.display import Image, display
# OpenAI APIキーを設定
openai.api_key = 'YOUR_OPENAI_API_KEY'
def get_clothing_details(image_path, attempt=1):
# 画像データを取得
with open(image_path, "rb") as image_file:
image_data = image_file.read()
# ユーザーコンテンツを設定
user_content = """
You are an AI assistant specializing in fashion analysis. The image shows a clothing design. Please perform the following tasks:
1. Determine if the design is for:
- Men
- Women
- Unisex
2. Select one color from the following options that best represents the clothing design:
- Red
- Blue
- Green
- Black
- White
Ensure to include both the gender and the color in the JSON output. If unsure, please make a prediction.
"""
# APIリクエストのペイロードを設定
payload = {
"model": "gpt-4o",
"messages": [
{
"role": "system",
"content": "You are a proficient assistant. Output the result in JSON format including 'gender' and 'color'."
},
{
"role": "user",
"content": user_content
}
]
}
# APIリクエストのオプションを設定
headers = {
'Authorization': f'Bearer {openai.api_key}',
'Content-Type': 'application/json'
}
api_url = 'https://api.openai.com/v1/chat/completions'
response = requests.post(api_url, headers=headers, json=payload)
response.raise_for_status() # エラーハンドリング
jsonResponse = response.json()
print("Get clothing details response:", jsonResponse)
# レスポンスの解析
if 'choices' in jsonResponse and len(jsonResponse['choices']) > 0 and 'message' in jsonResponse['choices'][0] and 'content' in jsonResponse['choices'][0]['message']:
message_content = jsonResponse['choices'][0]['message']['content']
# コードブロックを取り除く
message_content = message_content.strip('```json').strip('```')
try:
content = json.loads(message_content)
if 'gender' in content and 'color' in content:
# 性別と色を取得
gender_map = {"Men": "男性", "Women": "女性", "Unisex": "ユニセックス"}
color_map = {"Red": "赤", "Blue": "青", "Green": "緑", "Black": "黒", "White": "白"}
gender = gender_map.get(content['gender'])
color = color_map.get(content['color'])
# 性別または色が不明の場合、再試行
if (gender is None or color is None) and attempt < 3:
return get_clothing_details(image_path, attempt + 1)
return {'性別': gender, '色': color}
else:
# 必要なフィールドが含まれていない場合、再度リクエストを送信
if attempt < 3:
return get_clothing_details(image_path, attempt + 1)
else:
raise ValueError("3回の試行後にレスポンスから必要な詳細を取得できませんでした。")
except json.JSONDecodeError:
if attempt < 3:
return get_clothing_details(image_path, attempt + 1)
else:
raise ValueError("3回の試行後にレスポンスからJSONを解析できませんでした。")
else:
if attempt < 3:
return get_clothing_details(image_path, attempt + 1)
else:
raise ValueError("3回の試行後にレスポンスから詳細を取得できませんでした。")
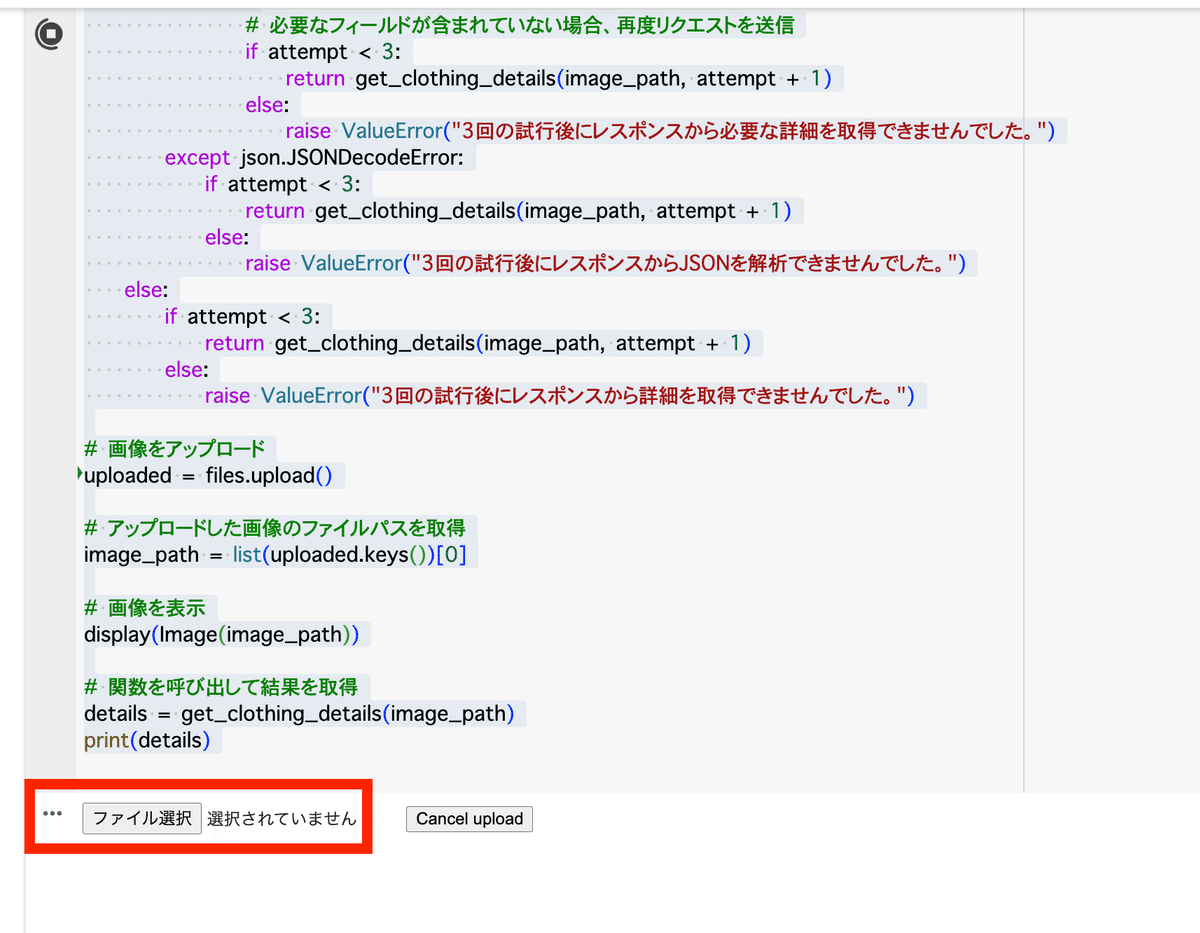
# 画像をアップロード
uploaded = files.upload()
# アップロードした画像のファイルパスを取得
image_path = list(uploaded.keys())[0]
# 画像を表示
display(Image(image_path))
# 関数を呼び出して結果を取得
details = get_clothing_details(image_path)
print(details)
実際に画像をアップロードして判定する
次に、上記のコードをGoogle Colabにコピーして実行します。実行すると、画像をアップロードするためのダイアログが表示されます。画像を選択してアップロードすると、OpenAIのAPIを使用して特定の情報が判定され、以下のようなJSON形式で結果が出力されます:
{
  "性別": "女性",
  "色": "赤"
}
終わりに
この記事では、Google Colabを使用して画像の性別と色を自動的に判定する方法について説明しました。OpenAIのAPIを活用することで、簡単に画像解析を行うことができます。是非、皆さんも試してみてください。
さらに、私のUdemy講座を特別価格で提供しています。以下のリンクから購入いただくと、期間限定で85%OFFクーポンが適用されます!
【初心者向け】ChatGPT完全ガイド:実践的な業務効率化の秘訣と人事業務への応用
ChatGPTを使った業務効率化の具体的な方法
人事業務への応用方法
効果的なプロンプトの作成術
【GPT-4o対応】初心者から上級者までのGPTsマスタークラス:基礎から実践まで - 初心者向けに優しく解説!
基本的なGPTsの使い方とそのメリット
GPTsを使用したビジネスシーンでの応用法
GASなどを使ったGPTsの外部連携方法
最後までご精読いただき、ありがとうございました。
この記事が気に入ったらサポートをしてみませんか?