
動画内の犬をレッサーパンダに変身させる方法

この記事はjig.jp Advent Calendar 2023の12月1日(金)の記事です。
犬の動画からAnimalPoseで動きを抽出し、Stable Diffusion web UIのAnimateDiffとControlNetでレッサーパンダに変身させた動画を生成します。

AnimalPoseのセットアップ
minicondaでPythonの仮想環境を作成し、Animal Pose Control for ControlNet、OpenCVをインストールします。
引用:https://github.com/abehonest/ControlNet_AnimalPose#installation
git clone https://github.com/abehonest/ControlNet_AnimalPose
conda create -n animalposeconda activate animalposepip install -U openmim
mim install mmengine
mim install "mmcv>=2.0.0"
mim install "mmdet>=3.0.0"git clone https://github.com/open-mmlab/mmpose.git
cd mmpose
pip install -r requirements.txt
pip install -v -e .
pip install python-opencv
モデルファイルをmodels/にダウンロードします
v1-5-pruned.ckpt
nimal_pose_epoch22.ckpt
rtmpose-m_simcc-ap10k_pt-aic-coco_210e-256x256-7a041aa1_20230206.pth
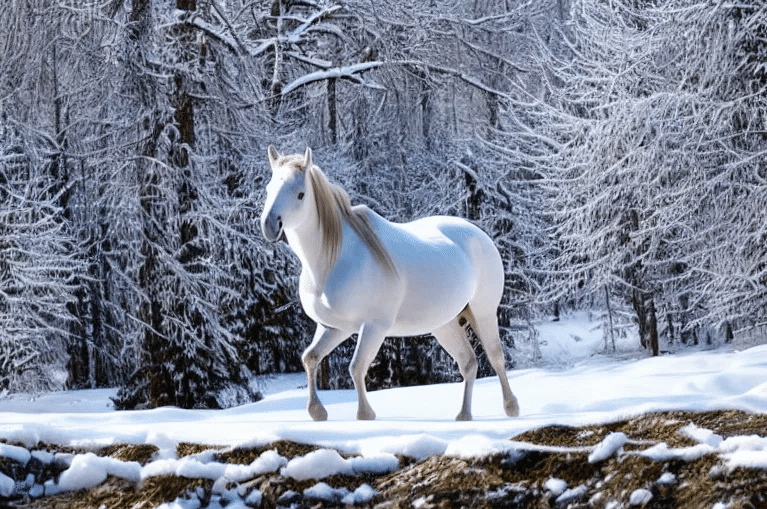
AnimalPoseのサンプル画像のtest_imgs/horse.pngのポーズデータを生成します。
Windowsではanimal_pose_tools.py内の~を./に変更します。
pose_config = './mmpose/configs/animal_2d_keypoint/rtmpose/ap10k/rtmpose-m_8xb64-210e_ap10k-256x256.py' # path to the model's configuration
filepose_checkpoint = './models/rtmpose-m_simcc-ap10k_pt-aic-coco_210e-256x256-7a041aa1_20230206.pth' # path to the model's checkpoint file
写真からポーズデータを生成するtest-animate-pos.pyファイルを作成します。
import cv2, sys
from animal_pose_tools import create_animal_pose_image

# 入力ファイルと出力ファイルのパス
input_file = sys.argv[1]
output_file = sys.argv[2]

# 入力ファイルを読み込む
photo = cv2.imread(input_file)

# ポーズ画像を作成
pose = create_animal_pose_image(photo)

# 保存
cv2.imwrite(output_file, pose)
test-animate-pose.pyを実行してポーズデータを生成します。
python test-animate-pose.py test_imgs/horse.png horse-pose.png 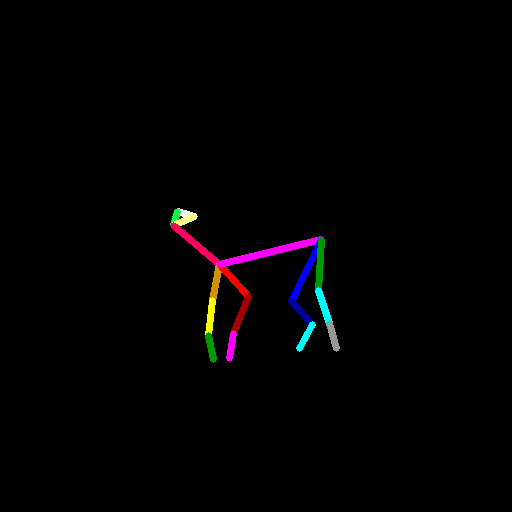
犬の動画のポーズデータの生成
犬の動画をPexelsからダウンロードします。動画をFFmpegで解像度512x288、フレームレート8、長さ10秒に変換します。
ffmpeg -i barking-dog.mp4 -r 8 -s 512x288 -t 10 barking-dog-lite.mp4
AnimalPoseのanimal_pose_tools.pyのcreate_animal_pose_image関数のestimatorの初期化処理を関数外に移動します。
初期化処理が関数次回呼び出し時に省略され処理が高速化されます。
# run inference on the image using the model
device = 'cuda:0'
cfg_options = dict(model=dict(test_cfg=dict(output_heatmaps=False)))


# build pose estimator
pose_estimator = init_pose_estimator(
    pose_config,
    pose_checkpoint,
    device=device,
    cfg_options=cfg_options
)
動画のポーズデータを生成するvideo2pose.pyファイルを作成します。フレームをVideoCaptureクラスで取得し、ポーズデータcreate_animal_pose_imageで作成します。ポーズデータの色空間をcvtColor関数でRGBからBGRに変換し、mp4ファイルをVideoWriterクラスで出力します。
from animal_pose_tools import create_animal_pose_image
from PIL import Image
import numpy as np
import cv2
import sys

input_file = sys.argv[1]
output_file = sys.argv[2]

cap = cv2.VideoCapture(input_file)
fps = cap.get(cv2.CAP_PROP_FPS)

resolution = (512, 512)
fourcc = cv2.VideoWriter_fourcc('X','2','6','4')
videoWriter = cv2.VideoWriter(output_file, fourcc, fps, resolution)

while cap.isOpened():
    ret, frame = cap.read()

    if not ret:
        break

    frame_np = np.asarray(frame)

    frame_np = cv2.resize(frame_np, new_size)

    pose = create_animal_pose_image(frame_np)
    pose = cv2.cvtColor(pose, cv2.COLOR_RGB2BGR)
    videoWriter.write(pose)

cap.release()
video2pose.pyを実行し、犬の動画のポーズデータを生成します。
python video2pose.py barking-dog-lite.mp4 barking-dog-pose.mp4
レッサーパンダの画像の生成
Python 3.10.6の新規環境を作成します。Stable Diffusion web UIをインストールし起動します。
conda create -n sdwebui python=3.10.6
conda activate sdwebui
git clone https://github.com/AUTOMATIC1111/stable-diffusion-webui
./wedui-user.bat --xformersレッサーパンダの画像を、モデルはClassic Negative、プロンプトは「red panda, on grass」で生成します。
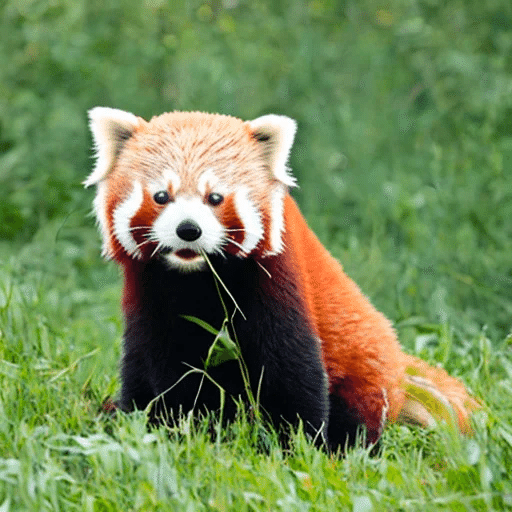
red panda, on grass, Steps: 20, Sampler: DPM++ 2M Karras, CFG scale: 7, Seed: 3570985333, Size: 512x512, Model hash: 7672e26be3, Model: classicnegative, Version: v1.6.0-2-g4afaaf8a
レッサーパンダの動画の生成
Stable Diffusion web UIの以下の拡張をインストールします。
AnimatePoseセットアップ時に用意したanimatediffMotion_v15V2.ckptをmodels/ControlNetフォルダにコピーします。
レッサーパンダの画像を以下の設定で生成します。
Model: classicnegative
Prompt: red panda, on grass
Steps: 20
Sampler: DPM++ 2M Karras
CFG scale: 7
Seed: 3570985333
Size: 512x512
AnimateDiff
MotionModule: animatediffMotion_v15V2.ckpt
Number of frames: 80
FPS: 8
VideoSource: barking-dog-pose.mp4
ControlNet
Preprocessor: none
Model: animal_pose_epoch22 [ed6cd726]
ContlolWeight: 1.0
ControlMode: Balanced
Resize Mode: Crop and Resize
結果はこのようになりました。noteに動画をアップできないのでgifでしかお見せできませんが、伝わればいいなと思います。
red panda, on grass,Steps: 20, Sampler: DPM++ 2M Karras, CFG scale: 7, Seed: 3570985333, Size: 512x512, Model hash: 7672e26be3, Model: classicnegative, AnimateDiff: "enable: True, model: animatediffMotion_v15V2.ckpt, video_length: 80, fps: 8, loop_number: 0, closed_loop: R-P, batch_size: 16, stride: 1, overlap: 4, interp: Off, interp_x: 10, mm_hash: 69ed0f5f", ControlNet 0: "Module: none, Model: animal_pose_epoch22 [ed6cd726], Weight: 1, Resize Mode: Crop and Resize, Low Vram: False, Guidance Start: 0, Guidance End: 1, Pixel Perfect: True, Control Mode: Balanced, Save Detected Map: True", Version: v1.6.0-2-g4afaaf8a
このように、犬の動きをするレッサーパンダの動画が生成されました。この10秒の動画の生成時間はGPUがGeForce RTX 4070のPCでは5分でした。是非チャレンジしてみてください。