“I tried out the easy LED conversion [RGB30 LED Flex PCB] as a beginner”

日本語版はこちら
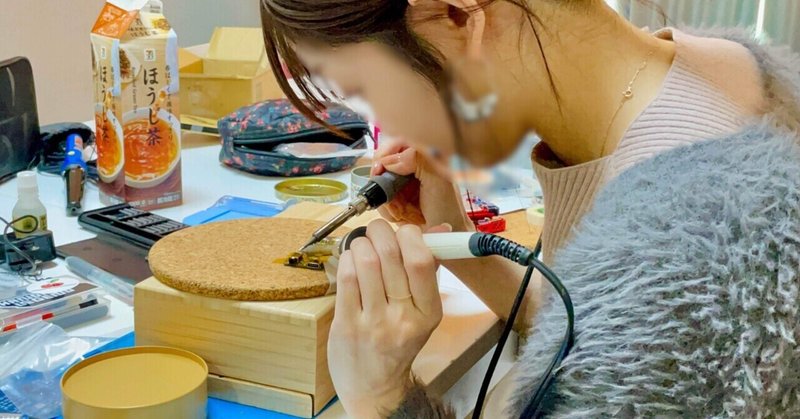
I had Pari-pari Ume, who I had just taught soldering, practice soldering on a prototype to hear her opinion as a beginner. She summarized her impressions in a nice column-like format, so I will publish them here.
"Nice to meet you.
My name is Pari-pari Ume.
Juntaro contacted me and I had the opportunity to try out the collaborative RGB30 LED product (prototype V00) which is being made by Juntaro, Ocelo, and Various.
That being said, I am a beginner who has only just learned how to solder and replace LEDs. I was very worried about whether I would be able to install it easily, but it went together very smoothly.
Meet the RGB30 LED Flex PCB

I performed soldering on the flexible PCB. The shape of the overlapping area with the directional keys suggests a design aimed at preventing incorrect inputs. I removed the Kapton tape which I had applied myself and began the task.

Preparation is key!

To make the process go more smoothly, I used masking tape with low adhesive strength to secure the flexible board in place.
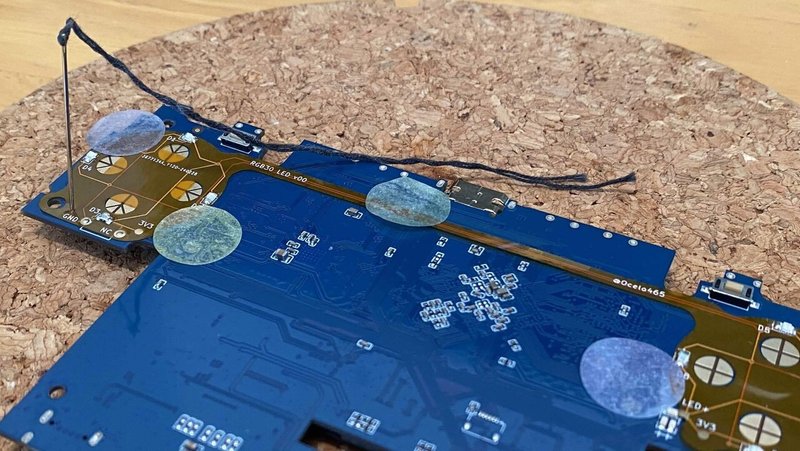
The V00 did not have the holes necessary for shell assembly, so I made them with a sewing pin.
Soldering is surprisingly easy!
The D-pad side only requires soldering in two places.
It was easy because I fixed the position with masking tape.

The power supply for the ABXY side will be taken from a 3.3V jumper. (I heard that it is more difficult to solder from the LED side, so I chose to connect it with a lead wire from the jumper.)


There were only four places where soldering were required. Thanks to the thorough preparation using masking tape etc., the work went surprisingly easily.
I was so impressed when the LED lit up for the first time!
I was so happy that I wanted to clap my hands! With basic soldering skills, even a beginner like me could easily attach the LEDs. And when I put the shell back in place, the LED lit up perfectly.
The buttons were made by various
D-pad & XY: Clear Holo Flake
ST・SEL & AB: Sun Opal
I thought the Sun Opal would be darker, but surprisingly it shines just as bright as the Holo Flake! The Sun Opal shines with a mix of blue and pink like a sunset, while the Holo Flake shines like a jewel. Both have different sparkles, and just looking at them makes my heart flutter!
lastly
Even though I've only just started soldering, I was able to finish the work in no time. It took about an hour in total. I was surprised and pleased that I was able to install the LEDs in such a short time.
I'm also looking forward to the improved V02, which has been tweaked in various ways. I'm excited to see further evolution, such as new functions and an improved design.
Pari-Pari Ume
(@paripariupe_ppu) ”
Related articles
この記事が気に入ったらサポートをしてみませんか?