PixiJSで画像読み込んだりなんやらかんやらする。
だいたいChatGPTくんに教えてもらったことのメモ。
参考
htmlから
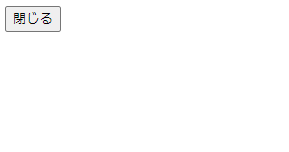
なんにもしないボタンのみの表示。
このhtmlファイルはファイルをダブルクリックするだけでブラウザに表示される。この時点でバグるのは保存時の文字コードの問題。

index.html
<!DOCTYPE html>
<html lang="ja">
<head>
    <meta charset="UTF-8">
    <title>Modal</title>
</head>
<body>
    <button id="close-modal">閉じる</button>
</body>
</html>
html+CSS
CSSによってhtml要素を装飾する。
ここではボタン要素にid属性ではなくclass属性をしていることに注意を要する。
index.html
<!DOCTYPE html>
<html lang="ja">
<head>
    <meta charset="UTF-8">
    <title>Modal</title>
    <link rel="stylesheet" href="styles.css">
</head>
<body>
	<button class="close-modal">閉じる</button>
</body>
</html>
styles.css
.close-modal {
  background-color: #4CAF50; /* 背景色 */
  border: none; /* 枠線を非表示にする */
  color: white; /* 文字色 */
  padding: 10px 20px; /* 内側の余白 */
  text-align: center; /* テキストの位置 */
  text-decoration: none; /* テキストの装飾を無効にする */
  display: inline-block; /* ブロック要素として表示する */
  font-size: 16px; /* フォントサイズ */
  margin: 4px 2px; /* 外側の余白 */
  cursor: pointer; /* カーソルをポインタにする */
  border-radius: 12px; /* 角を丸くする */
  transition-duration: 0.4s; /* ホバーエフェクトのアニメーション時間 */
}

セマンティクス(Semantics)
ある表現(ここではウェブページ)の内容や意味をhtmlという構造的な文章を用いて相手に伝えようとする努力。
html製作者は、ページの内容、コンテンツについて適切と思われるhtmlタグを当てはめるわけであるが、それが適切に当てはまってるかどうかは最終的にはページを訪れた個々人の判断にゆだねられる。
極論を言えば、html製作者は自分がそうだと思うようにページの内容にタグ付けすれば良い。ただしそれが他人に伝わるかは別の話である。可能な限り伝えたいのであればその辺の規範なりベストプラクティスなどにのっとれという話であると思われる。
極論を言えば、あなたのパソコンのファイルがぐっちゃぐちゃになるように、画像ファイルの分類がうまくいかないように、タグ付けという手法は必ず漏れ、およびなんとも言えない領域を作り出す。
ゆえに仕事としてお給料をもらいながらSEO対策を言いつけられているとかでなければそんなに難しく考える領域ではない。と思われる。
id属性とclass属性
属性(attribute)
id属性は要素ごとに一意(他に重複が無い)でなければならないとされる。規格上でしなければならないとされている。
class属性は要素ごとに複数設定してよい。そして設定したクラスごとにCSSなどを切り替えることができる。
DOMは、すべての名前空間ですべての要素にclass、idおよびslot属性に対するユーザーエージェントの要求を定義する。[DOM]
class、idおよびslot属性は、すべてのHTML要素に指定されてもよい。
HTML要素で指定される場合、class属性は、要素が属する様々なクラスを表す空白区切りトークンの集合の値を持たなければならない。
クラスを要素に割り当てることは、クラスのCSSセレクターでのマッチング、DOMにおけるgetElementsByClassName()メソッド、および他のそのような機能に影響を与える。
著者が使用できるclass属性のトークンに追加の制限は存在しないが、著者は、コンテンツの期待するプレゼンテーションを記述する値よりもむしろ、コンテンツの性質を記述する値を使用するよう推奨される。
HTML要素で指定される場合、id属性値は、要素のツリーですべてのIDに共通して一意でなければならず、かつ少なくとも1つの文字を含まなければならない。値は一切のASCII空白文字を含んではならない。
id属性はその要素の一意な識別子(ID)を指定する。
IDを取ることができる形式に制限は存在しない。具体的に、IDは数字のみまたは句読点のみで構成することができ、数字やアンダースコアで開始できる、などである。
要素の一意な識別子は様々な目的に使用されうる。中でも注目すべきはフラグメントを用いた文書の特定部分へのリンクする方法として、およびCSS由来の特定要素へのスタイル付けする方法としての目的である。
識別子は不透明な文字列である。固有の意味は、id属性の値から導出されるべきではない。
3.2.6 グローバル属性
モーダルなウィンドウ作る
html+CSS+JavaScript
index.html
<!DOCTYPE html>
<html lang="jp">
<head>
    <meta charset="UTF-8">
    <title>Modal</title>
    <link rel="stylesheet" href="styles.css">
</head>
<body>
    <button id="open-dialog">開く</button>
    <div id="dialog" class="dialog hidden">
        <div class="dialog-content">
            <button id="close-dialog">閉じる</button>
        </div>
    </div>
    <script src="app.js"></script>
</body>
</html>
styles.css
.dialog {
    position: fixed;
    top: 0;
    left: 0;
    width: 100%;
    height: 100%;
    background-color: rgba(0, 0, 0, 0.5);
    display: flex;
    justify-content: center;
    align-items: center;
}
.dialog-content {
    background-color: white;
    padding: 20px;
    border-radius: 5px;
    text-align: center;
}
.hidden {
    display: none;
}
app.js
const openDialogButton = document.getElementById("open-dialog");
const dialog = document.getElementById("dialog");
const closeDialogButton = document.getElementById("close-dialog");

// ダイアログを表示する関数
function showDialog() {
    dialog.classList.remove("hidden");
}

// ダイアログを非表示にする関数
function hideDialog() {
    dialog.classList.add("hidden");
}
// イベントリスナーを追加
openDialogButton.addEventListener("click", showDialog);
closeDialogButton.addEventListener("click", hideDialog);
classList
ファイル選択ダイアログ
html+JavaScript
src属性:画像ファイルのURL
alt属性:画像が未指定、あるいは読み込めない時に表示される代替テキスト。
scriptタグ内部はJavaScript
<!DOCTYPE html>
<html lang="jp">
<head>
    <meta charset="UTF-8">
    <title>Image Preview Example</title>
</head>
<body>
    <input type="file" id="file-input" accept="image/*">
    <img id="preview" src="" alt="プレビュー" style="max-width: 100%; max-height: 100%;">
    <script>
        const fileInput = document.getElementById('file-input');
        const preview = document.getElementById('preview');

        fileInput.addEventListener('change', (event) => {
            const file = event.target.files[0];
            if (!file) return;

            const reader = new FileReader();
            reader.onload = (e) => {
                preview.src = e.target.result;
            };
            reader.readAsDataURL(file);
        });
    </script>
</body>
</html>
ファイル選択ダイアログ(+PixiJS)
html+CSS+JavaScript+PixiJS
PixiJSのスプライトに対してファイル選択ダイアログから画像を読み込む。
pixi.jsはindex.htmlと同じフォルダにダウンロードしてきているものとする。
index.html
<!DOCTYPE html>
<html lang="jp">
<head>
    <meta charset="UTF-8">
    <title>PixiJS FileSelectDialoge</title>
</head>
<body>
    <input type="file" id="image-file" accept="image/*" hidden>
    <script src="pixi.js"></script>
    <script src="app.js"></script>
</body>
</html>
app.js
const app = new PIXI.Application({ width: 800, height: 600, backgroundColor: 0x1099bb });
document.body.appendChild(app.view);

//初期スプライトを作成する場合(この辺はローカルサーバーじゃないと動かない)
//const initialTexture = PIXI.Texture.from("img.jpg");
//const sprite = new PIXI.Sprite(initialTexture);
//sprite.x = (app.view.width - sprite.width) / 2;
//sprite.y = (app.view.height - sprite.height) / 2;
//sprite.interactive = true;
//app.stage.addChild(sprite);

const graphics = new PIXI.Graphics();
graphics.beginFill(0xDE3249);
graphics.drawRect(0, 0, 100, 100);
graphics.endFill();
app.stage.addChild(graphics);

const renderTexture = app.renderer.generateTexture(graphics);
const sprite = new PIXI.Sprite(renderTexture);
sprite.interactive = true;
app.stage.addChild(sprite);

const imageFileInput = document.getElementById("image-file");

// 画像ファイルが選択されたときに呼ばれる関数
function handleImageFileSelect(event) {
    const file = event.target.files[0];
    if (!file) return;

    const reader = new FileReader();
    reader.onload = (e) => {
        const texture = PIXI.Texture.from(e.target.result);
        sprite.texture = texture;
    };
    reader.readAsDataURL(file);
}


// スプライトがクリックされたときに呼ばれる関数
function handleSpriteClick() {
    imageFileInput.click();
}

// イベントリスナーを追加
imageFileInput.addEventListener("change", handleImageFileSelect);
sprite.on("pointerdown", handleSpriteClick);
