
DIY Pen Plotter (1) - Hardware Edition

DIY Pen Plotter (1) - Hardware Edition
A few years ago, I saw a mini pen plotter at Maker Fair, and it has been on my mind since then. This time, I decided to try building one myself.
I used inajob's blog as a reference and decided to build it by disassembling a DVD drive.
Materials:
2 DVD drives
Acrylic board (3mm thick)
Arduino Uno (Marduino, which I bought from Marutsu)
AC adapter (12V 3A, though a lower current might suffice)
DC jack kit for breadboards
Ballpoint pen refill (JETSTREAM 5mm)
Breadboard
Flat cables
Pin sockets
The stepper motors were taken from junk DVD drives. The motor driver is for controlling the stepper motors with pulses. I bought an EasyDriver using the A3967. The selection of the servo motor was pretty arbitrary since it only needs to lift and lower the pen, so high torque isn't necessary. For the ballpoint pen refill, it's better to use one that doesn't dry out easily. Regular ones didn't work well, but switching to a JETSTREAM made a big difference.
Making:
1) Disassemble the DVD drive and extract the stepper motors.
This was relatively easy to do.


The threaded rod on the right side is attached to the stepper motor. Since I wanted to use the drive mechanism and rails, I removed it along with the frame it's fixed to.
2) Solder flat cables to the stepper motor terminals.

I prepared three motors, including a spare, but soldering was difficult for some terminal configurations, and I ended up ruining one. Good thing I had a backup.

I soldered the flat cables to the terminals and fixed them to the side frame. To insulate and protect it, I secured everything with hot glue.
3) Solder pins to the motor driver.

I soldered pins to GND, STEP, DIR, PWR IN, GND, M+, MOTOR A×2, and MOTOR B×2.
4) Connect everything on a breadboard and test the stepper motors.
One motor driver didn't work due to an initial defect. I should have bought spares for the drivers as well.

In the actual setup, the AC adapter is connected to the system shown in the picture. I used the following blog as a reference for the connections and program.
5) Make the pen lifting mechanism from acrylic boards.
I'm glad I made an acrylic heater beforehand. While it can't produce complex parts like a 3D printer, it allows for freely creating simple ones.
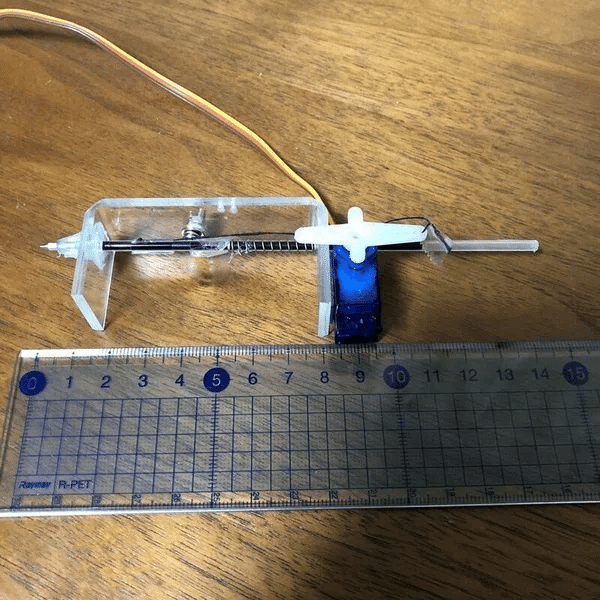
A spring is used to press the pen down, and a string pulls it up when controlled by the servo motor. If the pressing force is insufficient, it won't draw properly, and the pen tip may wobble, so it took some time to fine-tune.
6) Assembly.

The frames are fixed with L-shaped metal brackets, and the legs are secured with screws and nuts. I opted for this simple structure, but in hindsight, fixing it to a board might have made leveling and adjustments easier.

The stage was made from clear acrylic, making it easier to adjust positions afterward.
9) The physical assembly is complete with this. I'll cover the programming in the next post.