StreamDiffusionを外部プログラムから利用する(1)関数編

はにめに
StreamDiffusionをアプリから使う時、アプリ側のプログラムとStreamDiffusionの生成を分離できれば、アプリ側のプログラムの見通しが良くなります。リポジトリのデモでも例が示されていると思いますが(筆者はデモのソースコード殆ど読んでないのでわかりませんが。。。)そのためには工夫が必要です。いくつか手法はあると思いますが、3種類の方法を実装したので、順次公開と説明をしたいと思います。
1)関数化する(クラスでも同じですね)
2)POST/GETによるAPIサーバ化
3)ソケットを使うTCP/IPパケットによるサーバ化
これら以外にソケットを使うUDPなども考えられます。
1回目は関数化の話です。
StreamDiffusionを関数化して使う
これは、公式リポジトリでもラッパーで実装されています。もう少し融通が効いて、改造も出来るよう、独自に実装しました。以下の記事にあるコードの流用で、区切りのいい処理毎に関数としました。
ソースコード全体はこの章の最後に記載しています。
何処を関数にするのか
StreamDiffusionの処理の大まかな流れは以下のとおりです。
1)Diffusersのpipeにモデルをロードする
2)pipeをStreamDiffusionでラップしてStreamオブジェクトを定義
このとき、重要なパラメータを同時にラップします。
3)出来たStreamオブジェクトを利用して画像を生成する。
関数に分解する場合は上記3分割が良さそうです。
Diffusersのpipeにモデルをロードする
model_path = "./models/Model/Counterfeit-V3.0_fix_fp16.safetensors"
style_lora_path="./models/LoRA/megu_sports_v02.safetensors"
tensorrt_engine="engines_i2i_t4_non"

def load_model(model_path=model_path):
    pipe = StableDiffusionPipeline.from_single_file(
    model_path).to(
    device=torch.device("cuda"),
    dtype=torch.float16,
    )
    return pipe
引数はmodel_pathのみです。デフォルトは
model_path = "./models/Model/Counterfeit-V3.0_fix_fp16.safetensors"
で定義しています。
この関数はDiffuserでpipeにモデルをロードします。返り値は生成したpipeです。
Streamオブジェクト生成する
生成されたpipeを利用してStreamオブジェクトを準備すると共に画像生成に必要な各種の前処理を行います。以下は引数部分です。pipe以外はデフォルトが設定されているのでアプリからの呼び出しは単純です。
def init_stream(
                pipe,
                init_image=None,
                lora_path:str=style_lora_path,
                lora_preload:bool =True,
                lora_preload_weights:float=0.3,
                cfg_type:str="self",
                t_index_list:list[int]=[32, 45],
                img_size=[512,512],
                lora_load:bool =False,
                lora_scale_weights:float=0.3,
                tensorrt:bool =False ,
                tensorrt_engine:str = tensorrt_engine,
                prompt:str ="masterpiece, best quality",
                negative_prompt:str = "",
                guidance_scale:float = 1.2,
                delta:float = 1.0,
                seed:int = 1
                 ):
非公式LoRAのロード
    if lora_preload:
        #--- 非公式 独自LoRAのロード
        print("lora_path=",lora_path)
        pipe.load_lora_weights("latent-consistency/lcm-lora-sdv1-5", adapter_name="lcm") #Stable Diffusion 1.5 のLCM LoRA
        pipe.load_lora_weights("./models/LoRA/megu_sports_v02.safetensors", adapter_name="papercut")
        pipe.set_adapters(["lcm", "papercut"], adapter_weights=[1.0, lora_preload_weights])
lora_preload:bool =Trueの場合に実行されます
(非公式です。私個人の実験の基に実装しています)
Streamオブジェクト生成する
    # ---Wrap the pipeline in StreamDiffusion
    stream = StreamDiffusion(
        pipe,
        t_index_list=t_index_list,
        torch_dtype=torch.float16,
        cfg_type=cfg_type,
        width  =img_size[0], #height/width TensorRT有効のときはサイズに注意 512x512のみ
        height = img_size[1],
    )
StreamDiffusionでpipeをラップしています。引数はinit_stream()から引き継いでいます。
事前計算
生成時に再計算を省くために様々な計算をしておきます。
    # ---IIf the loaded model is not LCM, merge LCM
    stream.load_lcm_lora()
    stream.fuse_lora()

    #---公式 独自LoRAのロード
    if lora_load & (lora_path != "none"):
        stream.load_lora(lora_path)
        stream.fuse_lora(lora_scale=lora_scale_weights)

    # Use Tiny VAE for further acceleration
    stream.vae = AutoencoderTiny.from_pretrained("madebyollin/taesd").to(device=pipe.device, dtype=pipe.dtype)

    # --- Enable acceleration いずれかを有効にする
    if tensorrt==False:
        pipe.enable_xformers_memory_efficient_attention()
    else: # Enable acceleration with TensroRT
        from streamdiffusion.acceleration.tensorrt import accelerate_with_tensorrt
        stream = accelerate_with_tensorrt(stream,  tensorrt_engine,  max_batch_size=4,) #Step=3

    # ---事前計算
    stream.prepare(
                    prompt,
                    negative_prompt=negative_prompt,
                    guidance_scale = guidance_scale,
                    delta=delta,
                    seed=seed,
                    )

    # ---Warmup >= len(t_index_list) x frame_buffer_size
    if init_image is None:
        init_image= Image.new('RGB', img_size, (255, 255, 255))
    for _ in range(len(t_index_list)):
        stream(init_image)

    # ---Streamを返す
    return stream
1)#---IIf the loaded model is not LCM, merge LCM
LCM-LoRAをロード
#---公式 独自LoRAのロード
独自 LoRAをロード
2)---Use Tiny VAE for further acceleration
tiny VAEを適用
3)--- Enable acceleration
高速化処理。以下のA)かB)のいずれかを有効にします。
A) xformers
B) TensroRT xformersに比べて2~3倍高速になります。
4)---事前計算
ここでも引数はinit_stream()から引き継いでいます。
5) # ---Warmup >= len(t_index_list) x frame_buffer_size
パイプのウォームアップ(詳しくは論文参照)
6)---Streamを返す
作成したStreamを返します。
i2i生成
def stream_i2i(in_image,stream,prompt=""):
    #start_time = time.time()
    if prompt != "":
         #動的にプロンプトを変える         prompt=prompt+prompt_list[i]
        stream.update_prompt(prompt)

     #画像生成 i2i
    x_output = stream(in_image)
    ximage=postprocess_image(x_output, output_type="pil")[0]

    #gen_time=time.time() - start_time
    #print("i-time:",gen_time)
    #print("i-fps:   ",1/gen_time)

    #生成画像はpillow
    return ximage
アプリから引数streamを用いて画像を生成します。
同時にレファレンスとなるイメージと、インターラクティブプロンプト(オプション)も用いて画像を生成し、pillow形式の画像を返します。ここでプロンプトを渡さない場合はinit_stream()で渡したプロンプトで生成されます。
t2i生成
def stream_t2i(stream , prompt=""):
    #start_time = time.time()
    if prompt != "":
         #動的にプロンプトを変える         stream.update_prompt(prompt)

     #画像生成 t2i
    x_output = stream.txt2img()
    ximage=postprocess_image(x_output, output_type="pil")[0]

    #gen_time=time.time() - start_time
    #print("i-time:",gen_time)
    #print("i-fps:   ",1/gen_time)

    #生成画像はpillow
    return ximage
i2iと殆ど同じです。プロンプトからのみ生成するので、レファレンスのイメージが引数にありません。インターラクティブにプロンプトを変更で来ます。ここでプロンプトを渡さない場合はinit_stream()で渡したプロンプトで生成されます。以下全体のコードです。
sd_i2i_t2i_function_v1.py コード全体
import torch
from diffusers import AutoencoderTiny, StableDiffusionPipeline,StableDiffusionImg2ImgPipeline
from diffusers.utils import load_image

from streamdiffusion import StreamDiffusion
from streamdiffusion.image_utils import postprocess_image

import numpy as np
import time
import cv2
from PIL import Image

model_path = "./models/Model/Counterfeit-V3.0_fix_fp16.safetensors"
style_lora_path="./models/LoRA/megu_sports_v02.safetensors"
tensorrt_engine="engines_i2i_t4_non"

def load_model(model_path=model_path):
    pipe = StableDiffusionPipeline.from_single_file(
    model_path).to(
    device=torch.device("cuda"),
    dtype=torch.float16,
    )
    return pipe

def init_stream(
                pipe,
                init_image=None,
                lora_path:str=style_lora_path,
                lora_preload:bool =True,
                lora_preload_weights:float=0.3,
                cfg_type:str="self",
                t_index_list:list[int]=[32, 45],
                img_size=[512,512],
                lora_load:bool =False,
                lora_scale_weights:float=0.3,
                tensorrt:bool =False ,
                tensorrt_engine:str = tensorrt_engine,
                prompt:str ="masterpiece, best quality",
                negative_prompt:str = "",
                guidance_scale:float = 1.2,
                delta:float = 1.0,
                seed:int = 1
                 ):

    if lora_preload:
        #--- 非公式 独自LoRAのロード
        print("lora_path=",lora_path)
        pipe.load_lora_weights("latent-consistency/lcm-lora-sdv1-5", adapter_name="lcm") #Stable Diffusion 1.5 のLCM LoRA
        pipe.load_lora_weights("./models/LoRA/megu_sports_v02.safetensors", adapter_name="papercut")
        pipe.set_adapters(["lcm", "papercut"], adapter_weights=[1.0, lora_preload_weights])

    #--- RCFG の指定
     #cfg_type = "none"
     #cfg_type = "full"
     #cfg_type = "self"
     #cfg_type = "initialize"

    #--- t_index_lisの指定
    #index_list=[40]
    #index_list=[32, 45]
    #index_list=[38,40 ,42,45]
    #index_list=[20,30,40]
    #index_list=[40 ,42,45]
    #t_index_list=[41,42,44,45] #cam

    # ---Wrap the pipeline in StreamDiffusion
    stream = StreamDiffusion(
        pipe,
        t_index_list=t_index_list,
        torch_dtype=torch.float16,
        cfg_type=cfg_type,
        width  =img_size[0], #height/width TensorRT有効のときはサイズに注意 512x512のみ
        height = img_size[1],
    )

    # ---IIf the loaded model is not LCM, merge LCM
    stream.load_lcm_lora()
    stream.fuse_lora()

    #---公式 独自LoRAのロード
    if lora_load & (lora_path != "none"):
        stream.load_lora(lora_path)
        stream.fuse_lora(lora_scale=lora_scale_weights)

    # ---Use Tiny VAE for further acceleration
    stream.vae = AutoencoderTiny.from_pretrained("madebyollin/taesd").to(device=pipe.device, dtype=pipe.dtype)

    # --- Enable acceleration いずれかを有効にする
    if tensorrt==False:
        pipe.enable_xformers_memory_efficient_attention()
    else: # Enable acceleration with TensroRT
        from streamdiffusion.acceleration.tensorrt import accelerate_with_tensorrt
        stream = accelerate_with_tensorrt(stream,  tensorrt_engine,  max_batch_size=4,) #Step=3

    # ---事前計算
    stream.prepare(
                    prompt,
                    negative_prompt=negative_prompt,
                    guidance_scale = guidance_scale,
                    delta=delta,
                    seed=seed,
                    )

    # ---Warmup >= len(t_index_list) x frame_buffer_size
    if init_image is None:
        init_image= Image.new('RGB', img_size, (255, 255, 255))
    for _ in range(len(t_index_list)):
        stream(init_image)

    # ---Streamを返す
    return stream

# ---画像生成  Run the stream infinitely in_imageはOpenCV/255.0の0〜1へ変換したデータ=ndarrey
def stream_i2i(in_image,stream,prompt=""):
    #start_time = time.time()
    if prompt != "":
         #動的にプロンプトを変える         prompt=prompt+prompt_list[i]
        stream.update_prompt(prompt)

     #画像生成 i2i
    x_output = stream(in_image)
    ximage=postprocess_image(x_output, output_type="pil")[0]

    #gen_time=time.time() - start_time
    #print("i-time:",gen_time)
    #print("i-fps:   ",1/gen_time)

    #生成画像はpillow
    return ximage

def stream_t2i(stream , prompt=""):
    #start_time = time.time()
    if prompt != "":
         #動的にプロンプトを変える         stream.update_prompt(prompt)

     #画像生成 t2i
    x_output = stream.txt2img()
    ximage=postprocess_image(x_output, output_type="pil")[0]

    #gen_time=time.time() - start_time
    #print("i-time:",gen_time)
    #print("i-fps:   ",1/gen_time)

    #生成画像はpillow
    return ximage
アプリ側サンプルコード
以下のアプリでは表示をスレッド化して少しでも生成時間の短縮を工夫しています。以下表示部スレッドです。生成を始める前に
#-----表示スレッドを開始 th_img_flag=False thread = threading.Thread(target=disp_th, name='disp_th',daemon = True) thread.start()
で表示スレッドを動かし、画像が生成されたら
th_img = image #生成画像を準備
th_img_flag=True #画像準備フラグセット
のようにセットして表示させています。
# -----表示のスレッド化準備(必要に応じて)
global th_img , th_img_flag
#>>> 表示スレッドの定義
import threading
def disp_th():
global th_img , th_img_flag
while True:
if th_img_flag==True:
imgCV_RGB = np.array(th_img, dtype=np.uint8)
th_img = np.array(imgCV_RGB)[:, :, ::-1]
cv2.imshow("image", th_img)
cv2.waitKey(1)
th_img_flag=False
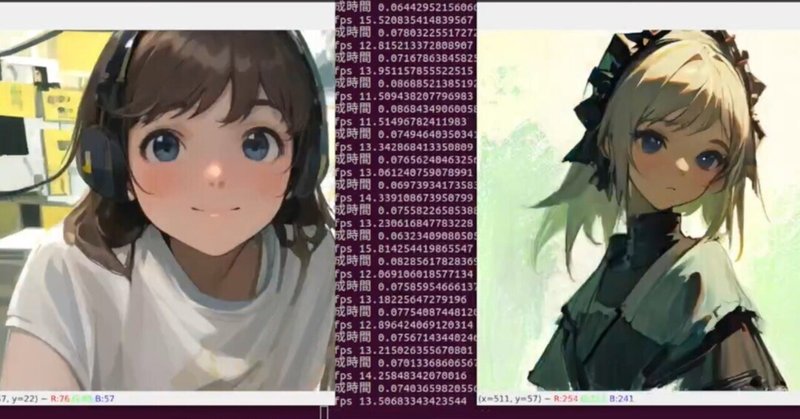
time.sleep(0.01)i2i WebCAMでキャプチャした画像をプロンプトに従い変換
import os
from PIL import Image
import cv2
import time
from time import sleep
import numpy as np
from sd_i2i_t2i_function_v1 import  load_model , init_stream , stream_i2i , stream_t2i

model_path = "./models/Model/Counterfeit-V3.0_fix_fp16.safetensors"
lora_path="./models/LoRA/megu_sports_v02.safetensors"

# -----表示のスレッド化準備(必要に応じて)
global th_img , th_img_flag
#>>> 表示スレッドの定義
import threading
def disp_th():
    global th_img , th_img_flag
    while True:
        if th_img_flag==True:
             imgCV_RGB = np.array(th_img, dtype=np.uint8)
             th_img = np.array(imgCV_RGB)[:, :, ::-1]
             cv2.imshow("image", th_img)
             cv2.waitKey(1)
             th_img_flag=False
        time.sleep(0.01)

# -----プログラムの開始
def main():
    from capture import init_cam,cap_img_pil, cap_close
    global th_img , th_img_flag  #表示スレッド用共有データとセマフォ
    #-----pipeの準備(モデルのロード)
    pipe = load_model ()

    #-----プロンプト
    prompt = "masterpiece, best quality, 1girl, solo, long hair,  white shirt, brown hair,looking at viewer,blush,bangs,blue eyes,smile,simple background, t-shirt,white background,closed mouth,white t-shirt,shorts,short shorts,headphones,black shorts,light brown hair,blue shorts "

    # -----Webカメラのキャプチャを開始
    status=init_cam()
    # -----キャプチャがオープンしていることを確認
    if status==False:
        print("カメラを開けません")
    #----- Prepare image
    image, init_image=cap_img_pil()

    #--- RCFG の指定
    cfg_type = "none"
     #cfg_type = "full"
     #cfg_type = "self"
     #cfg_type = "initialize"

    #--- t_index_lisの指定
    #index_list=[40]
    #index_list=[32, 45]
    #index_list=[38,40 ,42,45]
    #index_list=[20,30,40]
    #index_list=[40 ,42,45]
    #index_list=[41,42,44,45] #cam
    index_list=[35,35,35,45] #cam

    #-----Streamの初期化:=default
    stream=init_stream(
                        pipe=pipe ,
                        init_image=init_image,
                        lora_preload =True,
                        t_index_list= index_list,
                        #img_size=[512,768], #[w ,  h]
                        lora_load =True,
                        lora_scale_weights=0.5,
                        prompt=prompt ,
                        guidance_scale = 1.1,
                        cfg_type = cfg_type,
                        tensorrt=True,
                        )

    #-----表示スレッドを開始
    th_img_flag=False
    thread = threading.Thread(target=disp_th, name='disp_th',daemon = True)
    thread.start()


    #-----画像生成ループ
    count=500         #ループ回数
    total_time=0     #時間計測初期化     for n in  range(count):
         start_time=time.time()
          #カメラ入力          pil_image,cv2_image=cap_img_pil()
         #画像生成          image = stream_i2i(
                         pil_image,
                         stream,
                         )

         #スレッドで表示
         th_img = image      #生成画像を準備
         th_img_flag=True #画像準備フラグセット

         #ループ内で表示
         #cv2.imshow("i2i_c",image)
         #cv2.waitKey(1)

         #生成時間とフレームレートの表示          end_time=time.time()
         print("生成時間",end_time- start_time)
         print("i-fps",1/(end_time- start_time))
         total_time=total_time+(end_time- start_time)
    cap_close()
    print("avr-time:",total_time/count)
    print("avr-fps :",1/(total_time/count))

if __name__ == '__main__':
    main()
t2i 単純に何度も生成を行います
import os
from PIL import Image
import cv2
import time
from time import sleep
import numpy as np
from sd_i2i_t2i_function_v1 import  load_model , init_stream , stream_i2i , stream_t2i

model_path = "./models/Model/Counterfeit-V3.0_fix_fp16.safetensors"
lora_path="./models/LoRA/megu_sports_v02.safetensors"

# -----表示のスレッド化準備(必要に応じて)
global th_img , th_img_flag
#>>> 表示スレッドの定義
import threading
def disp_th():
    global th_img , th_img_flag
    while True:
        if th_img_flag==True:
             imgCV_RGB = np.array(th_img, dtype=np.uint8)
             th_img = np.array(imgCV_RGB)[:, :, ::-1]
             cv2.imshow("image", th_img)
             cv2.waitKey(1)
             th_img_flag=False
        time.sleep(0.01)

# -----プログラムの開始
def main():
    from capture import init_cam,cap_img_pil, cap_close
    global th_img , th_img_flag  #表示スレッド用共有データとセマフォ
    #-----pipeの準備(モデルのロード)
    pipe = load_model ()

    #-----プロンプト
    prompt = "masterpiece, best quality, 1girl,"
    prompt_list=[
            "1girl","long hair,","white shirt,","serafuku,","brown hair,","looking at viewer,","blush,","smile,", "bangs,","blue eyes,","simple background,", "t-shirt,",\
             "white background,","walk a  head,","white background,","walk a  head,","white background,","walk a  head,","white background,","walk a  head,","white background,"]
    #--- RCFG の指定
    cfg_type = "none"
     #cfg_type = "full"
     #cfg_type = "self"
     #cfg_type = "initialize"

    #--- t_index_lisの指定
    #index_list=[40]
    #index_list=[32, 45] #t2i     #index_list=[38,40 ,42,45]
    #index_list=[20,30,40]
    #index_list=[40 ,42,45]
    #index_list=[41,42,44,45] #cam
    #index_list=[35,35,35,45] #cam2
    index_list=[0, 16, 32, 45]  #t2i
    #-----Streamの初期化:=default
    stream=init_stream(
                        pipe=pipe ,
                        lora_preload =True,
                        t_index_list= index_list,
                        #img_size=[512,768], #[w ,  h]
                        lora_load =True,
                        lora_scale_weights=0.5,
                        prompt=prompt ,
                        guidance_scale = 1.2,
                        cfg_type = cfg_type,
                        #tensorrt=True,
                        )

    #-----表示スレッドを開始
    th_img_flag=False
    thread = threading.Thread(target=disp_th, name='disp_th',daemon = True)
    thread.start()


    #-----画像生成ループ
    count=500         #ループ回数
    #count=len( prompt_list)    #ループ回数
    total_time=0     #時間計測初期化     for n in  range(count):
         start_time=time.time()
          #動的にプロンプトを変える          #next_prompt=prompt + prompt_list[n]
         #画像生成          image = stream_t2i(
                         stream=stream,
                         #prompt= next_prompt,   #動的にプロンプトを変える                          )

         #スレッドで表示
         th_img = image      #生成画像を準備
         th_img_flag=True #画像準備フラグセット

         #ループ内で表示
         #cv2.imshow("i2i_c",image)
         #cv2.waitKey(1)

         #生成時間とフレームレートの表示          end_time=time.time()
         print("生成時間",end_time- start_time)
         print("i-fps",1/(end_time- start_time))
         total_time=total_time+(end_time- start_time)
    print("avr-time:",total_time/count)
    print("avr-fps :",1/(total_time/count))

if __name__ == '__main__':
    main()
まとめ
関数化はリポジトリのラッパーの独自実装版です。クラス形式になっていませんが、変更は容易です。ぜひ皆さんも独自実装にチャレンジしてください。
次回
FastAPIによるサーバ化、またはTCP/IPによるサーバー化の記事です。