Autoencoderを使用して次元削減

以前の記事で、Autoencoderでの入力データと再構成されたデータの間の誤差(再構成誤差)を利用した異常検知を行いました。
今回は次元削減を行ってみたいと思います。
下記の記事を参考にしています。
データセットの準備
今回はMNISTデータセット(手書き数字)を利用し、次元を削減します。
from keras.datasets import mnist
import numpy as np

(x_train, _), (x_test, _) = mnist.load_data()
データの前処理を行っておきます。
x_train = x_train.astype('float32') / 255.
x_test = x_test.astype('float32') / 255.
x_train = x_train.reshape((len(x_train), np.prod(x_train.shape[1:])))
x_test = x_test.reshape((len(x_test), np.prod(x_test.shape[1:])))
Autoencoderモデルの構築
エンコーダー層とデコーダー層を持つモデルの構築を行います。
from keras.layers import Input, Dense
from keras.models import Model

input_img = Input(shape=(784,))
encoded = Dense(32, activation='relu')(input_img)
decoded = Dense(784, activation='sigmoid')(encoded)

autoencoder = Model(input_img, decoded)
またエンコーダー用とデコーダー用のモデルを定義します。
encoder = Model(input_img, encoded)encoded_input = Input(shape=(32,))
decoder_layer = autoencoder.layers[-1]
decoder = Model(encoded_input, decoder_layer(encoded_input))モデルの学習
autoencoder.compile(optimizer='adam', loss='binary_crossentropy')
autoencoder.fit(x_train, x_train,
                epochs=50,
                batch_size=256,
                shuffle=True,
                validation_data=(x_test, x_test))
次元削減された画像を表示
import matplotlib.pyplot as plt
encoded_imgs = encoder.predict(x_test)
decoded_imgs = decoder.predict(encoded_imgs)
n = 10
plt.figure(figsize=(20, 4))
for i in range(n):
ax = plt.subplot(2, n, i + 1)
plt.imshow(x_test[i].reshape(28, 28))
plt.gray()
ax.get_xaxis().set_visible(False)
ax.get_yaxis().set_visible(False)
ax = plt.subplot(2, n, i + n + 1)
plt.imshow(decoded_imgs[i].reshape(28, 28))
plt.gray()
ax.get_xaxis().set_visible(False)
ax.get_yaxis().set_visible(False)
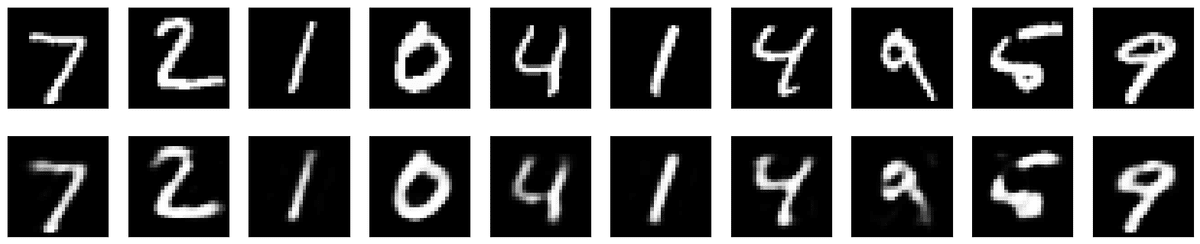
plt.show()上は元の画像です。下は再構築された画像です。
今回はベーシックなAutoencoderモデルによる次元削減のみですが、
参考記事では、ここからさらに発展させています。