MiniKFでReusableなComponentを作成

前回MiniKFでとりあえずPipeline作成してみたけど
次はReusableなComponentを作成してみる
基本前回と同じで「ローカルからGCSにcsvアップロード」「GCSのcsvをBQにロードする」の二つを実現。
Componentに変更を加えなくても、引数GCSのバケット名等指定すればいろんな場所にデータ移行できればいいなという目論見
ディレクトリ構成
以下構成で作成
本当はcomponentsディレクトリ作成して、「GCSからBQへロード」みたいな抽象度でcomponent作成して行った方が再利用性高そう
.
├── load_from_gcs_to_bq
│   ├── Dockerfile
│   ├── README.md
│   ├── build_image.sh
│   ├── component.yaml
│   ├── requirements.txt
│   └── src
│       └── main.py
├── pipeline.py
├── pipeline.tar.gz
├── upload_from_local_to_gcs
│   ├── Dockerfile
│   ├── README.md
│   ├── build_image.sh
│   ├── component.yaml
│   ├── requirements.txt
│   └── src
│       ├── data
│       │   ├── calendar.csv
│       │   ├── sales_train_validation.csv
│       │   ├── sample_submission.csv
│       │   └── sell_prices.csv
│       └── main.py
└── upload_pipeline.sh
GCSへのアップロード
アップロードソースコードの作成
アップロードするGCSバケット名とディレクトリを引数から受け取る
upload_from_local_to_gcs/src/main.py
from google.cloud import storage
import argparse
import os
from os import listdir


def main():
   parser = argparse.ArgumentParser(description='ML Trainer')
   parser.add_argument('--input-bucket-name', type=str, help='Google Cloud Storage bucket name for input', required=True)
   parser.add_argument('--input-bucket-dir', type=str, help='Google Cloud Storage bucket dir for input', required=True)
   args = parser.parse_args()
   print('bucket name: ', args.input_bucket_name)
   print('bucket dir: ', args.input_bucket_dir)

   storage_client = storage.Client()
   bucket = storage_client.bucket(args.input_bucket_name)
   destination_blob_dir = args.input_bucket_dir
   source_dir = os.path.join(os.path.dirname(__file__), 'data')
   for file in listdir(source_dir):
       destination_blob_name = f"{destination_blob_dir}/{file}"
       blob = bucket.blob(destination_blob_name)
       blob.upload_from_filename(os.path.join(source_dir, file))

   with open('/tmp/output_bucket_name.txt', 'w') as f:
       f.write(args.input_bucket_name)

   with open('/tmp/output_bucket_dir.txt', 'w') as f:
       f.write(args.input_bucket_dir)


if __name__ == '__main__':
   main()
コンテナにしてアップロード
ソースコードを詰めるだけのコンテナ作成
upload_from_local_to_gcs/Dockerfile
FROM python:3.8.2
COPY requirements.txt ./
RUN pip install -r requirements.txt
COPY ./src /pipelines/component/src
以下シェルスクリプトを実行してコンテナ(0.1.0)をGCRにプッシュ
[project_id]は各GCPプロジェクトのものに変更してくだされ
#!/bin/sh -e

if [ $# -lt 1 ]; then
 cat << EOS
 image_tag argument is required.
 ex) sh build_image.sh 0.1.0
EOS
 exit
fi

IMAGE_TAG="$1"

image_name=asia.gcr.io/[project_id]/kubeflow/components/upload_from_local_to_gcs
full_image_name=${image_name}:${IMAGE_TAG}

cd "$(dirname "$0")"

docker build -t "$full_image_name" .
docker push "$full_image_name"

# Output the strict image name (which contains the sha256 image digest)
docker inspect --format="{{index .RepoDigests 0}}" "${full_image_name}"
component.yamlの作成
componentをyamlで定義しPipelineから呼び出せるようにする
1. fileOutputsにソースコードで吐き出したパスを指定
2. outputsで指定するとPipelineでoutputをして取り出せる
3. inputsで指定したものをソースの引数に渡す
upload_from_local_to_gcs/component.yaml
name: upload to gcs
description: upload csv from local to gcs
inputs:
 - {name: input_bucket_name, type: String, description: 'GCS bucket name for input'}
 - {name: input_bucket_dir, type: String, description: 'GCS bucket dir for input'}
outputs:
 - {name: output_bucket_name, type: String, description: 'GCS bucket name for output'}
 - {name: output_bucket_dir, type: String, description: 'GCS bucket dir for output'}
implementation:
 container:
   image: asia.gcr.io/[project_id]/kubeflow/components/upload_from_local_to_gcs:0.1.0
   command: [python, /pipelines/component/src/main.py]
   args: [
     --input-bucket-name, {inputValue: input_bucket_name},
     --input-bucket-dir, {inputValue: input_bucket_dir}
   ]
   fileOutputs:
     output_bucket_name: /tmp/output_bucket_name.txt
     output_bucket_dir: /tmp/output_bucket_dir.txt
GCSからBQへのロード
BQロードソースコードの作成
読み込むGCSバケット名とディレクトリを引数(前項のoutput)から取得
load_from_gcs_to_bq/src/main.py
import argparse
from google.cloud import storage
from google.cloud import bigquery


def main():
   parser = argparse.ArgumentParser(description='From gcs to bq load')
   parser.add_argument('--input-bucket-name', type=str, help='Google Cloud Storage bucket name', required=True)
   parser.add_argument('--input-bucket-dir', type=str, help='Google Cloud Storage bucket dir', required=True)
   parser.add_argument('--input-bq-dataset', type=str, help='BQ target dataset', required=True)
   args = parser.parse_args()
   print('bucket name: ', args.input_bucket_name)
   print('bucket dir: ', args.input_bucket_dir)
   print('bq dataset: ', args.input_bq_dataset)

   storage_client = storage.Client()
   blobs = storage_client.list_blobs(
       args.input_bucket_name, prefix=args.input_bucket_dir
   )

   client = bigquery.Client()
   dataset_id = args.input_bq_dataset

   dataset_ref = client. dataset(dataset_id)
   job_config = bigquery.LoadJobConfig()
   job_config.autodetect = True
   job_config.skip_leading_rows = 1
   job_config.source_format = bigquery.SourceFormat.CSV
   base_uri = f"gs://{args.input_bucket_name}"
   for blob in blobs:
       num = blob.name.count('/')
       string = blob.name.split('/')[num]
       string_list = string.split('.')
       load_job = client.load_table_from_uri(
           f"{base_uri}/{blob.name}", dataset_ref.table(string_list[0]), job_config=job_config
       )
       load_job.result()  # Waits for table load to complete.

   with open('/tmp/output_dataset.txt', 'w') as f:
       f.write(dataset_id)


if __name__ == '__main__':
   main()
コンテナにしてアップロード
ソースコードを詰めるだけのコンテナ作成
load_from_gcs_to_bq/Dockerfile
FROM python:3.8.2
COPY requirements.txt ./
RUN pip install -r requirements.txt
COPY ./src /pipelines/component/src
以下シェルスクリプトを実行してコンテナ(0.1.0)をGCRにプッシュ
[project_id]は各GCPプロジェクトのものに変更してくだされload_from_gcs_to_bq/build_image.sh
#!/bin/sh

if [ $# -lt 1 ]; then
 cat << EOS
 image_tag argument is required.
 ex) sh build_image.sh 0.1.0
EOS
 exit
fi

IMAGE_TAG="$1"

image_name=asia.gcr.io/[project_id]/kubeflow/components/load_from_gcs_to_bq
full_image_name=${image_name}:${IMAGE_TAG}

cd "$(dirname "$0")"

docker build -t "$full_image_name" .
docker push "$full_image_name"
component.yamlの作成
componentをyamlで定義しPipelineから呼び出せるようにする
1. fileOutputsにソースコードで吐き出したパスを指定
2. outputsで指定するとPipelineでoutputをして取り出せる
3. inputsで指定したものをソースの引数に渡す
upload_from_local_to_gcs/component.yaml
name: m5 forecasting
description: m5 forecasting pipeline
inputs:
 - {name: input_bucket_name, type: String, description: 'GCS bucket name for input'}
 - {name: input_bucket_dir, type: String, description: 'GCS bucket dir for input'}
 - {name: input_bq_dataset, type: String, description: 'Target BQ dataset'}
outputs:
 - {name: output_bq_dataset, type: String, description: 'BQ dataset name for output'}
implementation:
 container:
   image: asia.gcr.io/[project_id]/kubeflow/components/load_from_gcs_to_bq:0.1.0
   command: [python, /pipelines/component/src/main.py]
   args: [
     --input-bucket-name, {inputValue: input_bucket_name},
     --input-bucket-dir, {inputValue: input_bucket_dir},
     --input-bq-dataset, {inputValue: input_bq_dataset}
   ]
   fileOutputs:
     output_bq_dataset: /tmp/output_dataset.txt
Pipelineの作成
細かいとこは前回の記事を参照したいとこだが
load_component_from_fileで作成したyamlファイルを指定して、あとはcomponent間のinputとoutputを出したり入れたり調整する感じ
import kfp
from kfp import dsl
from kfp import gcp
import kubernetes
import os


base_dir = os.path.dirname(__file__)

upload_from_local_to_gcs_op = kfp.components.load_component_from_file(
   os.path.join(base_dir, 'upload_from_local_to_gcs/component.yaml'))

load_from_gcs_to_bq = kfp.components.load_component_from_file(
   os.path.join(base_dir, 'load_from_gcs_to_bq/component.yaml'))


@dsl.pipeline(
   name='m5 forecasting pipeline',
   description='A pipeline fro m5 forecasting.'
)
def m5_forecasting_pipeline(bucket_name, bucket_dir, bq_dataset):
   dsl.get_pipeline_conf().set_image_pull_secrets([kubernetes.client.V1LocalObjectReference(name="regcred")])
   upload_from_local_to_gcs_task = upload_from_local_to_gcs_op(
       input_bucket_name=bucket_name,
       input_bucket_dir=bucket_dir,
   ).apply(gcp.use_gcp_secret())

   load_from_gcs_to_bq(
       input_bucket_name=upload_from_local_to_gcs_task.outputs['output_bucket_name'],
       input_bucket_dir=upload_from_local_to_gcs_task.outputs['output_bucket_dir'],
       input_bq_dataset=bq_dataset,
   ).apply(gcp.use_gcp_secret()).after(upload_from_local_to_gcs_task)


if __name__ == '__main__':
   kfp.Client().create_run_from_pipeline_func(m5_forecasting_pipeline, arguments={})
検証
例の如くpipelineをコンパイル
dsl-compile --py pipeline.py --output pipeline.tar.gzKubeflowのUIからアップロードしてexperiments, run作成して実行
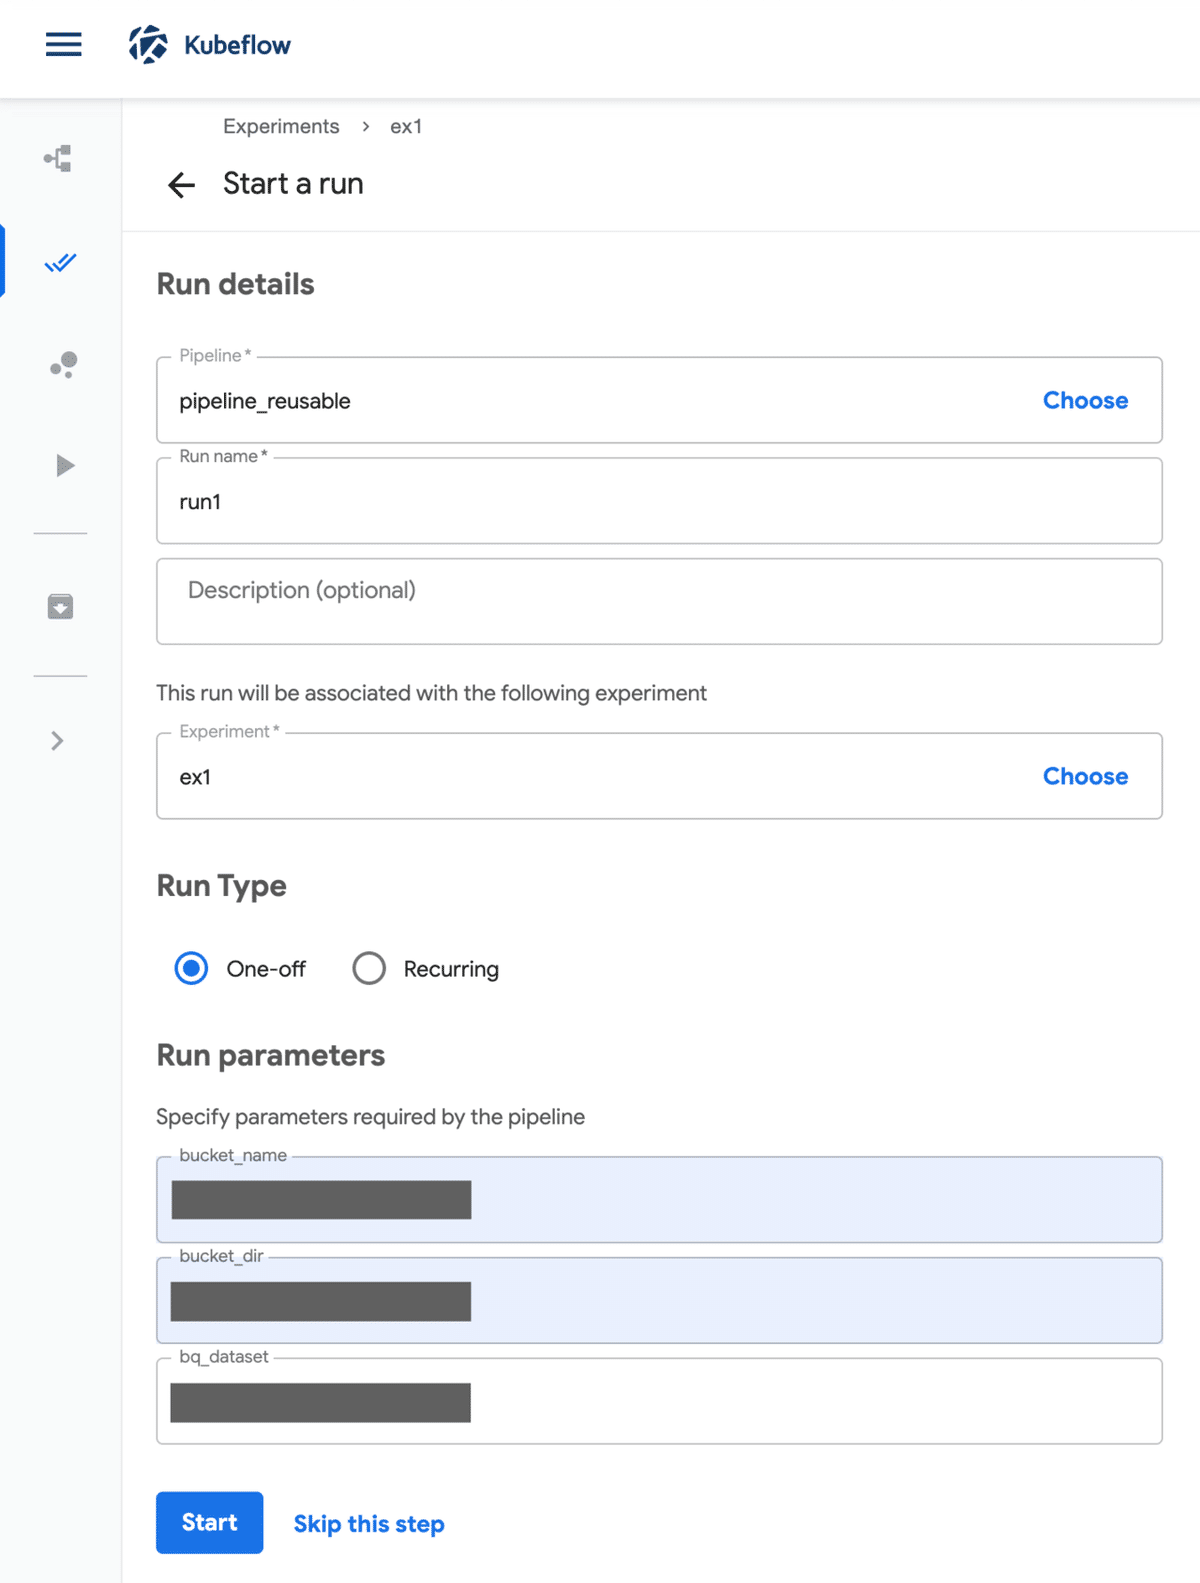
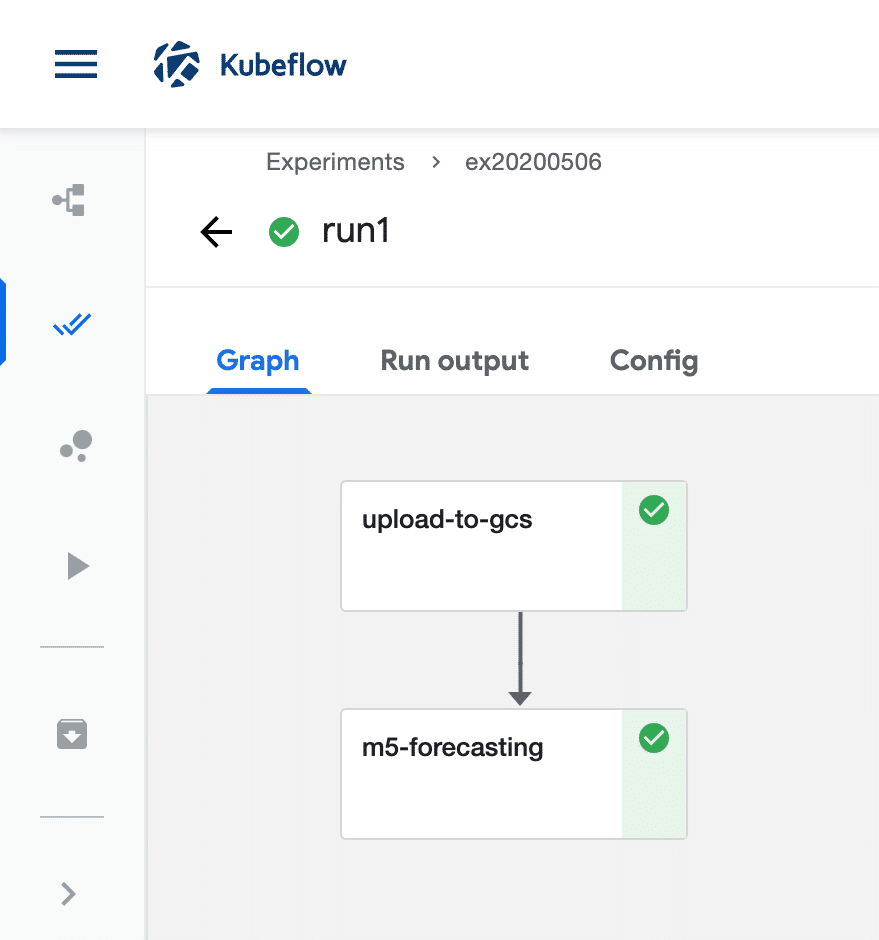
こんな感じでパイプラインが成功すればOK
まとめ
パイプラインのアップロードがUIからなのが面倒
SDKにアップロードするメソッドはありそうだけど、ClientでMiniKFの認証を突破する術がわからぬ・・・トークン渡せそうだけど、userとpasswodだからなぁ・・・
https://github.com/kubeflow/pipelines/blob/62e33c711b12ebeb60d5fb393e9484f2b297bcac/sdk/python/kfp/_client.py#L675
この辺のissueで何かしら回答が出ることを祈って一旦忘れることにする
https://github.com/kubeflow/pipelines/issues/3611