
[WCS master Top 16] Lost Giratina deck explanation

Self Intro
Hello, my name is BU (Akira Sato).
I started playing Pokémon cards during my junior years, about 20 years ago, took a break, and then picked it up again 7 years ago.
Last year, I participated in the WCS for the first time, but the global competition was intense, leading to my elimination on day 1.
I discovered the joy of BO3 tournaments and the excitement of playing Pokémon cards with international players.
This season, I had the opportunity to participate in the EUIC and OCIC, which was fulfilling.
Fortunately, I was able to earn the right to represent Japan at the WCS through CSP this year as well.
Using the Lost Giratina deck in tournaments like EUIC, CL Niigata, JCS, and WCS, I managed to achieve the best 16 in both CL Niigata and WCS.
With the season now over, I've decided to compile my conscious strategies and thoughts on various matchups from playing this deck continuously for about five months.
Deck I used in WCS
I used the same deck in the day 1 and day2.

Day 1
Fusion Mew: Win-Win
Chien-Pao: Lose-Win-Win
Arceus, Umbreon, Slaking deck: Win-Win
Single Strike Lugia: Win-Lose-Draw
Inteleon / Urshifu VMAX Deck: Lose-Lose
Gardevoir: Win-Lose-Win
Lost Dragonite: Lose-Win-Win
Inteleon / Urshifu VMAX Deck: Win-Win
Day 2
Arceus, Umbreon, Duraludon deck: Win-Win
Arceus, Umbreon, Slaking deck: Win-Win
Gardevoir: Win-Lose-Draw
Fusion Mew: Lose-Lose (WCS top 8)
Chien-Pao: Win-Win
Lost Dragonite: Win-Win
Single Strike Lugia: Win-Win
Fusion Mew: Lose-Lose (WCS champion)
Points to note in my deck are,
①4 Path to the Peak
②4 Jet Energy
③No Manaphy
Generally, against the widely considered disadvantageous matchup, Single Strike Lugia, I managed a winning record with one win and one draw. Similarly, against Gardevoir, I recorded one win and one draw. However, in the final match for the top 8, I was defeated by the WCS champion.
The Value of "Path to the Peak"
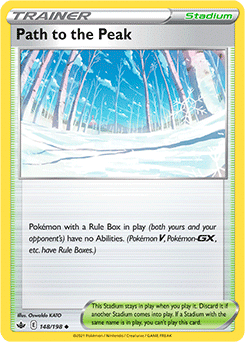
This deck highly values 'Path to the Peak' (hereinafter referred to as 'PP') .
The value of PP can be roughly represented by a graph like this (please note that this is merely a diagram to grasp the tendency, so please don't care about the specific numbers)

The vertical axis represents the value, and the horizontal axis represents the passage of Time, Prize cards.
- Apart from Arceus, positioning PP (Path to the Peak) + Roxanne or Iono in the endgame will result in strong interference.
- And thus there is a strong perception that PP should be placed in the latter half, but for decks like Arceus and Lugia, there are a certain number of opponents who has particular value in PP in the first half.
ー Match-ups where Path to the Peak is particularly strong in the Beginning of the game ー
【Arceus】
・There are few ways to break PP (Path to the Peak) in the decks, because Arceus deck is supposed to use PP rather than being used
【Lugia】
・There's a possibility to stop Summoning Star
【Mew Vmax(Fusion)】
・Initially, cards like the first Cram-o-matic or Forest Seal Stone, usually chosen for Battle VIP pass, need to be devoted to breaking PP, and this increases the requirements later.
【Chien-Pao】
・Chien-Pao can't bring Water Energy from the deck
・Can't perform a 2-draw with Radiant Greninja (hereinafter referred to as 'Greninja')
・Commonly adopted Arceus can't use Starbirth
ー Match-ups where Path to the Peak is particularly strong in the endgame ー
【Lugia Vstar】
・Neolant doesn't become a game winning card after hand interference
【Mew Vmax(Fusion)】
・The chance of breaking PP after using Roxanne or Ione is low, and it may be stopped
【Chien-Pao】
・As a deck that actively plays PokeStop and prepares necessary cards, there are few cards to break PP later on.
【Gardevoir ex】
・It's hard to recover if Kirlia or Gardevoir is absent when Roxanne or Iono is played
【Lost Bullet】
・In the case of LTB(Water) → Concealed Cards can't be played, and hand interference is more likely to hit
・In the case of LTB(Fire) → Charizard can't be activated.
The Arceus is particularly weak against Path to the Peak in the early game, but after Starbirth, it can hardly be used effectively.
On the other hand, Lugia can raise the requirements for Summoning Star, making its value high in the early game, and it also has high value in the latter half by not allowing Neolant→Boss's Orders.
There is also significant value in continuously requiring to break PP to Mew right from the start.
Lost Giratina with only about 2 Path to the Peak was leaning disadvantageous against Lugia and Mew.
However, both Lugia and Mew, which Lost Giratina struggles against, have low resistance to PP in the early game, making 4 PP, which can be overwhelmingly accessible in the early game, powerful in that sense.
In the case of playing 4 PP, the probability of accessing PP in the early game is about 50% with just one Flower Selecting, and about 70% with one Flower Selecting + one Colress. Furthermore, if you were using a Battle VIP pass before Flower Selecting, the probability increases even more. Therefore, especially in BO3, having 4 PP can be expected as a stable game plan.
Additionally, by continuing to demand PP from the early game, even if the opponent overcomes the early game requirements to break PP, the opponent's cards to break will decrease and the final stage of PP + Roxanne and Iono have more chance to work effectively.
Enjoying the benefits of placing PP in the early game to the fullest, and since it increases the success rate of PP Roxanne and PP Iono in the end of the game, I decided to have 4 Path to the Peak in my deck.
In the previous Champions League in Japan, my Lost Giratina couldn't overcome Gardevoir, which had been a concern, but the discovery of a clear winning strategy, along with the case of a 4-PP build, and even in disadvantageous matchups such as Fusion Mew Vmax or Lugia where it escalated to a 50-50 game, led to the decision to use it.
That concludes the overview of the 4-PP Lost Giratina deck.
From here on, I will explain the following in more detail:
Strategies and game plans for each matchup
Inclusion and exclusion of cards (including reasons for not including Manaphy, reasons for including 4 Jet Energy, etc.)
The explanation will mainly focus on gameplay strategies. In particular, the strategies against Gardevoir, which required clear identification of advantages or disadvantages when selecting Lost Giratina as a WCS deck, have been extensively studied, so I believe it will be of reference.
Lost Giratina remains strong in the next card environment, so please be sure to read on.
Hope you enjoy this article.
Game plans (Against Gardevoir)

Generally, Lost Giratina is a deck that takes the first, but this explanation assumes the opponent goes first, and Lost Giratina goes second.
The matchup between Gardevoir and Lost Giratina often leads to debates about who has the advantage or disadvantage.
I think this is a case-by-case.
Here's my thoughts.
If the "Gardevoir line totals 3 or fewer" on the board, then the Lost Giratina has the advantage.
If the "Gardevoir line totals 4 or more" on the board, then the Gardevoir side is considered to have the advantage.
However, since the "Gardevoir line totaling 3 or fewer" is very common board situation, I believe Lost Giratina has an advantage (with a record of 1 win and 1 draw in WCS).
First, I will focus on explaining situations where you absolutely want to win when the "Gardevoir line totals 3 or fewer."
The initial premise of "Gardevoir line totaling 3 or fewer" refers to this kind of board situation.

It's a frequently observed board situation, but surprisingly, Giratina has the advantage at this point already.
The strategy is to "ensure that Reversal energy isn't activated, not take the lead in Prize cards, defeat the Gardevoir line, and finally stop them using Path to the Peak + Iono or Roxanne".
Making a hasty move in the Prize card race by aiming Cramorant's "Spit Innocently" at Mew is a poor decision, and you should leave Mew as it is.
Mew occupies one slot on the board, and if you take the lead in the Prize cards race, Giratina V can be defeated easily by Reversal energy.
Moreover, your hand tends to thin out due to the opponent's Iono, creating a disadvantage.
Therefore, you absolutely must not take Mew here (important).
On your side, line up comfey, use Colress to gather Prize cards, then declare Abyss Seeking.
It's not a problem to line up 2-3 comfey. If you have PP in your hand, place it immediately.

In cases like this, the Gardevoir side often takes Comfey with Moonlight Reverse of Cresselia.

In response, let's activate Sableye to target Kirlia, which is the deck engine of bench compression. The remaining 4 points are placed on Shining Arcana Gardevoir (hereafter referred to as 'Arcana').

The reason for placing 4 points on Arcana is that even if 2 points are recovered by Moonlight Reverse, it will still have 120HP left, and if Sableye is activated again, Arcana can be defeated by Lost Mine.
There's also the option for opponent to attack GiratinaV with Arcana, but especially when our side isn't leading in Prize cards and the Reversal Energy isn't activated, there are risks such as needing to put multiple damage counters on oneself when attacking with Arcana, being targeted by Lost Mine for a double knockout with Kirlia, and entering the Roxanne range.
Unless Zacian is present, it should be Moonlight Reverse.
If you can, it's very strong to have two Sableye set up because you can definitively defeat both the opponent's Kirlia and Arcana. By using Artazon, which was reluctantly placed to break the PP, Sableye is relatively easy to set up.


And when the opponent has 3 Prize cards left, you'll be able to clear Kirlia and Arcana from the opponent's board. At that point, you'll take the game using PP + Roxanne or Iono.
At this juncture, the opponent will be in a difficult position, with no hand cards and no cards to increase their hand.
Lastly, with Boss's Orders, defeating Gardevoir pretty much sets the game.

That's the basic strategy to win when the opponent has '3 or fewer in the Gardevoir line.'
"In the case where there are 4 or more in the Gardevoir line"
When the "Gardevoir line totals 4 or more," the basic strategy remains the same. However, at least one Kirlia or Arcana will remain, making it difficult for the "decrease opponent's cards" tactic to be effective. Hence, I think the situation leans more towards being disadvantageous. However, considering factors like the probability of having all four Ralts active without any going to the Prize cards, I believe that having a favorable strategy against the opponent's common board setup is highly valuable.
The reason I've adopted only two Water Energies is to increase the likelihood of facing a board with "3 or fewer in the Gardevoir line."
In a BO3 scenario, if the Water Energy isn't visible, from the second game onwards, there won't be any Manaphy placed and the Gardevoir line increases by one, leading to a disadvantageous matchup.
The Water Energy is included to make the opponent put out Manaphy on their board. (To dive into details, the probability of attaching two types of energy using Mirage Gate slightly increases, but the main reason is as mentioned above.)
If Zacian is on the board from the beginning, then either Cresselia or Mew would be replaced by Zacian, but by depleting the Gardevoir line similarly, you can effectively use the "decrease opponent's cards" strategy.
In BO3, this strategy was crucial for securing one solid win. What would be bad for our side is when the opponent fully forgives to me to use Moonlight Shuriken and doesn't place Manaphy. However, if more players adapt to this strategy, increasing the Water Energy count to three and defeating Kirlia is believed to be an effective countermeasure.
(Exception) When the Collapsed Stadium is placed.
By the way, it's generally a good idea to play Path to the Peak (PP) as soon as you draw it. However, there's a clear exception. It's when the opponent places a Collapsed stadium as a means to remove your PP.

Many times, the opponent uses the Collapsed stadium to drop Pokémon like Mew and Greninja. Until the Collapsed stadium is broken, no new Pokémon can be placed. Conversely, if you place PP, they might end up placing a new Ralts.
By leaving the Collapsed stadium as is, there are instances where an opponent, frustrated by the pressure from Sableye's Lost Mine, might use Worker or another stadium to expand their bench space. This allows us to conserve our PP while reducing the opponent's stadiums, making subsequent PPs and the "decrease opponent's cards" tactic extremely demanding (I took the lead in a Gardevoir matchup on Day 2 with this strategy).
Given that the Gardevoir deck can't attack under PP, constantly demanding PP means you can force the opponent to place stadiums they wouldn't want to. This is also why having 4 PPs in the deck is powerful.
In the Case of Kirlia with Mirage Step
When there are more than 4 Kirlia lines by Mirage Step, there's one more compared to the aforementioned plan (the plan to roll from PP and Roxanne), which makes it stronger against "decrease opponent's cards".
Therefore, if there isn't a Manaphy on the opponent's field, you should first consider the plan to knock out 2 Kirlia with Moonlight Shuriken. (It might be a good idea to increase to 3 Water Energy if the Mirage Step deck type becomes mainstream).
The Mirage Step type progresses slower than the Refinement-only type. So, when Manaphy is placed, it's believed that a plan similar to the Lost Dragonite deck, where you aim to take the Prize cards ahead of time, is optimal.
Starting with Mirage Step means that the attack will start from the 3rd turn or later. So, there's a high possibility that the Giratina side can take the Prize cards ahead. (However, be aware that the game can become tough as the opponent's Iono and Reversal energy become effective).
In the turn after being Mirage Step used, you'd want to go ahead in Prize cards with Cramorant's Spit Innocently. After that, you'd want to continue attacking to take a Prize card every turn. Ideally, even if you get hit by Iono, you'd want to continue the attack and prepare attackers on the field (grow Sableye or Giratina with Mirage Gate).
To begin with, when Kirlia appears with Mirage Step, the Ralts already on the field will basically require Rare Candy evolution. Therefore, if you fight properly, you should be able to stand up to it adequately.
Matchup Strategy (against Single Strike Lugia)

Although it's mostly perceived as a slightly disadvantageous matchup, by playing 4 PP, the matchup becomes about even (even in the WCS, it was one win, one tie).
From our side, we impose the following challenges on the opponent:
Can they break the PP and declare the Summoning Star by discarding two Archeops?
Can they take the Prize cards in a 2-2-2 pattern while there are subsequent PP in play?
Ideal board for the Lost Giratina side: 3 Comfey, 2 Giratina, 1 Greninja with Path to the Peak

Early in the game, accumulate Lost cards using Flower Selecting and Colress, then play PP. Avoid using Abyss Seeking as much as possible, as Giratina V becomes easily targeted by Lugia Vstar, making it easier for the opponent to take Prize cards in a 2-2-2 pattern and win.
The prize-taking plan for the Lost Giratina side is to take them in a 2-2-2 pattern. Ignore non-V Pokémon like Stonjourner and Snorlax, and start knocking out V Pokémon using Boss's Orders. Preserve Starbirth to one-shot a Lugia with V Guard Energy attached.
If Comfey gets knocked out early in the game by a Lugia with V Guard Energy, often the Lost cards haven't reached 10, and you can't one-shot Lugia. At this time, use the Escape Rope to force a Lugia without V Guard Energy or Neolant into the battle field. This allows you to take two Prize cards with Lost Impact. If Archeops comes into play, knock it out with Lost Impact. The requirements for Tyranitar to attack increases, making it less likely for Giratina Vstar to be one-shotted.
It's okay to play Path to the Peak from the first turn. When going first, you can potentially prevent a turn one Neolant. Also, even if you plan to play PP on your second turn and have one in hand, there's a chance that PP in your hand could be disrupted by Iono on their first turn, so it's considered okay to play PP from the first turn.
The latter PP is also highly valued. Thanks to PP, there was a game where the opponent couldn't declare a Neolant → Boss's Orders, allowing for a win.
Matchup Strategy (against Baxcalibur-type Chien-Pao)

The most important thing in this matchup is to have the Path to the Peak (PP) in play.
Ideal Board State: Having PP in play is the top priority. The ideal Pokémon setup would be 3 Comfey, 2 Giratina, and 1 Cramorant (or alternatively, Greninja). However, having PP is always the main priority. With 4 PP, this becomes a favorable matchup.

In this matchup, the primary goal is to place PP. The secondary objective is to defeat Baxcalibur and stop the opponent's momentum.
Furthermore, using Boss's Orders to target and take down Baxcalibur is extremely effective. Given that decks with Baxcalibur tend to have minimal hand disruption, this strategy is often easy to execute.
Even if Giratina gets one-shotted by Chien-Pao, if you set up PP and knock out Chien-Pao with Giratina Vstar, the requirements to defeat that Giratina Vstar become much higher.
There might be times in this matchup where you'd wish you had Manaphy. However, given that you cannot stop the Greninja's Moonlight Shuriken by Canceling Cologne and even if the opponent Greninja takes out two Comfey, as long as you don't put two more Comfey or Sableye afterward, you'll be in a good game state. Ideally, you'd want to counter the Moonlight Shuriken by calling out Baxcalibur and defeating it.
Chien-Pao's Stadium plays a role in gathering essential cards. Consequently, they often have to play it first, reducing their own answers to PP, which I believe is a huge challenging aspect for them.
Matchup Strategy (against Mew Vmax)

The primary method to counter the Path to the Peak in Fusion Mew decks consists of Lost Sweeper (2-3 cards) and Stadium cards (2-3 cards, excluding PP).
– averaging about 5 cards in total. The Forest Seal Stone and Cram-o-matic play roles to break PP.
The basic strategy is to keep the PP in play from the early game, causing the opponent to expend their Sweepers, Stadium cards, and Seal Stones. You then finish with a PP and Roxanne combo.
For the Prize cards plan, if the opponent sends out Meloetta or Eiscue, you'll follow a 1-2-3 plan (taking the first Prize card with the likes of Cramorant, Sableye, or Moonlight Shuriken).
On the other hand, if they don’t send out non-V Pokémon, it will be a 2-2-3 plan.
Moreover, it's crucial to ensure two Giratina V are in play simultaneously. If you can't set one up early, pile up your lost zone using Comfey while maintaining PP and Roxanne.
This situation is different from the Mew with a lot of Path to the Peak deck, which cards that break PP were more than Fusion Mew Vmax.
Fusion Energy and other impurities like Elesa's Sparkle can be abundant in opponent's hand, so often, they can't prepare a card to break PP on their turn.
In a battle that determined the Top 8 for the WCS Masters, the winner's deck had a total of 5 cards to counter PP.
However, in practice, we used a deck with 6 cards to break PP, and we could effectively stop this deck. Given this, we still assume that the matchup is about even.
Matcuhp Strategy (against LTB)

When faced with the Lost Bullet matchup, given that the opponent has no hand disruption outside of Roxanne, it becomes easier to meet our requirements.
Thus, I consider this a favorable matchup.
The main focus is to win in terms of total HP.
The ideal board state would be: 2 Comfey, 2 Giratina, 1 Cramorant, and 1 Greninja.

Don't Play Manaphy & Limit Comfey: Don't set up Manaphy, and limit Comfey to a maximum of 2 on the board.
Early to Mid-Game Strategy: Utilize Cramorant and the Giratina's Shred strategy to take Prize cards. At this stage, you still have the leeway to use Abyss Seek. Absorbing a Spit Shot 110 with Giratina and then healing it with a Switching Cart ensures that it won't be knocked out by Lost Mines. Moreover, during the mid-game, it's essential to evolve into Giratina Vstar (with 280 HP) to ensure that it doesn't get taken down by Lost Mine.
Counter the Lost Mine: Be mindful that the opponent can't take 3 Prize cards with 2 rounds of Lost Mines. As long as you don't have more than 2 Comfey in play, you should be fine. On the other hand, if you can land 2 rounds of Lost Mines, you can defeat Comfey, Manaphy, and Sableye, taking all 3 Prize cards and turning the tide in the Prize race.
Utilizing Lost Impact: Sometimes, you can use Lost Impact even if it's not against a V Pokémon. This method beautifully pushes the lost counter to 10 and offers a strong strategy by emphasizing high endurance. An essential thing to note is to always be prepared to counter with Lost Impact if Giratina V gets defeated by Charizard.

If you're only one Prize card behind in the early game, you can turn the game around by following the above plan. Even if you're two or more Prize cards behind, causing the opponent to stumble with Roxanne or Iono can give you an opening.
Practical Tip: In practice, when opponents assume you have Manaphy in the deck, it works to your advantage.
Since Manaphy isn't visible, they sometimes give up on their Kyogre strategy, making it easier for you.
Matchup Strategy (against Inteleon / Urshifu VMAX Deck)

The ideal board setup involves having 3 Comfeys, 2 Lost Giratinas, and 1 Greninja.
From the beginning, the goal is to keep spinning and accumulate Lost. Ideally, you'd want to take all your Prize cards in 3 turns with a 2-3-1 plan.
Inteleon Vmax often starts on the battlefield in the early game. If the opponent doesn’t have a Vmax on their bench, using an Escape Rope can be effective. As Octillery can be defeated with Spit Innocently and Alakazam has a heavy escape requirement, the opponent will often reluctantly bring out their Inteleon V. Capturing it using Lost Impact at that point can be very powerful.
Since the opponent's main attacker is usually Vmax, after taking two Prize cards, it's relatively easy to naturally get three more with Star Requiem. Victory can be achieved by capturing Octillery using Lost Mine or Cramorant with Boss's Orders.
One vulnerability in this matchup is continuously having Comfey taken down by Double Gunner, Alakazam, or Yoga Loop, resulting in losing the Prize card race. To counteract this, it's crucial to keep "Path to the Peak" (PP) in play. By deploying PP, you can force the opponent to rely on Octillery’s ability to fetch Tower of Waters instead of evolving cards or Rapid Strike Energy. Restricting the opponent's desired moves in this way is vital.
Matchup Strategy (against Lost Giratina)

Ideal board setup: 3 Comfeys, 2 Giratinas, and a Greninja (or Cramorant).
Ideally, you'd use non-V cards like Cramorant and Sableye to take 2 Prize cards, and Giratina to secure 4 more (targeting 2 opponent Giratinas).
Focusing on nurturing two Giratina Vstars to establish a robust board is crucial.
If you haven't brought up two Giratinas, it's risky to hastily reduce the opponent's Prize cards to three or less. There's a high chance that Roxanne will disrupt your game. Instead, prioritize scattering Lost Mines or using Abyss Seeking to strengthen your board and hand.
Notably, this particular list has a slight disadvantage against the recently popular "Cross Switcher + Lost Giratina" strategy. As a result, we've added a second Iono card to this list. The idea is to play Iono when the opponent has 4 Prize cards left, thereby increasing their game requirements.
Inclusion and exclusion of cards
Why no Manaphy?
Mainly for the following reasons, but essentially, it's not necessary for victory. 1. In battles against LTB, you wouldn't want to place a Pokémon with low HP (you wouldn't want to lose 3 Prize cards with two Lost Mines).
2. In battles against Lost Giratina, even if 2 Comfeys are taken with Moonlight Shuriken, you can still play with a strategy of raising 2 strong Lost Giratina.
3. Against Chien-Pao battles, although there is a value in preventing 2 Comfeys from being taken by Moonlight Shuriken when placing Manaphy, considering the adoption of the 4th PP and the value in slowing down movements from the first turn by placing PP, the 4th PP was more versatile when considering other matchups, leading to the decision of replacing Manaphy with the 4th PP.
Why 4 Jet Energy?
It's strong whenever used, be it early, mid, or eng game! It's the best card with the worth of both switching and energy in one card!
① Against Chien-Pao, Lugia, Mew, and others, when you want to place PP early in the game, Jet Energy makes it easier to use Flower Selecting more frequently, making it easier to access PP.
② It makes Abyss Seeking more feasible in the early to mid-game.
③ In the endgame, if Giratina V Star is bound or cannot escape, if you can place Jet Energy on Comfey, you can switch Giratina V Star while replenishing your hand with Flower Selecting.
With no downsides. In this deck, which often declares Abyss Seeking, there was no option to reduce it from 4 as it synergizes so well.
Other Card Explanations:
Iono (second):
The last card to be added. Replaced the third Water Energy. Mainly adopted to have an advantage against the Lost Giratina mirror match, especially the Choice Switcher type.
Water Energy (Third):
The third Water Energy was the last card to be removed. Considering situations where you might have to drop Water Energy due to Colress or LTB, and the probability of not being able to use Moonlight Shuriken increases. At the outset, a deck without Water Energy was also considered. As per the strategy mentioned, it was evaluated highly for making the opponent place Manaphy, occupying one of their board slots.
Notably, there was only one situation where Greninja couldn't be used as desired in WCS games, and in cases where it was wanted, the opponent's board was generally weak, so victory was achievable without using it.
Lost Sweeper:
Valued for its ability to accumulate 1-2 Lost cards while disrupting the opponent's moves. However, the only card that can actively send cards to the Lost Zone is PP in our side, causing a slight anti-synergy with the deck's concept. Therefore, it was considered a risky choice and not adopted.
Cross Switcher:
Essentially, you can declare a Boss's Orders while choosing to use either decrease opponent's cards or Colress, which is a powerful move. However, against decks like Gardevoir that have a lot of hand disruption, it's challenging to gather the 2-card combo, making it often a dead card in hand. Notably, because the Lost Giratina mirror match with Cross Switcher was considered a little weak, 2 Ionos were adopted to make it harder for the opponent to accumulate cross switchers.
Spiritomb:
A strong measure against Genesect of Mew Vmax deck, and also against Lugia VSTAR and Chien-Pao's Neolant.
By itself, Spiritomb cannot hold back Mew VMAX in the current environment. Therefore, it's necessary to adopt it in a set with the Temple of Sinnoh. However, needing two slots is problematic, especially since PP (Path to the Peak) serves almost the same purpose, leading to it not being chosen.
A concerning point is that it's too weak when started with this pokemon.
Temple of Sinnoh
It can penetrate the V Guard Energy of Lugia and Arceus (but it can't defeat Mew VMAX).
Although there might be times you might get stuck with Jet Energy, it also increases the requirements for the opponent. Especially increasing the requirements for Lugia (particularly in stopping Tyranitar), and stopping Reversal activation is highly regarded.
Being able to destroy the opponent's stadiums (like Artazon) is also valued.
You can also break your own PP, making it strong even when Concealed Cards are absolutely necessary.
However, without adopting it alongside Spiritomb, its value diminishes when facing Mew VMAX. And just like Spiritomb, the benefits you get from PP are nearly the same, and led to it not being adopted.
Choice Belt
It can defeat V Pokémon with an effective durability of 310 (like Lugia and Arceus VSTAR, Mew VMAX).
On the other hand, when facing LTB and Gardevoir, it almost has no role, which is concerning.
In a face-off with Mew VMAX, you can win with two attacks, making it a highly regarded plan and a very strong card. However, given it has no role against the likes of LTB, it was not adopted.
That's it for this article! Thank you for reading my article and feel free to ask if you have any questions!
Thanks @AdvisorTCG for giving me the chance for all of this!