
Raspbianのセットアップ2 〜ext4ファイルシステム解決と思ったらバッドエンドだった

このやり方はダメです
[2018/11/15] 結論から書くとext4領域のファイル編集は、パーミッションの変更ができないという問題に行き当たってしまい無理と判断しました。
ただこの記事は「これやっても上手くいかないよ」という失敗例として残しておきます。
----------------------------------------------------------------------------
前回、microSDにimgファイルを書き込んでSSHの設定して、さぁネットワーク設定だ!というところでつまづきました。
ネットワーク設定ファイルはRaspbian本体がいるext4ファイルシステムの領域にあるので、WindowsやMacでは普通には編集できないというのがその理由でした。
仕組みがわかってしまえばば倒せない敵は居ない!
ext4といえども所詮はファイルシステム、マウントしてしまえば倒せない敵ではない。ということでMacにext4のディスクをマウントする方法を探します。
ありました(あっさり)
ext4fuseをインストールすると良いようです。
ext4fuseをインストールするとき"brew"というコマンドを使っています。
これ、Homebrewというパッケージ管理ソフトのコマンドですね。
似たようなものにMacPortsというのもありますが、どうもHomebrewのほうがシステムファイル類の書き換えが少ない穏健派らしいので...
Homebrewのインストール
コマンドラインで以下のコマンドを入力するとインストールが開始されます。
/usr/bin/ruby -e "$(curl -fsSL https://raw.githubusercontent.com/Homebrew/install/master/install)"あ、また見切れてしまっています。
正しくはHomebrewの"インストール"に記載されているのでそれをコピペすればOK。
途中、enterキーを押すのと(インストールをするので)管理者パスワード入力を求められますが、後は自動でやってくれます。
Homebrewのコマンドはこのあたりを参考にしています。
インストールが終わったらQiitaにある環境診断をします。
"brew doctor"を実行します。
$ brew doctor
Please note that these warnings are just used to help the Homebrew
maintainers with debugging if you file an issue. If everything you
use Homebrew for is working fine: please don't worry or file an issue;
just ignore this. Thanks!

Warning: Unbrewed dylibs were found in /usr/local/lib.
If you didn't put them there on purpose they could cause problems when
building Homebrew formulae, and may need to be deleted.

Unexpected dylibs:
 /usr/local/lib/IKStealthPedalAPI.dylib
 /usr/local/lib/IKStompIO1API.dylib

Warning: Your XQuartz (2.7.7) is outdated.
Please install XQuartz 2.7.11 (or delete the current version).
XQuartz can be updated using Homebrew Cask by running
 brew cask reinstall xquartz
$
Warningが2つ出てきました。
一つはdylibsに変なファイルがあって問題が起きるかも。もう一つはxquartzが古いから再インストールしなさいとのこと。
dylibs(ダイナミックライブラリ)の方は問題が起こらないなら放置しておきます。Homebrewが知らないと言っていますが他で使っているアプリがあるかもしれないので。
xquartzの方は表示されたコマンドを素直に実行します。
途中、やっぱりパスワードを求められる以外は特に何もすることがありません。
$ brew cask reinstall xquartz
==> Tapping homebrew/cask
Cloning into '/usr/local/Homebrew/Library/Taps/homebrew/homebrew-cask'...
remote: Enumerating objects: 4149, done.
remote: Counting objects: 100% (4149/4149), done.
remote: Compressing objects: 100% (4123/4123), done.
remote: Total 4149 (delta 27), reused 589 (delta 23), pack-reused 0
Receiving objects: 100% (4149/4149), 1.32 MiB | 3.36 MiB/s, done.
Resolving deltas: 100% (27/27), done.
Tapped 1 command and 4051 casks (4,159 files, 4.2MB).
==> Satisfying dependencies
==> Downloading https://dl.bintray.com/xquartz/downloads/XQuartz-2.7.11.dmg
######################################################################## 100.0%
==> Verifying SHA-256 checksum for Cask 'xquartz'.
==> Installing Cask xquartz
==> Running installer for xquartz; your password may be necessary.
==> Package installers may write to any location; options such as --appdir are ignored.
Password:
installer: Package name is XQuartz 2.7.11
installer: Upgrading at base path /
installer: The upgrade was successful.
/Library/LaunchAgents/org.macosforge.xquartz.startx.plist: service already loaded
🍺  xquartz was successfully installed!
$
ext4fuseのインストール
再インストールが成功したので、ext4fuseをインストールします。
途中でパスワードを求められますが必要なダウンロードまで自動でやってくれます。便利便利。
$ brew cask install osxfuse
$ beww install ext4fuse
$ ext4fuse -h
Version: ext4fuse-0.1.3
Usage: ext4fuse <disk> <mountpoint>
ディスクのマウント
それではmicroSDを入れてマウントします。
まず"diskutil list"コマンドでdiskの確認。
$ diskutil list
/dev/disk0 (internal, physical):
  #:                       TYPE NAME                    SIZE       IDENTIFIER
  0:      GUID_partition_scheme                        *500.3 GB   disk0
  1:                        EFI EFI                     209.7 MB   disk0s1
  2:                 Apple_APFS Container disk1         500.1 GB   disk0s2

/dev/disk1 (synthesized):
  #:                       TYPE NAME                    SIZE       IDENTIFIER
  0:      APFS Container Scheme -                      +500.1 GB   disk1
                                Physical Store disk0s2
  1:                APFS Volume Macintosh HD            181.2 GB   disk1s1
  2:                APFS Volume Preboot                 44.8 MB    disk1s2
  3:                APFS Volume Recovery                512.8 MB   disk1s3
  4:                APFS Volume VM                      1.1 GB     disk1s4

/dev/disk2 (external, physical):
  #:                       TYPE NAME                    SIZE       IDENTIFIER
  0:     FDisk_partition_scheme                        *32.2 GB    disk2
  1:             Windows_FAT_32 boot                    45.9 MB    disk2s1
  2:                      Linux                         4.1 GB     disk2s2
Type Linuxのdisk2s2をマウントポイント /mntとしてマウントします。
$ sudo ext4fuse /dev/disk2s2 /mnt -o allow_other
mount_osxfuse: the file system is not available (1)
$ sudo ext4fuse /dev/disk2s2 /mnt -o allow_other
$
Quiitaの記事にあるように初回実行ではmacOSの「セキュリティとプライバシー」のパネルが開くので、そこでこのosxfuseの実行許可を与えると二度目はすんなりと行きます。
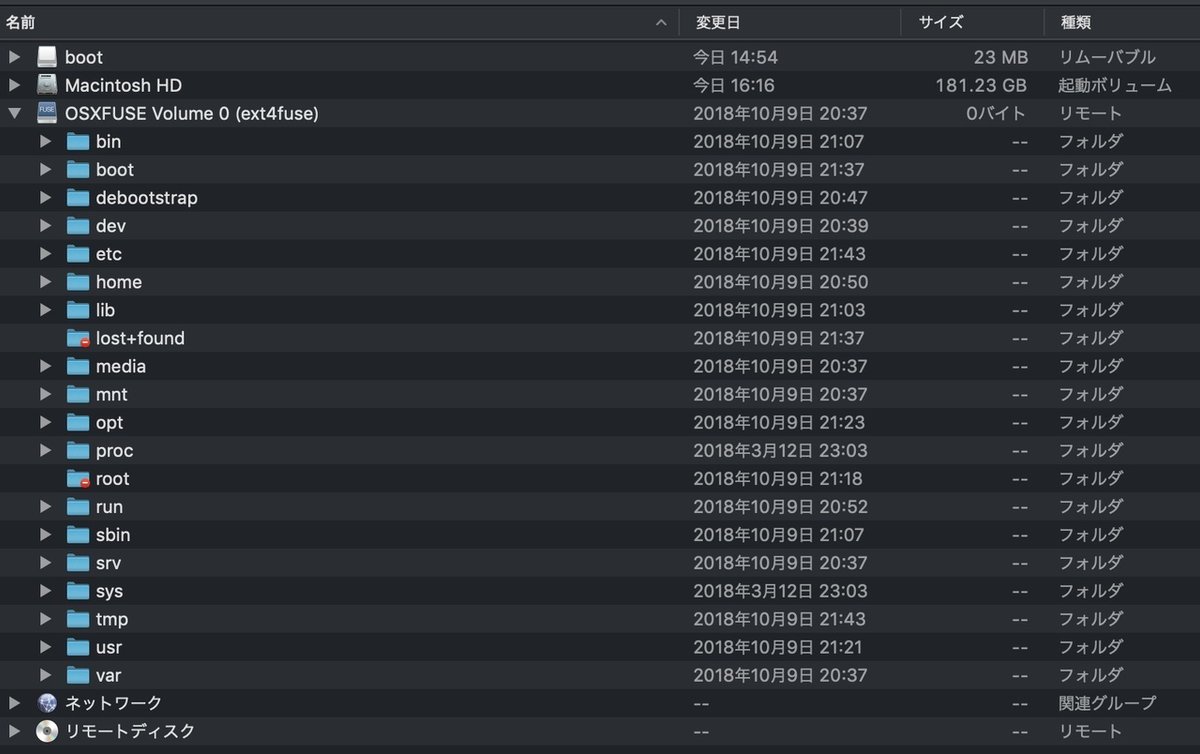
はい。Finderでも中身が見えるようになりました。
$ sudo umount /mntアンマウントも簡単。
但し、microSDにはbootもあるのでUSBドングルを抜く前にそっちのアンマウントも忘れないようにしましょう。
さて、microSDの中身が丸裸になったのでいよいよ(やっと?)ネットワーク設定ができます。
ネットワーク関連の設定ファイル
今更ですがネットワーク関連のファイルは何があるか整理します。Raspberry PiのWi-Fiを使うにはRaspbianの以下の設定ファイルが関係します。
1, LANや無線LAN等のインタフェースの設定ファイル
/etc/network/interfaces
2, 無線LANのSSIDやパスフレーズを設定するファイル
/etc/wpa_supplicant/wpa_supplicant.conf
3, IPアドレスの設定ファイル
/etc/dhcpcd.conf
初期状態での設定ファイル
さっさと設定してしまってもいいのですが、素の状態では何が書かれているのか見てみることにします。
/etc/network/interfacesの初期状態
$ cd /mnt/etc/network
$ ls -l interfaces
-r--r--r--  1 root  wheel  271 10  9 21:03 interfaces
$ cat interfaces
# interfaces(5) file used by ifup(8) and ifdown(8)

# Please note that this file is written to be used with dhcpcd
# For static IP, consult /etc/dhcpcd.conf and 'man dhcpcd.conf'

# Include files from /etc/network/interfaces.d:
source-directory /etc/network/interfaces.d
$
interfacesのパーミッションは444(r--r--r--)でroot、グループ、その他ユーザ共にreadだけ許されています。
内容はsource-directoryに/interfaces.dを指定していますが、配下は空っぽでした。なんでしょう?
/etc/wpa_supplicant/wpa_supplicant.confの初期状態
$ cd /mnt/etc/wpa_supplicant/
$ ls -l
total 88
-r-xr-xr-x  1 root  wheel    937 10 14  2017 action_wpa.sh
-r-xr-xr-x  1 root  wheel  25619 10 14  2017 functions.sh
-r-xr-xr-x  1 root  wheel   4696 10 14  2017 ifupdown.sh
-r--------  1 root  wheel     72 10  9 21:03 wpa_supplicant.conf
$ sudo cat wpa_supplicant.conf
Password:
ctrl_interface=DIR=/var/run/wpa_supplicant GROUP=netdev
update_config=1
$
wpa_supplicant.confのパーミッションは400、rootのreadしか許可されていません。
sudoコマンドでファイルの内容表示すると、これまたほぼ空っぽです。
/etc/dhcpcd.confの初期状態
$ cd /mnt/etc
$ ls -l dhcpcd.conf
-r--r--r--  1 root  108  1701  9 10 17:31 dhcpcd.conf
$ cat dhcpcd.conf
# A sample configuration for dhcpcd.
# See dhcpcd.conf(5) for details.

# Allow users of this group to interact with dhcpcd via the control socket.
#controlgroup wheel

# Inform the DHCP server of our hostname for DDNS.
hostname

# Use the hardware address of the interface for the Client ID.
clientid
# or
# Use the same DUID + IAID as set in DHCPv6 for DHCPv4 ClientID as per RFC4361.
# Some non-RFC compliant DHCP servers do not reply with this set.
# In this case, comment out duid and enable clientid above.
#duid

# Persist interface configuration when dhcpcd exits.
persistent

# Rapid commit support.
# Safe to enable by default because it requires the equivalent option set
# on the server to actually work.
option rapid_commit

# A list of options to request from the DHCP server.
option domain_name_servers, domain_name, domain_search, host_name
option classless_static_routes
# Most distributions have NTP support.
option ntp_servers
# Respect the network MTU. This is applied to DHCP routes.
option interface_mtu

# A ServerID is required by RFC2131.
require dhcp_server_identifier

# Generate Stable Private IPv6 Addresses instead of hardware based ones
slaac private

# Example static IP configuration:
#interface eth0
#static ip_address=192.168.0.10/24
#static ip6_address=fd51:42f8:caae:d92e::ff/64
#static routers=192.168.0.1
#static domain_name_servers=192.168.0.1 8.8.8.8 fd51:42f8:caae:d92e::1

# It is possible to fall back to a static IP if DHCP fails:
# define static profile
#profile static_eth0
#static ip_address=192.168.1.23/24
#static routers=192.168.1.1
#static domain_name_servers=192.168.1.1

# fallback to static profile on eth0
#interface eth0
#fallback static_eth0

$
dhcpcd.confのパーミッションは444(r--r--r--)でroot、グループ、その他ユーザ共にreadだけ許されています。
内容は、説明書きが多いですね。
設定ファイルの書き換え...ができない
それでは設定ファイルを書き換えていきます。
ですが設定ファイルのパーミッションはreadしか許されていないので、chmodコマンドでパーミッションを666(rw-rw-rw-)に変更して編集します。
編集が終わったら元のパーミッションへ戻しますが、ここで不安なことが3つあります。
1, パーミッションを444や400に戻すとラズパイ起動時に書き換えできない?
2, ラズパイが初回起動したときに(せっかく書いた)設定ファイルの内容が変わる?
3, Raspberry Pi3 B+のネットワークインタフェース構成を知らない
1,についてはwrite権限を残しておくことにします。
(444 → 666、400 → 600にする)
2,についてはまぁそうなったらWi-Fiがつながらないだろうから、もう一度microSDを抜き出してMacで編集すればいいだろうという塩対応で。
3,については多分、lo (ループバック)、eth0 (有線LAN I/F)、wlan0 (無線LAN I/F)なんじゃないかな?と思ってたらそのとおりみたいです。
ということで書き換えのためにパーミッションを変更します。
まずはinterfaces
$ chmod 666 interfaces
chmod: Unable to change file mode on interfaces: Operation not permitted
あれ?root権限じゃないchmodできないのかな?
ということでsudoコマンドを使います。
$ sudo chmod 666 interfaces
Password:
chmod: Unable to change file mode on interfaces: Function not implemented
Function not implimented...ファンクションノットインプリメンテッド?(そんなのねぇよ)
どゆこと?
ということで色々調べてそもそものマウントポイント(今回はmnt)のパーミッションを見てみました。
$ ls -l
total 23
drwxrwxr-x+ 86 root  admin  2752 11 13 20:27 Applications
drwxr-xr-x+ 67 root  wheel  2144 11 13 15:01 Library
drwxr-xr-x   2 root  wheel    64  9 28 03:07 Network
drwxr-xr-x@  5 root  wheel   160  9 21 13:05 System
drwxr-xr-x   7 root  admin   224 11 13 22:16 Users
drwxr-xr-x@  6 root  wheel   192 11 13 22:31 Volumes
drwxr-xr-x@ 37 root  wheel  1184 11  7 09:10 bin
drwxrwxr-t   2 root  admin    64  9 28 03:07 cores
dr-xr-xr-x   3 root  wheel  5466 11 13 21:56 dev
lrwxr-xr-x@  1 root  wheel    11  9 28 03:05 etc -> private/etc
dr-xr-xr-x   2 root  wheel     1 11 13 22:08 home
-rw-r--r--   1 root  wheel   313  8 18 09:55 installer.failurerequests
dr-xr-xr-x@ 22 root  wheel  4096 10  9 21:43 mnt
一番最後の行にあるmntのパーミッションが555(書き込みだけできない)なのでここからパーミッションを変えてやろうとしましたが、chmodコマンドが蹴られることには変わりありませんでした。
とりまバッドエンドルートということに
ちょっとこのext4ファイルシステムをマウントして設定ファイルを直接書き換えてしまうという方法は取りやめにすることにします。
この方法の問題点は、chmodができないのがMacの問題なのかext4fuseの問題なのか不明なところから始まってるので、別の機会に調べてみようと思います。
(詳しい人にしてみると噴飯モノ(ブフォッ)かもしれませんが)
ま、こうした失敗談も残しておくと誰かの役に立つかもなので。