Raspberry Pi 4 Model B 8GB(Revision:d03114)にVPNサーバーを構築した。

IPv4 PPPoEのルーターにRaspberry Piを接続したので、IPv4 over IPv6のルーターで接続しているデバイスからはアクセスができません。繋ぎ変えれば良いことですが、スマートではないと言う名の楽がしたいものです。
今回はグローバルIPアドレスの環境下で、Raspberry PiにVPNサーバーを構築、IPv4 over IPv6のルーターで接続しているデバイスや外出先でもアクセスができるようにします。
VPNサーバーはルーター内で立てられるモデルもあります。処理能力や規格の兼ね合いもあり、Raspberry Piに構築します。安物ルーターのVPNは懲りた経験があるからです。
VPNとしてはSoftEther VPNやOpenVPNがポピュラーだと考えています。Shadowsocksは異なるものなので行いません。
PiVPNと言うものを見つけました。それでWireGuardと言うものを知りました。3通りのインストール方法から1つを選択して、2つのVPNから1つを選択して構築できるのは素敵です。
決めました!PiVPNで1番目の方法でOpenVPNを構築して楽をしてしまいましょう。
OpenVPN用にポート開放を行う必要があります。そう書いてあります。デフォルトのポートでも構いません。また、IPアドレスにドメインを当てて名前解決を図りたいです。それが完了してからPiVPNに移ります。
ルーターでUDP1194ポートを開けました。名前解決に関してはドメインを取得するか、ダイナミックドメインネームシステム(DDNS)を用います。グローバルIPアドレスが変更になっても、名前解決が安易なのはDDNSです。
ルーターのメーカーやモデルによってはDDNSが標準装備されています。おさしみくんは残念ながらいずれにも該当しないので、外部のDDNSサービスを頼ることにします。
他にもありそうです。おさしみくんはDDNS Nowにします。ネーミングセンスがお気に入りで、直感でロマンを感じた為です。その後にウェブサイトを読んで楽園だと感じたのは否定しません。
ぐうかわくくさま様!
[Linux] crondでIPアドレスを自動更新する方法
1. wgetがインストールされているか確認します。
wget https://ddns.kuku.lu/
インストールされていなければ、「sudo yum install wget」(CentOSなど)、「sudo apt-get install wget」(Ubuntuなど)でインストールしてください。
2. cronに登録して定期的(1分ごと)に実行させるには、下記のようにします。
crontab -e
下記を行末に追記
0-59 * * * * wget -O DDNSNow_update.log "https://f5.si/update.php?domain=ユーザ名&password=パスワード"
ユーザ名: DDNSNowに登録したユーザ名 (f5.siなどドメイン部分は除く)
パスワード: DDNSNowに登録したパスワード (もしくはパスワードのかわりにAPIトークンを指定してもOK)
IPv6接続もある環境でAAAAレコードも更新したい場合は、下記も追加します。
0-59 * * * * wget -O DDNSNow_update.log "https://v6.f5.si/update.php?domain=ユーザ名&password=パスワード"
レスポンスは下記の通りです。末尾に追加メッセージが含まれることがあるため、完全一致ではなく部分一致または前方一致で判定してください。
ERROR:100 (※パスワードまたはトークンが間違っている)
ERROR:110 (※ユーザ名が間違っている)
ERROR:120 (※IPアドレスの形式が不正)
ERROR:200 (※DDNS Now側システムエラー、DBサーバに接続不能)
ERROR:210 (※DDNS Now側システムエラー、DNSサーバに接続不能)
ERROR:300 (※DDNS Now側システムエラー、更新確認不能)
ERROR:400 (※詳細設定でCNAMEが設定中のためAレコードが利用不可)
OK:SUCCESS (※正常に処理完了)
プロバイダー側のメンテナンスでルーターのPPPoE接続が切断され、再接続したり。停電でルーターの電源が切れ、再起動した時にうれしいサービスです。理由は変更されたグローバルIPアドレスを自動更新できるからです。
早速登録しちゃうことにします!可愛く自動更新♪今すぐナウ!!


pi@raspberrypi4mb8gb:~ $ dpkg -l | grep -e wget -e cron
ii  cron                                    3.0pl1-134+deb10u1                  armhf        process scheduling daemon
ii wget 1.20.1-1.1 armhf retrieves files from the web armhf retrieves files from the webpi@raspberrypi4mb8gb:~ $ wget https://ddns.kuku.lu/
--2020-11-01 19:10:34-- https://ddns.kuku.lu/
ddns.kuku.lu (ddns.kuku.lu) をDNSに問いあわせています... 172.67.71.160, 104.26.2.85, 104.26.3.85
ddns.kuku.lu (ddns.kuku.lu)|172.67.71.160|:443 に接続しています... 接続しました。
HTTP による接続要求を送信しました、応答を待っています... 200 OK
長さ: 特定できません [text/html]
`index.html' に保存中
index.html [ <=> ] 21.10K --.-KB/s 時間 0.003s
2020-11-01 19:10:35 (7.07 MB/s) - `index.html' へ保存終了 [21606]
pi@raspberrypi4mb8gb:~ $ ls
Bookshelf Documents Music Public Videos
Desktop Downloads Pictures Templates index.htmlpi@raspberrypi4mb8gb:~ $ sudo crontab -l
no crontab for root
pi@raspberrypi4mb8gb:~ $ crontab -l
no crontab for pi入っています。グローバルIPアドレスの自動更新はRoot権限が不要な為、一般ユーザでcronに登録します。
pi@raspberrypi4mb8gb:~ $ crontab -e
no crontab for pi - using an empty one

Select an editor.  To change later, run 'select-editor'.
 1. /bin/nano        <---- easiest
 2. /usr/bin/vim.tiny
 3. /bin/ed

Choose 1-3 [1]: 1
おさしみくんはnanoを選択しました。
0-59 * * * * wget -O DDNSNow_update.log "https://f5.si/update.php?domain=hogepiyo&password=xxxxxxxxxxxx"pi@raspberrypi4mb8gb:~ $ crontab -l
# Edit this file to introduce tasks to be run by cron.
#
# Each task to run has to be defined through a single line
# indicating with different fields when the task will be run
# and what command to run for the task
#
# To define the time you can provide concrete values for
# minute (m), hour (h), day of month (dom), month (mon),
# and day of week (dow) or use '*' in these fields (for 'any').
#
# Notice that tasks will be started based on the cron's system
# daemon's notion of time and timezones.
#
# Output of the crontab jobs (including errors) is sent through
# email to the user the crontab file belongs to (unless redirected).
#
# For example, you can run a backup of all your user accounts
# at 5 a.m every week with:
# 0 5 * * 1 tar -zcf /var/backups/home.tgz /home/
#
# For more information see the manual pages of crontab(5) and cron(8)
#
# m h dom mon dow command
0-59 * * * * wget -O DDNSNow_update.log "https://f5.si/update.php?domain=hogepiyo&password=xxxxxxxxxxxx"pi@raspberrypi4mb8gb:~ $ ls
Bookshelf DDNSNow_update.log Desktop Documents Downloads Music Pictures Public Templates Videos index.html
pi@raspberrypi4mb8gb:~ $ cat DDNSNow_update.log
OK:SUCCESS (good) 正常に処理完了できました。これでポート開放と名前解決が済んだのでPiVPNに移れます。
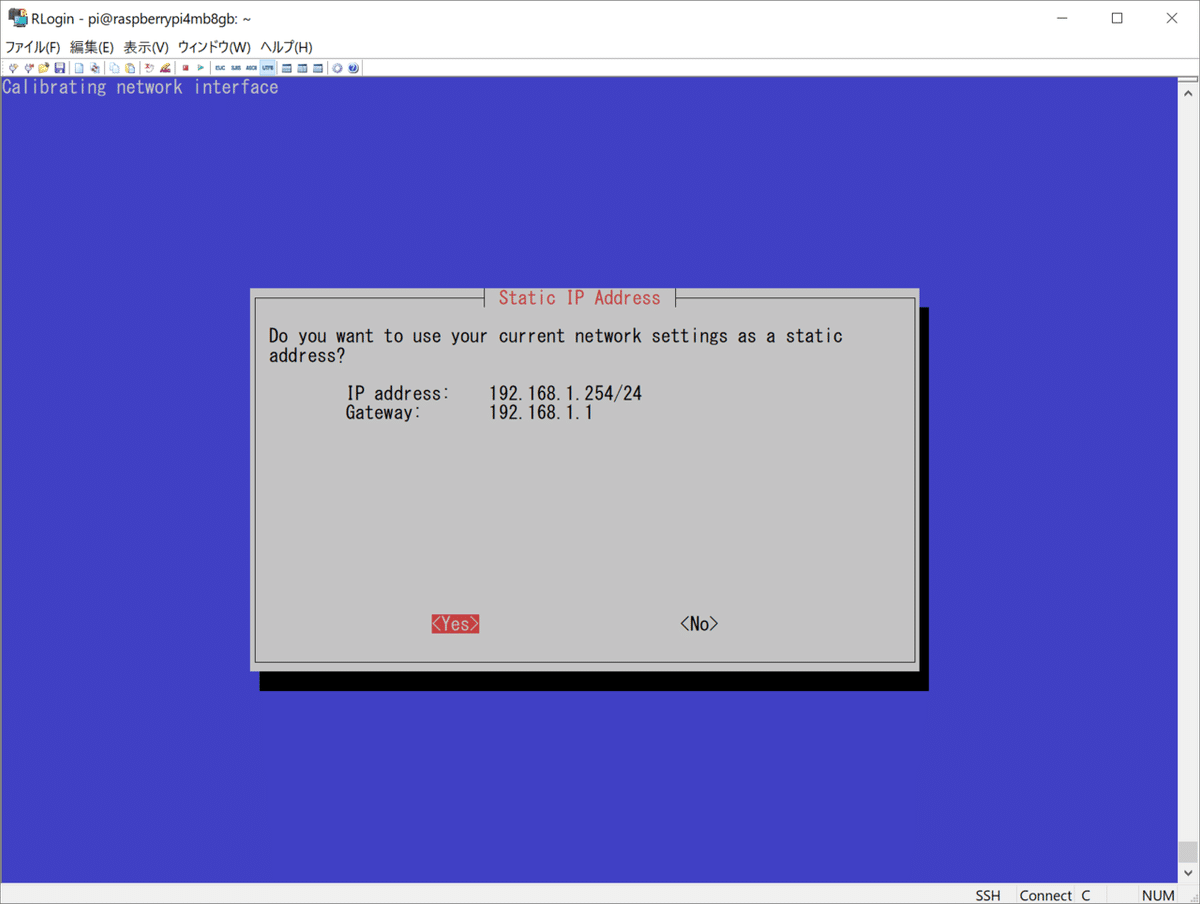
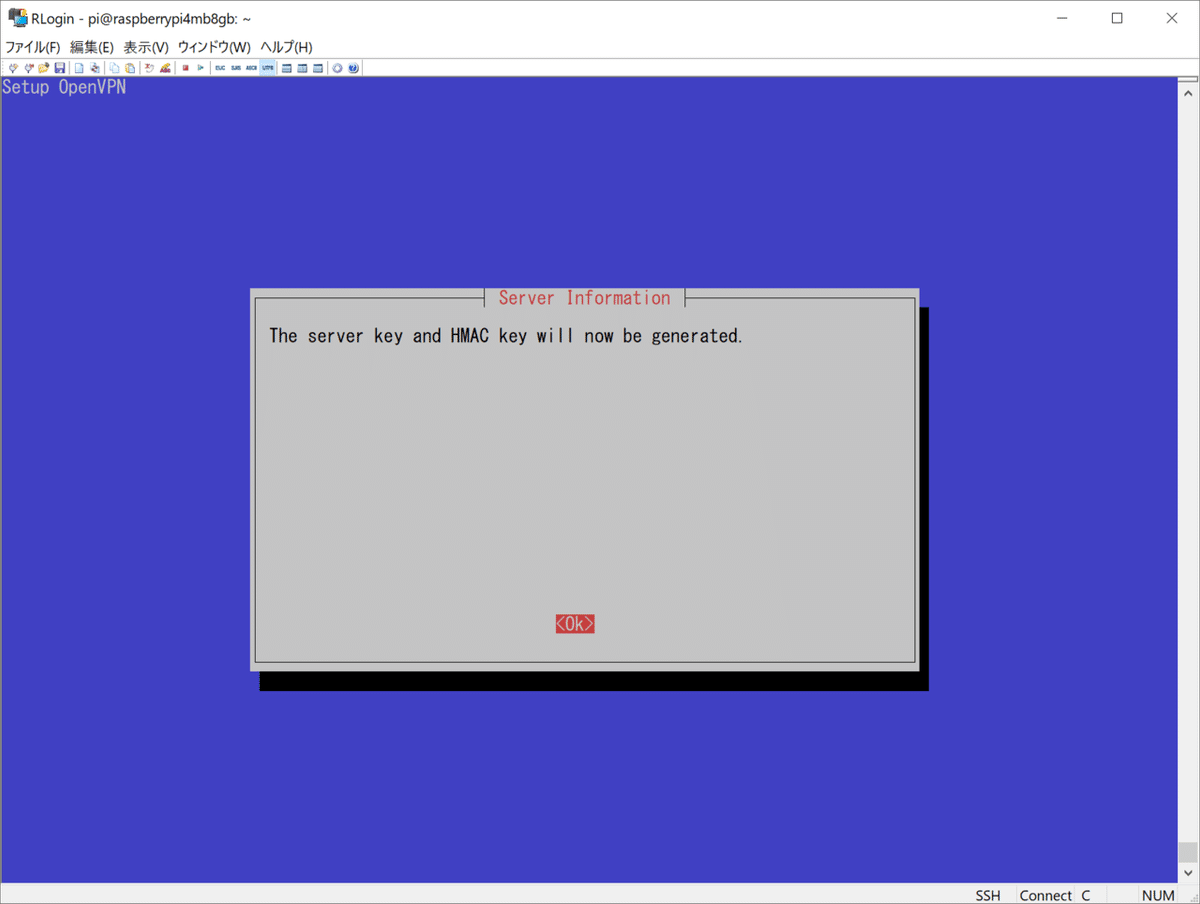
ポートはUDP1194。DNSプロバイダーはローカルではなくGoogle。カスタムサーチドメインは有効にしない。IPではなくDNSネームで登録。互換性は考慮しない。暗号鍵の長さは256Bit。unattended-upgradesは有効にする。OpenVPNプロファイル名はhogepiyo。有効期限は3,650日。ファイルのみで接続とします。1番目の方法でそれなりに楽をします。
OpenVPNプロファイルはターミナルソフトのRLoginでSFTPファイルの転送で引っ張り出します。
pi@raspberrypi4mb8gb:~ $ curl -L https://install.pivpn.io | bash


pi@raspberrypi4mb8gb:~ $ pivpn help
::: Control all PiVPN specific functions!
:::
::: Usage: pivpn <command> [option]
:::
::: Commands:
:::  -a, add [nopass]     Create a client ovpn profile, optional nopass
:::  -c, clients          List any connected clients to the server
:::  -d, debug            Start a debugging session if having trouble
:::  -l, list             List all valid and revoked certificates
:::  -r, revoke           Revoke a client ovpn profile
:::  -h, help             Show this help dialog
:::  -u, uninstall        Uninstall PiVPN from your system!
:::  -up, update          Updates PiVPN Scripts
:::  -bk, backup          Backup Openvpn and ovpns dir
pi@raspberrypi4mb8gb:~ $ pivpn -a nopass
::: Create a client ovpn profile, optional nopass
:::
::: Usage: pivpn <-a|add> [-n|--name <arg>] [-p|--password <arg>]|[nopass] [-d|--days <number>] [-b|--bitwarden] [-i|--iOS] [-o|--ovpn] [-h|--help]
:::
::: Commands:
:::  [none]               Interactive mode
:::  nopass               Create a client without a password
:::  -n,--name            Name for the Client (default: 'raspberrypi4mb8gb')
:::  -p,--password        Password for the Client (no default)
:::  -d,--days            Expire the certificate after specified number of days (default: 1080)
:::  -b,--bitwarden       Create and save a client through Bitwarden
:::  -i,--iOS             Generate a certificate that leverages iOS keychain
:::  -o,--ovpn            Regenerate a .ovpn config file for an existing client
:::  -h,--help            Show this help dialog

Enter a Name for the Client:  hogepiyo
How many days should the certificate last?  3650
spawn ./easyrsa build-client-full hogepiyo nopass

Note: using Easy-RSA configuration from: /etc/openvpn/easy-rsa/vars
Using SSL: openssl OpenSSL 1.1.1d  10 Sep 2019
Generating an EC private key
writing new private key to '/etc/openvpn/easy-rsa/pki/easy-rsa-1235.TGTs3W/tmp.jYwV2F'
-----
Using configuration from /etc/openvpn/easy-rsa/pki/easy-rsa-1235.TGTs3W/tmp.E7yiC8
Check that the request matches the signature
Signature ok
The Subject's Distinguished Name is as follows
commonName            :ASN.1 12:'hogepiyo'
Certificate is to be certified until Oct 30 11:33:45 2030 GMT (3650 days)

Write out database with 1 new entries
Data Base Updated

Client's cert found: hogepiyo.crt
Client's Private Key found: hogepiyo.key
CA public Key found: ca.crt
tls Private Key found: ta.key


========================================================
Done! hogepiyo.ovpn successfully created!
hogepiyo.ovpn was copied to:
 /home/pi/ovpns
for easy transfer. Please use this profile only on one
device and create additional profiles for other devices.
========================================================pi@raspberrypi4mb8gb:~ $ cd /home/pi/ovpns
pi@raspberrypi4mb8gb:~/ovpns $ ls
hogepiyo.ovpn


後はクライアントソフトをインストールしてプロファイルを読み込ませれば完了です。

OpenVPNを経由してSSHに接続できました。ぐうかわでグローバルIPアドレスを自動更新できる。ルーターに線を繋ぎ変える必要が消えました。
それなりに楽をしたので満足です。人によってはもっと楽ができるのだと考えます。お好みでどうぞ。
この記事が気に入ったらサポートをしてみませんか?