Respiratory Rehab: Step-by-Step Guide (PS6~7)

PS6~7
This applies to each step – you never need to overexert yourself. Please do the movements that you can do within your comfort zone. The goal of positions 0-2 is to allow you to naturally deepen by your breathing just by simply maintaining a comfortable position. The recommended duration is from 5 to 10 minutes, but feel free to do it for longer. It is also advised to do this frequently about once per hour. Since this makes the parasympathetic nervous system dominant, you may become sleepy. Falling asleep while doing this exercise over and over again is actually recommended for recovery. In order for you to recover, it is important to increase the duration of time when the parasympathetic nervous system is dominant. If you would like to prevent yourself from developing post exertional malaise (PEM), it is good to mainly focus on positions 0-2 after doing daily activities, and rest intentionally.
No. 0 0:00~
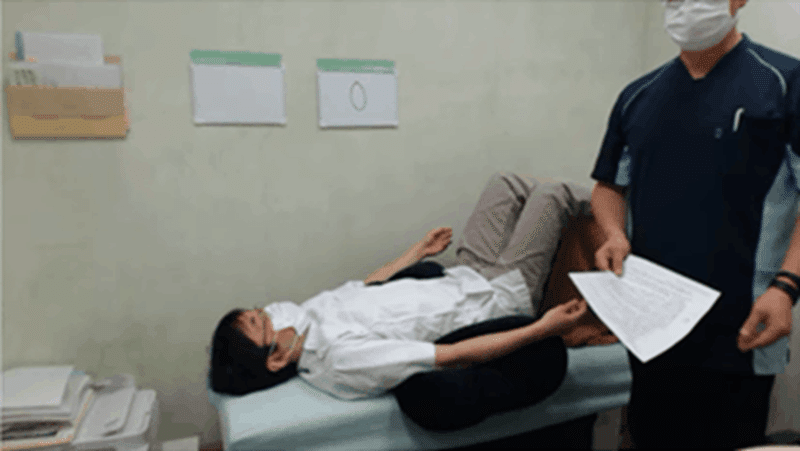
Lie on your back. Try your best to place your legs on a platform or chair, so that your hip joints and knees form 90-degree angles. You can use a lower angle if it is difficult, or you can bend your knees according to your comfort. This position is ideal for allowing air to enter the belly naturally, as it makes it easier for the diaphragm to move. Maintain this position, but you do not need to intentionally breathe deeply. The position itself will naturally make your breath deeper, and it leads to parasympathetic dominance. If lying on your back is difficult, putting a cushion under your shoulder blade may help. As a general rule, breathing should be done through your nose.
Gradually spread your arms into a T-pose, until your armpits form 90-degrees angles. This makes it easier for air to flow into the sides of the chest. If you spread your arms into a Y-pose, air will flow into the upper chest, so maintain the position. Do not push yourself. Only those who find it easy should continue doing the exercise. Manually holding up your arms will get tiresome, so it is recommended to support the elbows or arms with cushions.
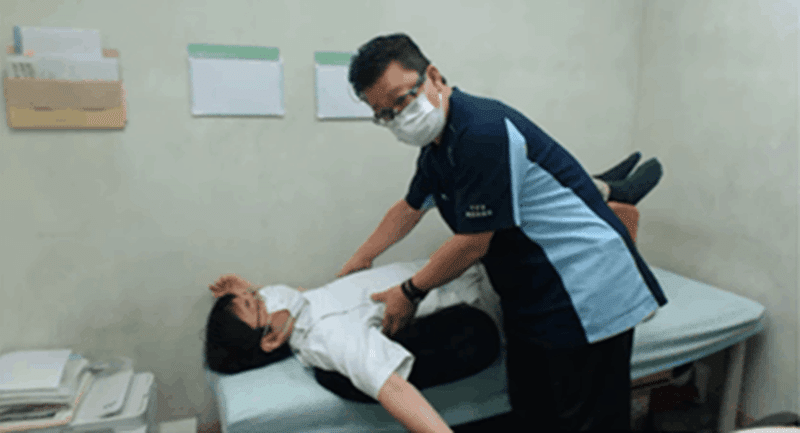
While putting your arms down, stretching your neck lightly is recommended.
(Stretching the Sternocleidomastoid and Scalene Muscles -- They assist in breathing.)

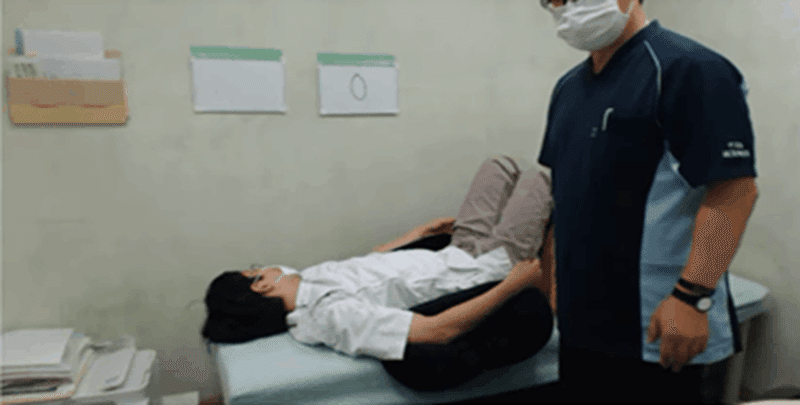
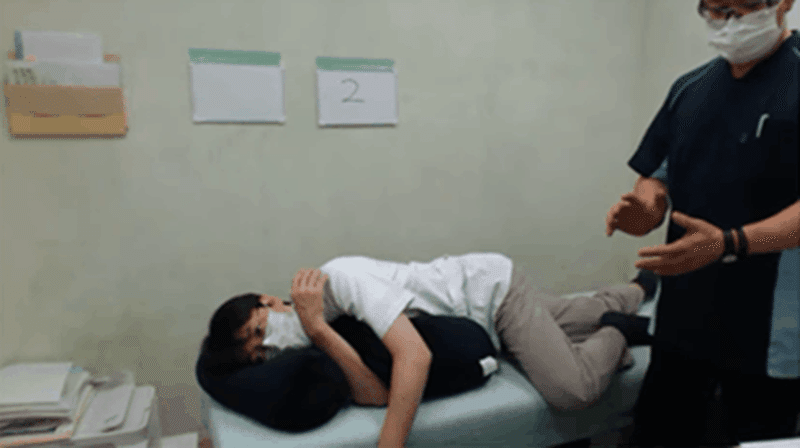
If it is difficult to lift your legs, bend your knees and then lay your legs to the side. You can get into this position effortlessly is you try to stretch your oblique. It is best to support your legs with cushions, rather than let them get tired from having to manually hold them up. While holding this position, do each side for three to five minutes.
No.1 4:47~
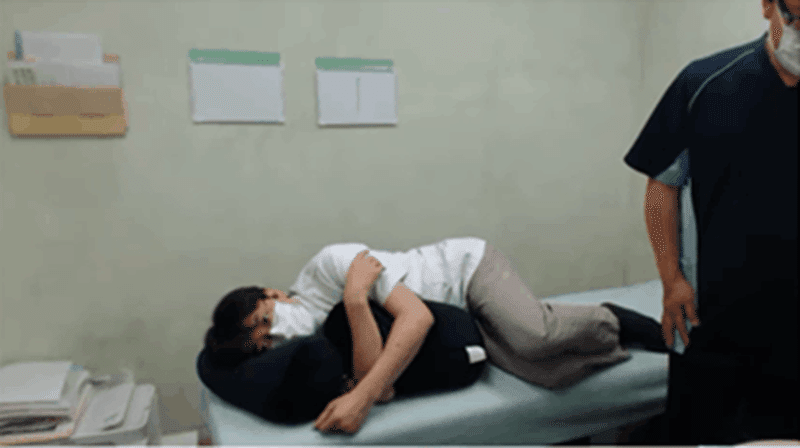
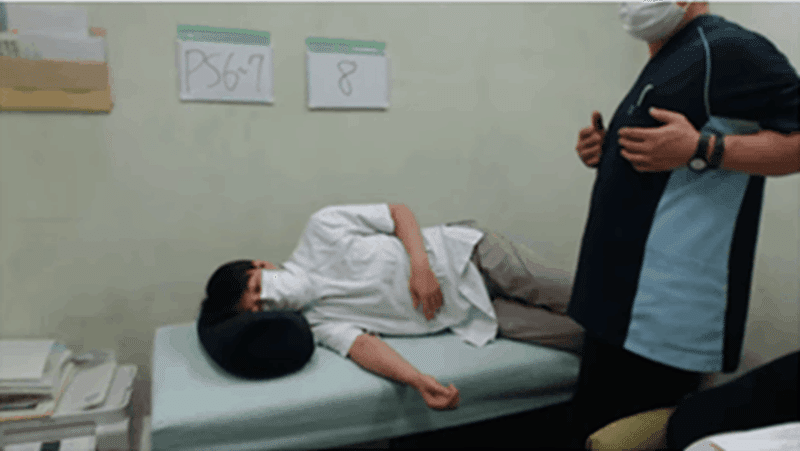
Lie on your side, and hold a cushion. Round your back a little, allowing air to flow into the lower lungs. First remain in this position as you feel air coming in and out throughout your back. You will hold this position for 5 to 6 minutes. If it makes you feel good, you can do this position for longer. If it is hard for you to round your back, you can relax it a little and extend your legs. If you have the energy, take deeper breaths to allow air to flow into your mid-back. When you exhale, do so naturally. Breathe through your nose.
No.2 7:00~
Continuing from position one, bend your top leg towards the floor and push it forward. This is a position lying partially on your stomach. Feel the air coming into the sides of your abdomen and around the pelvis. Breathe naturally, feeling the air coming in and out of your lungs. Hold this for 2 to 3 minutes. Next, breathe in so that the air flows into the sides of your abdomen and pelvis. Hold this for 2 to 3 minutes as well. If you have the energy, you can raise your arms, such as above your head. This opens the sides of your ribs and abdomen. Feel air flow into your ribs as you maintain this position. Breathe in deeply to draw air into the area. This movement should only be done by those who are capable of doing this within their comfort zone.
No.4 for PS6-7 8:56~
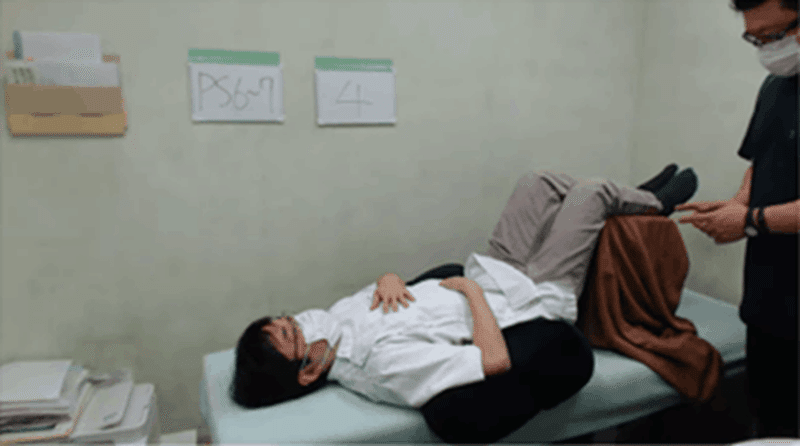
You can do this with position 0, or you can bend your knees. Putting pillows or cushions under the arms will help avoid any arm fatigue. Put one hand on your chest and the other on your stomach. If this is hard for you, you can put your hands down. Position 4 is divided into three phases: A, B, and C.
A. Feel the sensation of your hand on your chest. Feel the air coming in and out of your chest from the movement of your hands. It is alright even if you cannot feel it. If that is the case, try to focus on the sensation of your hands for about 1 to 2 minutes. Next, inhale by drawing air into your chest so that the hand on your chest will rise. You will do this for the same amount of time. When you exhale, do so naturally. Breathe through your nose. You should do this as long as you can keep your neck and shoulders relaxed.
B. Next, switch your focus to your hand on your belly. Feel the air flow in and out of your belly through the movement of your hand. It is alright even if you cannot feel it. If that is the case, try to feel the sensation of your hand for about 1 to 2 minutes. Next, inhale by drawing air into your belly so that your hand will rise. You will do this for the same duration of time. When you exhale, do so naturally. Breathe through your nose. You should do this as long as you can keep your neck and shoulders relaxed. Next, you will breathe in just like you did before, but this time you will purse your lips lightly and exhale a long, thin breath. Perform this breathing for about one to two minutes while being careful not to strain yourself.
C. Switch your focus to both the hand on your chest and the one on your belly. Feel the air flow in and out of your belly through the movement of your hand. It is alright even if you cannot feel it. If that is the case, try to feel the sensation of your hand for about 1 to 2 minutes. Next inhale by drawing air into your chest and belly so that they will expand simultaneously. When you exhale, do so naturally. Breathe through your nose. Do this for the same amount of time. You should do this as long as you can keep your neck and shoulders relaxed.
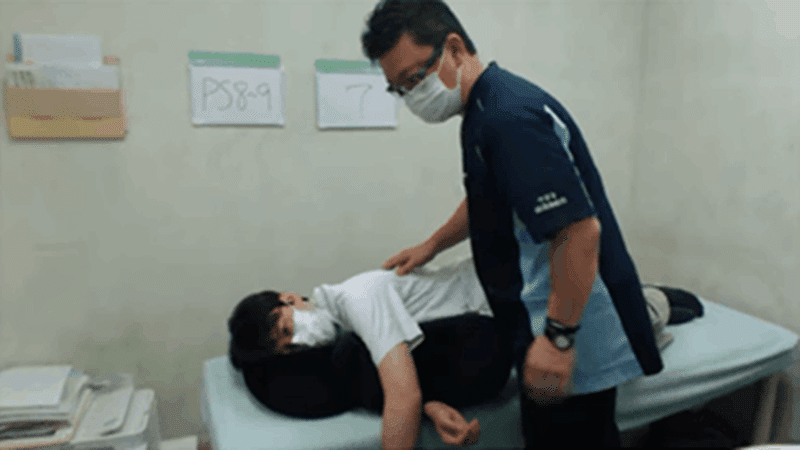

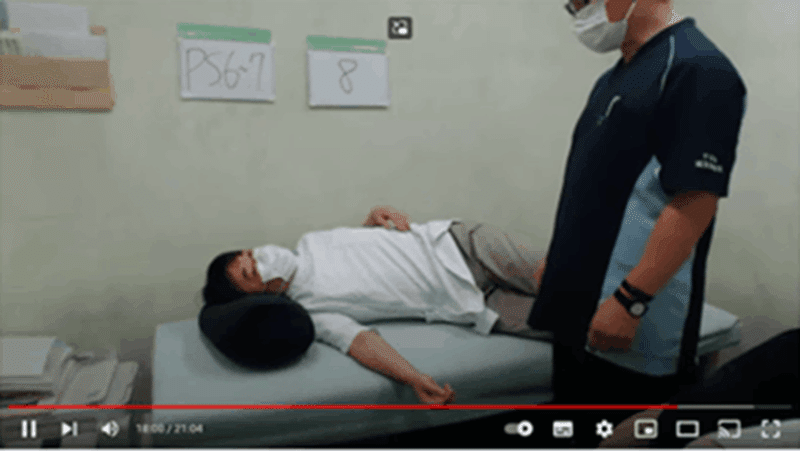
No.7 14:39~
Lie on your side. Hold this position using pillows or cushions in a comfortable posture. Keeping your elbow at your side, extend your arm forward as you exhale. Extend your arm as far as you can, but keep your arm muscles relaxed. You should lose tension rather than tense them up. Imagine moving your arm under its own weight, while your arm is slowly gliding across the floor. When you pull your arm back, let it glide across the floor as if the arm were a rope that lost tension. It may be good to keep the arm extended forward as you maintain your breathing for a while, and feel the stretch in your shoulder blade. It is fine to take a comfortable approach, such as: If you are lying on a bed, let your arm hang. If you are lying on a mattress, you should glide your arm forward. It is recommended to do this position 5 to 8 times, but it is not a strict rule. Also it is good to do this movement slowly only once taking about 5 minutes. If you push yourself when doing the arm movements, your symptoms will worsen, so never do more than your comfort level.
No. 8 16:58~
You will start in the same position as number seven where the elbow is touching the side of the abdomen. While breathing out, pull your elbow further back. (You can do this while breathing in). When pulling your arm, imagine twisting your thoracic spine and moving your shoulder blade towards the floor.
Tip: Move only your upper body without moving your lower back.
It is recommended to do this slowly between 5 and 10 times. You can do this as many times as you like at your own pace within your comfort zone.
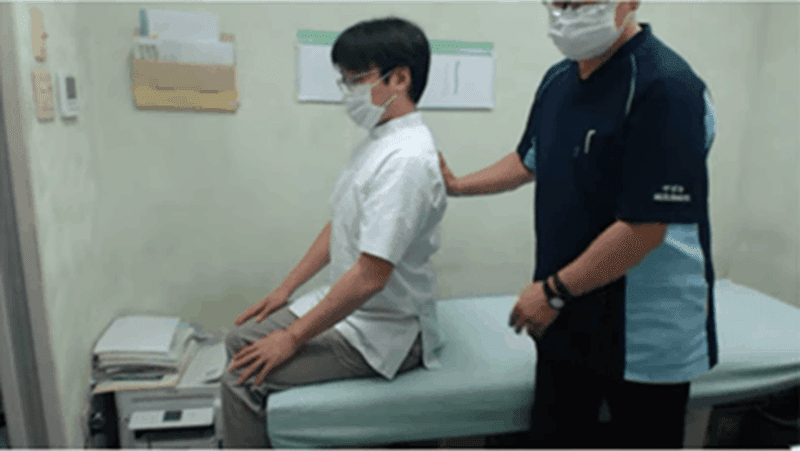
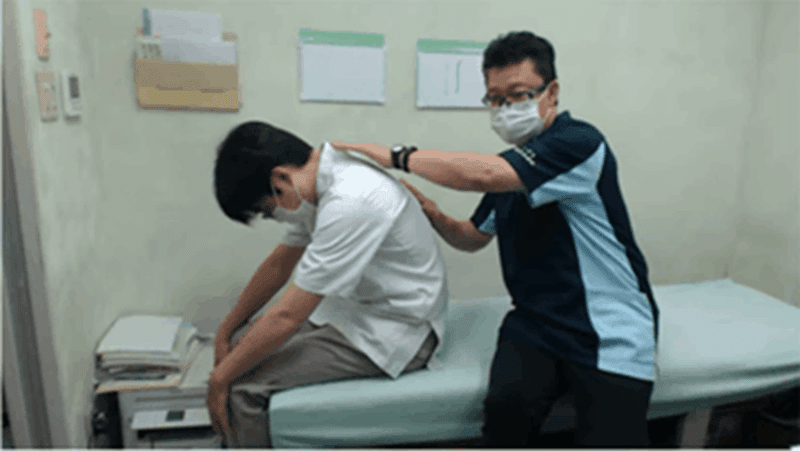
No.11 18:34~
While sitting on something, like a chair, you will synchronize your breathing while rounding and straightening your back. The straightening and rounding the spine should be in sync with your breathing. Your hands should rest on your thighs as you breathe out, and they will glide forward as you round your back. While breathing in, make your pelvis upright and straighten your back. Focus on where your hands are, and straighten the spine. It is recommended to do this exercise between 5 and 10 times.
© 2022 Shinji Nozaki, Koichi Hirahata
Respiratory Rehab Video for PS6~7 (for Long COVID, LPCVS, ME/CFS)
この記事が気に入ったらサポートをしてみませんか?