LM StudioのHTTP機能を使ってみた

背景
LM Studioを入れて、ChatGPTようにチャットしていたのだが、そういえば、ChatGPTみたいにファイル読み込ませられんのね。他にも、別PCからアクセスとかできないかなぁ~とかもやりたいこと色々出てきた。
その備忘録的なものをここに残します。(添付したコードは動いているコードそのままです。)
LM StudioのHTTPサーバー機能について
正直よくわからなかったので、ChatGPTさんの方に聞いてみました( ´∀` )
回答とサンプルコードも書いてもらったりしました。
そこから、色々できそうってことでLM StudioのHTTPサーバー機能を有効にしてみますか。LM Studioを開いて右バーのところに「←→」こんなアイコンがあるのでクリックする。
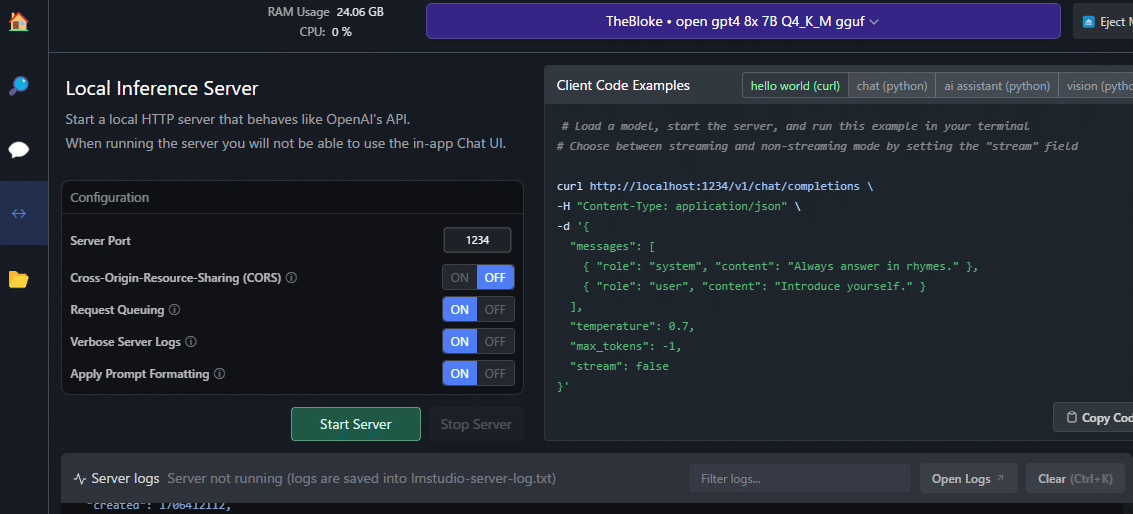
お~なんか、「Start Server」ってそれっぽいボタンがあるので、ポチしてみる。
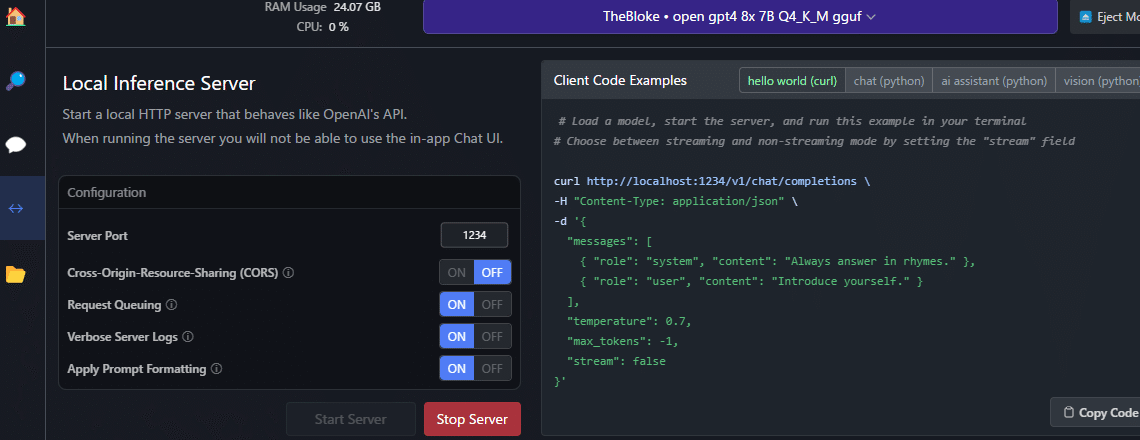
Pythonアプリ作ってみた
なんか起動したっぽい。でも、起動したけどどう使えばええん?ってことで、再びChatGPT先生に聞いてみたら、Python使ってサーバとつなげるみたい。
私は、Python書いたことないので、ここでもChatGPT先生に聞いてみた。HTTPサーバー機能を使ったPythonアプリのコードを作ってもらった。
(途中、色々改善とか改良して…以下のようなコードになりました)
今回は、ぜ~んぶ、ChatGPT先生に作ってもらいました。
import tkinter as tk
from tkinter import scrolledtext, filedialog
import requests
import json
import os
import pandas as pd
import docx2txt
from pdf2image import convert_from_path
from openpyxl import load_workbook
import pytesseract
from PIL import Image
import tempfile

# Tesseractのパスを設定(Windowsの場合)
pytesseract.pytesseract.tesseract_cmd = r'C:\xxxxxxxxx\tesseract.exe' # ファイルパス

# PDFファイルからテキストを抽出する関数
def read_pdf(file_path):
    # PDFから画像を抽出
    images = convert_from_path(file_path)
    text = ''
    for img in images:
        # 画像からテキストを抽出
        text += pytesseract.image_to_string(img, lang='eng')
    return text

def read_excel(file_path):
    wb = load_workbook(filename=file_path)
    text = ''

    for sheet in wb.sheetnames:
        ws = wb[sheet]

        # テキストデータの抽出
        for row in ws.iter_rows():
            for cell in row:
                if cell.value:
                    text += str(cell.value) + ' '

        # 画像データの抽出とOCR処理
        if ws._images:
            temp_dir = tempfile.mkdtemp()
            for image in ws._images:
                img = Image.open(image.ref)
                img_path = os.path.join(temp_dir, 'temp_img.png')
                img.save(img_path)
                text += pytesseract.image_to_string(img, lang='eng')

            # 一時ファイルの削除
            os.remove(os.path.join(temp_dir, 'temp_img.png'))
            os.rmdir(temp_dir)

    return text

def read_word(file_path):
    # 一時ディレクトリで画像を抽出
    temp_dir = tempfile.mkdtemp()
    text = docx2txt.process(file_path, temp_dir)

    # 一時ディレクトリ内のすべての画像に対してOCRを実行
    for image_file in os.listdir(temp_dir):
        img_path = os.path.join(temp_dir, image_file)
        text += pytesseract.image_to_string(Image.open(img_path), lang='eng')

    # 一時ファイルを削除
    for image_file in os.listdir(temp_dir):
        os.remove(os.path.join(temp_dir, image_file))
    os.rmdir(temp_dir)

    return text

# ファイルを選択して読み込む関数
def load_file():
    file_path = filedialog.askopenfilename(
        title="ファイルを選択",
        filetypes=(("PDFファイル", "*.pdf"), ("Excelファイル", "*.xlsx"), ("Wordファイル", "*.docx"),
                  ("テキストファイル", "*.txt"), ("CSVファイル", "*.csv"), ("すべてのファイル", "*.*"))
    )
    if file_path:
        if file_path.endswith('.pdf'):
            content = read_pdf(file_path)
        elif file_path.endswith('.xlsx'):
            content = read_excel(file_path)
        elif file_path.endswith('.docx'):
            content = read_word(file_path)
        elif file_path.endswith('.txt') or file_path.endswith('.csv'):
            with open(file_path, 'r', encoding='utf-8') as file:
                content = file.read()
        append_to_conversation(content)

def append_to_conversation(text):
    messages.append({"role": "user", "content": text})
    update_conversation_history()

# 会話履歴の保存と読み込み
def save_conversation():
    with open("conversation_history.json", "w") as file:
        json.dump(messages, file)

def load_conversation():
    if os.path.exists("conversation_history.json"):
        with open("conversation_history.json", "r") as file:
            return json.load(file)
    return []

def get_max_tokens(user_input):
    # ユーザー入力の長さに基づいてmax_tokensを決定する簡単なロジック
    if len(user_input) > 1000:
        return 400000
    elif len(user_input) > 500:
        return 20000
    elif len(user_input) > 100:
        return 4000
    else:
        return 2000

def send_to_ai():
    user_input = user_input_text.get("1.0", tk.END).strip()
    if user_input:
        max_tokens = get_max_tokens(user_input)
        messages.append({"role": "user", "content": user_input})
        payload = {
            "messages": messages,
            "temperature": 0.7,
            "max_tokens": max_tokens
        }
        # URLっぽいの入れるとNoteが更新できないので以下はそれっぽいのに変える。
        response = requests.post(
            "xxx.xxx.xxx.xxx:1234/v1/chat/completions",
            headers={"Content-Type": "application/json"},
            data=json.dumps(payload)
        )
        ai_response = response.json()['choices'][0]['message']['content']
        messages.append({"role": "assistant", "content": ai_response})

        update_conversation_history()

def update_conversation_history():
    conversation_text.config(state=tk.NORMAL)
    conversation_text.delete("1.0", tk.END)
    for message in messages:
        if message['role'] == "user":
            conversation_text.insert(tk.END, f"You: {message['content']}\n", 'user')
        else:
            conversation_text.insert(tk.END, f"AI: {message['content']}\n", 'ai')
    conversation_text.config(state=tk.DISABLED)
    user_input_text.delete("1.0", tk.END)

    # スクロールをテキストボックスの最下部に移動
    conversation_text.see(tk.END)

    conversation_text.config(state=tk.DISABLED)
    user_input_text.delete("1.0", tk.END)

# 会話履歴
messages = load_conversation()

# GUI setup
root = tk.Tk()
root.title("AI Chat App")

# ウィンドウのサイズを設定
root.geometry("800x600")

# 会話履歴のテキストボックス
conversation_text = scrolledtext.ScrolledText(root, height=40, width=100, state=tk.DISABLED)
conversation_text.pack()

# テキストタグの設定(ユーザーの入力とAIの応答のフォント色)
conversation_text.tag_config('user', foreground='blue')
conversation_text.tag_config('ai', foreground='green')

# 入力欄と送信ボタン
input_frame = tk.Frame(root)
input_frame.pack(fill=tk.BOTH)

user_input_text = scrolledtext.ScrolledText(input_frame, height=3)
user_input_text.pack(side=tk.LEFT, expand=True, fill=tk.BOTH)

send_button = tk.Button(input_frame, text="Send", command=send_to_ai)
send_button.pack(side=tk.RIGHT)

# ファイル読み込みボタン
load_button = tk.Button(root, text="ファイルを読み込む", command=load_file)
load_button.pack()

# アプリケーションが終了する際に会話履歴を保存
def on_closing():
    save_conversation()
    root.destroy()

root.protocol("WM_DELETE_WINDOW", on_closing)
root.mainloop()
このぐらいのコードは、作ってくれるのでChatGPT先生には頭上がらないですね。今回、直接HTTPリクエストしているのでこのあたりが要っぽいなと思っていたりします。
def send_to_ai():
    user_input = user_input_text.get("1.0", tk.END).strip()
    if user_input:
        max_tokens = get_max_tokens(user_input)
        messages.append({"role": "user", "content": user_input})
        payload = {
            "messages": messages,
            "temperature": 0.7,
            "max_tokens": max_tokens
        }
        # URLっぽいの入れるとNoteが更新できないので以下はそれっぽいのに変える。
        response = requests.post(
            "xxx.xxx.xxx.xxx:1234/v1/chat/completions",
            headers={"Content-Type": "application/json"},
            data=json.dumps(payload)
        )
        ai_response = response.json()['choices'][0]['message']['content']
        messages.append({"role": "assistant", "content": ai_response})

        update_conversation_history()
入力欄に記載した内容を取ってきて、それをLM Studioの方に送るみたいなことをしてます。(あと、過去のトーク履歴も送っています)
他には、ファイルの内容も送れるようにしていて、PDF、Word、Excelファイルは、送れるようにしてみました。
起動するとこんな画面。
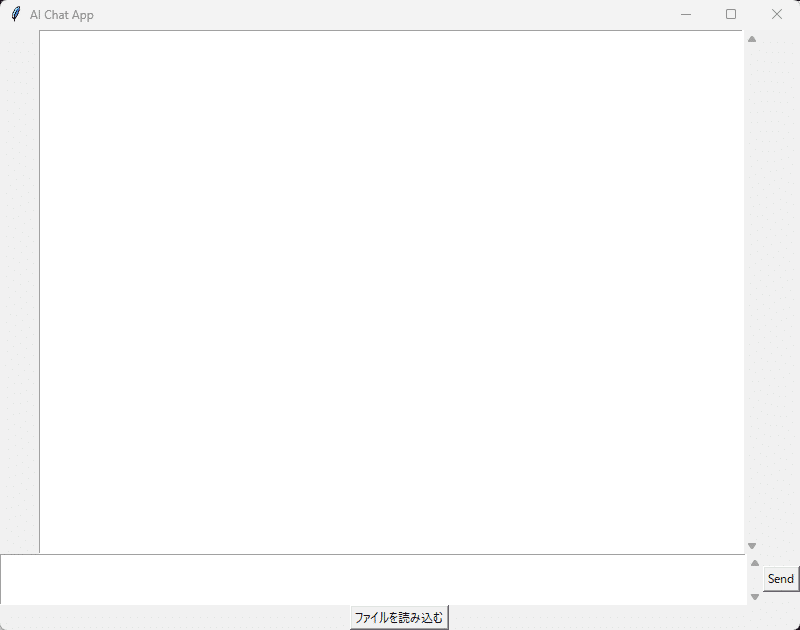
補足:このPythonコードですが、事前にインストールしておかないと動かないので注意がいります。
Tesseract OCRのインストール。
Popplerのインストール。
後は、Pythonのライブラリ(以下ぐらいだと思う。)
pip install requests
pip install pandas openpyxl
pip install pytesseract pdf2image Pillow
pip install docx2txt
実際に使ってみた
どんなものか使ってみた。
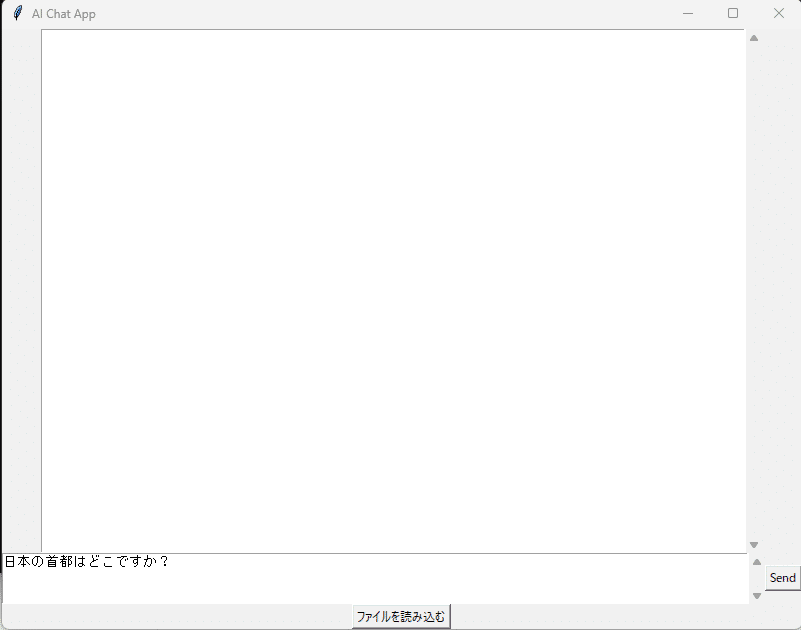
「Send」ボタンを押下して回答を待ちます。
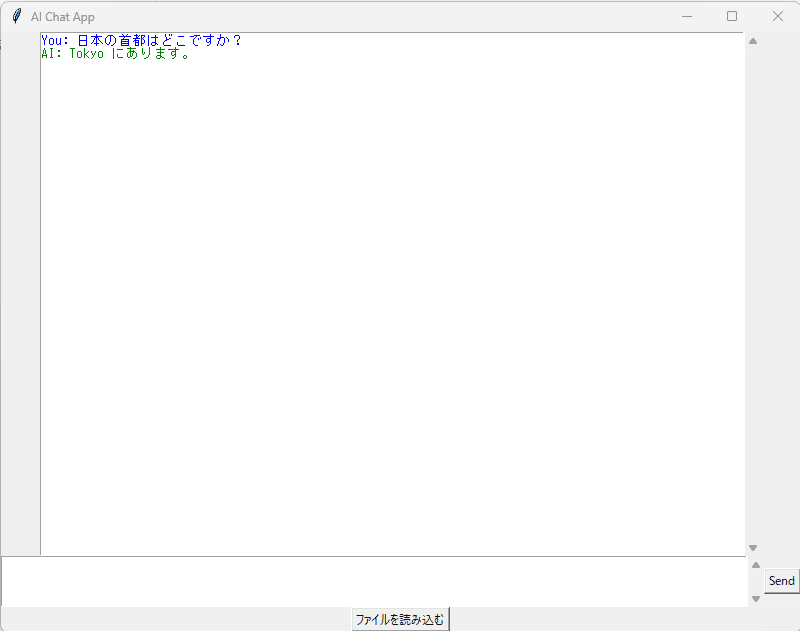
「Tokyo」となりますが、まあ、許容範囲。ところでこの子のモデルは何が入っているんだろうってことで聞いてみよう。

GPT-3.5なんだ…ダウンロードした時のファイル名は、GPT4って書いてあったから期待してけど…仕方がないですね。ChatGPTの無料版ぐらいは使えるってことになるだろう。(怪しいのつかまされてるのかもと不安はちょっとあります)
ファイル読み込みさせる前後での回答の違い
ファイルを読み込ませてそのファイルの情報から知識を引っ張ってくるかどうかの実験をしてみた。
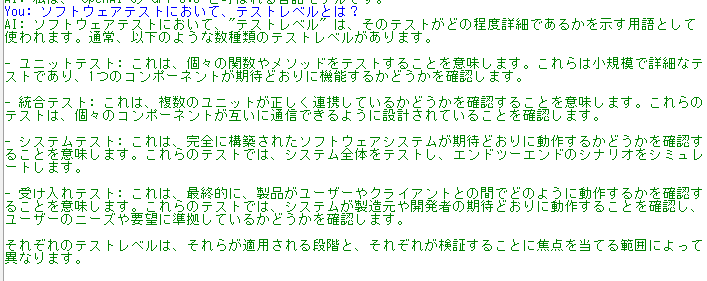
質問:ソフトウェアテストにおいて、テストレベルとは?
最初は特に何もファイル読み込ませずに実施。
JSTQBのシラバス読ませたら回答がどうなるか実験。読ませている間は時間がかかるんですがね。そのあたりは、仕方がない。
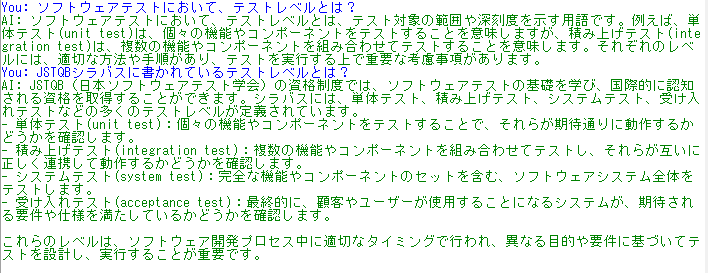
読み込ませたのだが、同じ質問ではちょっと違う気がする回答が返ってきた💦
質問を変えたら何とかなったが、あまり、過去の会話無しで質問したのと変わりがない気がしなくもない。
他に世に転がっていない情報ならどうなのかは実験はしたいとは思う。
まとめ
LM Studioでは、添付ファイルが送ることができなかったので、Pythonアプリを作って、添付ファイルの文章を送ることはできたとは思う。
今後は、改善、実験、面白そうなことないかなとかで色々していきたい。
この記事が気に入ったらサポートをしてみませんか?