
Shopify|商品ページにギフトの選択肢を追加し、カートと明細書に反映する(Dawn)

こんにちは、ななこまです。
今回は、商品ページに熨斗やラッピング等を選択する項目を追加し、カートページと明細書に反映する作業を行っていきます。
main-product.liquidにコードを追加する
下記コードを追加します。
{%- when 'noshi' -%}
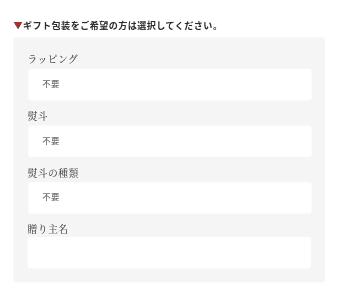
<p style="font-size: 13px; margin: 2.5rem 0 -1rem; font-weight: 600;"><span style="color: #9e2b2b;">▼</span>ギフト包装をご希望の方は選択してください。</p>
<div class="noshi_field">
{% assign tesages = block.settings.select2 | split: "," %}
<div class="noshi__select-feild">
<label for="tesage" style="font-family: var(--font-heading-family); font-size: 14px; font-weight: 500;">{{ block.settings.title4 }}</label>
<select id="tesage" class="select__select" name="properties[ラッピング]" form="product-form-{{ section.id }}">
{% for tesage in tesages limit:1 %}
<option value="{{ tesage }}" selected="selected">{{ tesage }}</option>
{% endfor %}
{% for tesage in tesages offset:1 %}
<option value="{{ tesage }}">{{ tesage }}</option>
{% endfor %}
</select>
</div>
{% assign noshis = block.settings.select | split: "," %}
<div class="noshi__select-feild">
<label for="noshi" style="font-family: var(--font-heading-family); font-size: 14px; font-weight: 500;">{{ block.settings.title1 }}</label>
<select id="noshi" class="select__select" name="properties[熨斗]" form="product-form-{{ section.id }}">
{% for noshi in noshis limit:1 %}
<option value="{{ noshi }}" selected="selected">{{ noshi }}</option>
{% endfor %}
{% for noshi in noshis offset:1 %}
<option value="{{ noshi }}">{{ noshi }}</option>
{% endfor %}
</select>
</div>
{% assign types = block.settings.select3 | split: "," %}
<div class="noshi__select-feild">
<label for="type" style="font-family: var(--font-heading-family); font-size: 14px; font-weight: 500;">{{ block.settings.title2 }}</label>
<select id="type" class="select__select" name="properties[熨斗種類]" form="product-form-{{ section.id }}">
{% for type in types limit:1 %}
<option value="{{ type }}" selected="selected">{{ type }}</option>
{% endfor %}
{% for type in types offset:1 %}
<option value="{{ type }}">{{ type }}</option>
{% endfor %}
</select>
</div>
<input type="hidden" id="js-memo-val" value="{{ block.settings.memo }}">
<div id="js-memo" style="display: flex; flex-direction: column;">
<label for="memo" style="font-family: var(--font-heading-family); font-size: 14px; font-weight: 500;">{{ block.settings.title3 }}</label>
<input id="memo" style="padding: 0 3rem 0 2rem; height: 4.5rem; border-radius: 4px; border: none;" type="text" name="properties[メモ]" form="product-form-{{ section.id }}">
</div>
</div>続いて、{% schema %}~{% endschema %}の"blocks"内に下記コードを追加します。
    {
      "type": "noshi",
      "name": "熨斗",
      "limit": 1,
      "settings": [
        {
          "type": "header",
          "content": "熨斗"
        },
        {
          "type": "text",
          "id": "title1",
          "label": "ラベル",
          "default": "熨斗"
        },
        {
          "type": "html",
          "id": "select",
          "label": "熨斗の有無",
          "default": "熨斗不要,その他"
        },
        {
          "type": "header",
          "content": "熨斗種類"
        },
        {
          "type": "text",
          "id": "title2",
          "label": "ラベル",
          "default": "熨斗不要,短冊熨斗(名入れ不可)"
        },
        {
          "type": "html",
          "id": "select3",
          "label": "熨斗の種類",
          "default": "蝶結び赤金,結び切り赤金"
        },
        {
          "type": "header",
          "content": "贈り主名"
        },
        {
          "type": "text",
          "id": "title3",
          "label": "ラベル",
          "default": "贈り主名"
        },
        {
          "type": "html",
          "id": "memo",
          "label": "表示項目",
          "default": "その他",
          "info": "半角カンマで区切ってください。"
        },
        {
          "type": "header",
          "content": "ラッピング"
        },
        {
          "type": "text",
          "id": "title4",
          "label": "ラベル",
          "default": "ラッピング"
        },
        {
          "type": "html",
          "id": "select2",
          "label": "ラッピング有無",
          "default": "不要,要",
          "info": "半角カンマで区切ってください。"
         }
      ]
   },
ギフト包装のコード追加はこちらで完了です!
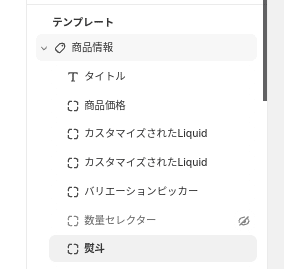
カスタマイズ画面できちんと表示されているか確認します。
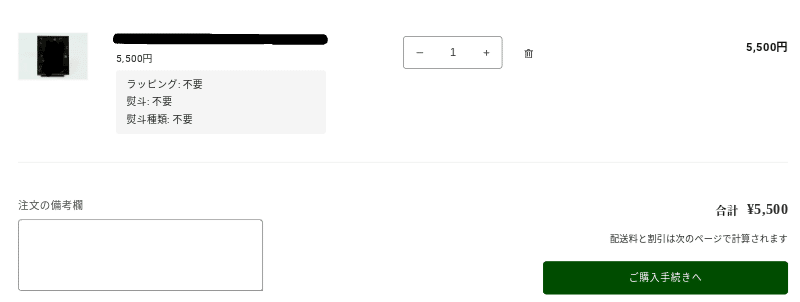
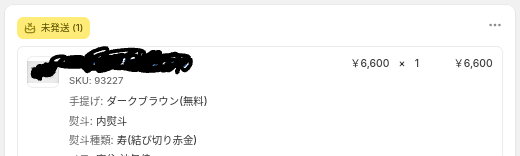
これでカートページにも、購入後の注文管理画面にも表示されるようになっているはずです。
明細書に反映させる(おまけ)
明細書を使用する方への追加情報。
設定>配送と配達>明細表>テンプレートを編集を選択します。
{% for line_item in line_items_in_shipment %}~{% endfor %}内の下記コードの下に
            {% if line_item.variant_title != blank %}
              <span class="line-item-description-line">
                {{ line_item.variant_title }}
              </span>
            {% endif %}
下記のコードを追加します。
              <br>
              {% for property in line_item.properties %}
              <span class="line-item-description-line">
              {{ property.first }}: {{ property.last }}
              </span>
              {% endfor %}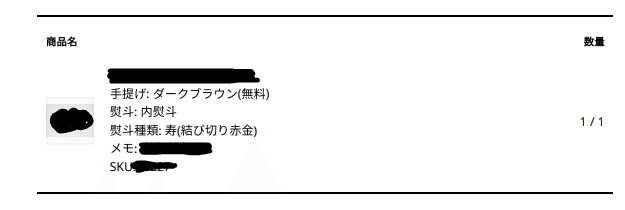
上記のように明細書にもきちんと反映されました。
これでオーダー漏れが無くなりそうですね。必要な方は、バックアップを取った上でお試しください☺
ちなみに、明細書の配送先住所の並びは下記のようにすると日本仕様で見やすいです。
      <p class="address-detail">
        {% if shipping_address != blank %}
          {{ shipping_address.name }}
          <br>
          {{ shipping_address.country }}
          {% if shipping_address.city_province_zip != blank %}
          <br>
            {{ shipping_address.city_province_zip }}
          {% endif %}
          <br>
          {{ shipping_address.address1 }}
          {% if shipping_address.address2 != blank %}
          <br>
            {{ shipping_address.address2 }}
          {% endif %}
          {% if shipping_address.phone != blank %}
          <br>
            {{ shipping_address.phone }}
          {% endif %}
        {% endif %}
      </p>
それでは!
この記事が気に入ったらサポートをしてみませんか?