
手と顔だってコントロール!! 【ControlNet v1.1 nightly導入方法を簡単解説】

はじめに
皆様、こんにちは!駆け出しAI美女生成アーティストMiSiMO(みしも)です。
まずはこちら。最近CotrolNet1.1というのが出ました。
へっ!!??すす、すごいぞ!!
次回の週刊MiSiMOでも触れる気でした。
すごいみたいですよー、あとはみんな頑張ってー、みたいな感じで。
でも、普通にみんな気になるでしょ。いやどう使うのって。いや私も気になるし。
ので、まとめました。
導入方法
ステップ1)ControlNet最新をPull
まずGitHub上のMikubillさんのControlNetをextensions以下にclone
%cd [your sd-webui dir]/extensions/
!git clone https://github.com/Mikubill/sd-webui-controlnet.git
もしくはすでに同controlnetをクロンしている人はpull
%cd [your sd-webui dir]/extensions/sd-webui-controlnet
!git pull
ステップ2)最新のモデルをひたすら持ってくる
colabなら以下のような感じだと思う。要はここからモデルダウンロードしてるよって話。wgetやcurlでも手動でもなんでも良い。けど、ダウンロードされたモデルのファイル名にだけは気をつけよう、という感じ。
%cd [your sd-webui dir]/extensions/sd-webui-controlnet/models

!apt -y install -qq aria2

!aria2c --console-log-level=error -c -x 16 -s 16 -k 1M https://huggingface.co/Linaqruf/anything-v3.0/resolve/main/anything-v3-full.safetensors -o anything-v3-full.safetensors
!aria2c --console-log-level=error -c -x 16 -s 16 -k 1M https://huggingface.co/runwayml/stable-diffusion-v1-5/resolve/main/v1-5-pruned.ckpt -o v1-5-pruned.ckpt
!aria2c --console-log-level=error -c -x 16 -s 16 -k 1M https://huggingface.co/lllyasviel/ControlNet-v1-1/resolve/main/control_v11e_sd15_ip2p.pth -o control_v11e_sd15_ip2p.pth
!aria2c --console-log-level=error -c -x 16 -s 16 -k 1M https://huggingface.co/lllyasviel/ControlNet-v1-1/resolve/main/control_v11e_sd15_shuffle.pth -o control_v11e_sd15_shuffle.pth
!aria2c --console-log-level=error -c -x 16 -s 16 -k 1M https://huggingface.co/lllyasviel/ControlNet-v1-1/resolve/main/control_v11p_sd15_canny.pth -o control_v11p_sd15_canny.pth
!aria2c --console-log-level=error -c -x 16 -s 16 -k 1M https://huggingface.co/lllyasviel/ControlNet-v1-1/resolve/main/control_v11p_sd15_depth.pth -o control_v11p_sd15_depth.pth
!aria2c --console-log-level=error -c -x 16 -s 16 -k 1M https://huggingface.co/lllyasviel/ControlNet-v1-1/resolve/main/control_v11p_sd15_inpaint.pth -o control_v11p_sd15_inpaint.pth
!aria2c --console-log-level=error -c -x 16 -s 16 -k 1M https://huggingface.co/lllyasviel/ControlNet-v1-1/resolve/main/control_v11p_sd15_lineart.pth -o control_v11p_sd15_lineart.pth
!aria2c --console-log-level=error -c -x 16 -s 16 -k 1M https://huggingface.co/lllyasviel/ControlNet-v1-1/resolve/main/control_v11p_sd15_mlsd.pth -o control_v11p_sd15_mlsd.pth
!aria2c --console-log-level=error -c -x 16 -s 16 -k 1M https://huggingface.co/lllyasviel/ControlNet-v1-1/resolve/main/control_v11p_sd15_normalbae.pth -o control_v11p_sd15_normalbae.pth
!aria2c --console-log-level=error -c -x 16 -s 16 -k 1M https://huggingface.co/lllyasviel/ControlNet-v1-1/resolve/main/control_v11p_sd15_openpose.pth -o control_v11p_sd15_openpose.pth
!aria2c --console-log-level=error -c -x 16 -s 16 -k 1M https://huggingface.co/lllyasviel/ControlNet-v1-1/resolve/main/control_v11p_sd15_scribble.pth -o control_v11p_sd15_scribble.pth
!aria2c --console-log-level=error -c -x 16 -s 16 -k 1M https://huggingface.co/lllyasviel/ControlNet-v1-1/resolve/main/control_v11p_sd15_seg.pth -o control_v11p_sd15_seg.pth
!aria2c --console-log-level=error -c -x 16 -s 16 -k 1M https://huggingface.co/lllyasviel/ControlNet-v1-1/resolve/main/control_v11p_sd15_softedge.pth -o control_v11p_sd15_softedge.pth
!aria2c --console-log-level=error -c -x 16 -s 16 -k 1M https://huggingface.co/lllyasviel/ControlNet-v1-1/resolve/main/control_v11p_sd15s2_lineart_anime.pth -o control_v11p_sd15s2_lineart_anime.pth
!aria2c --console-log-level=error -c -x 16 -s 16 -k 1M https://huggingface.co/lllyasviel/ControlNet-v1-1/resolve/main/control_v11u_sd15_tile.pth -o control_v11u_sd15_tile.pth
使い方
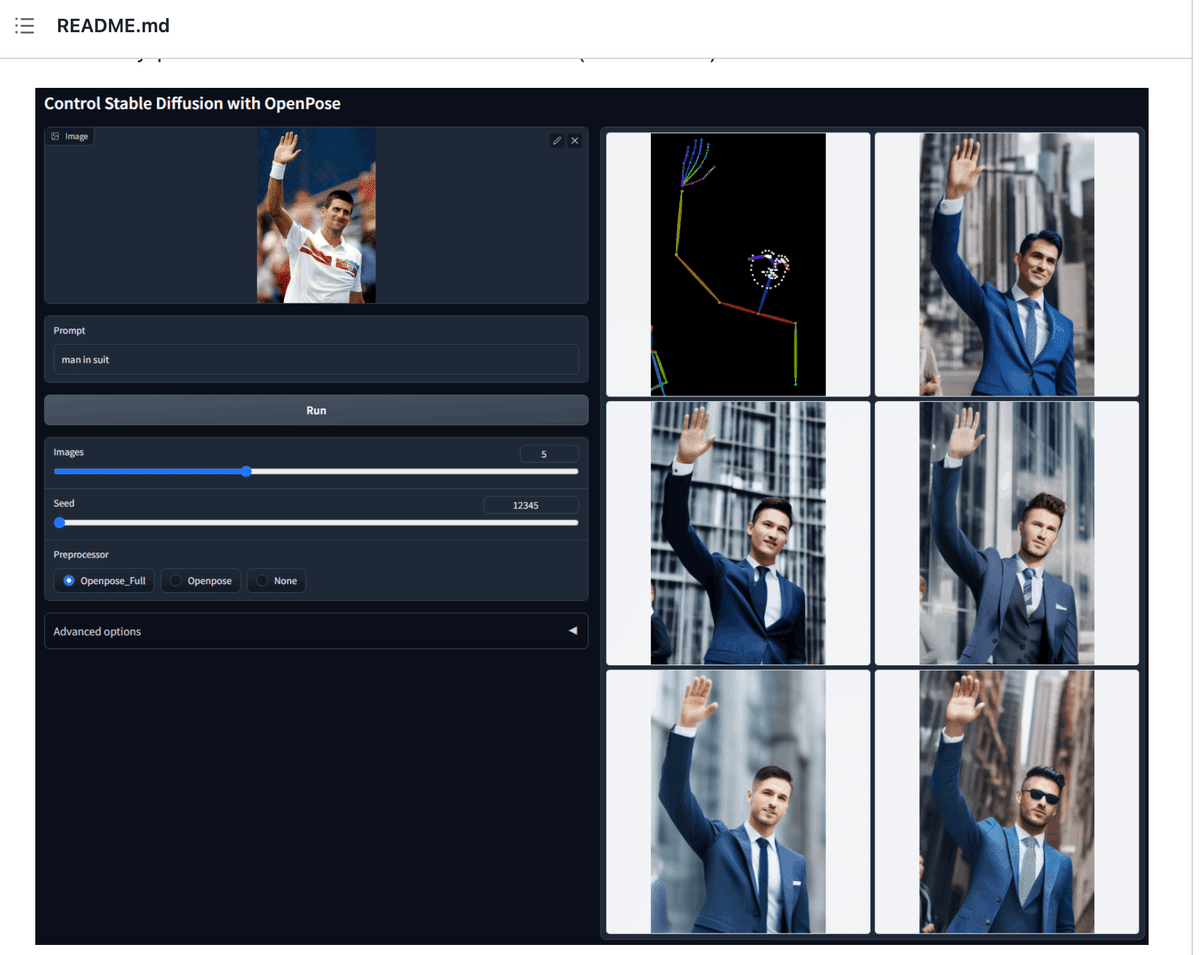
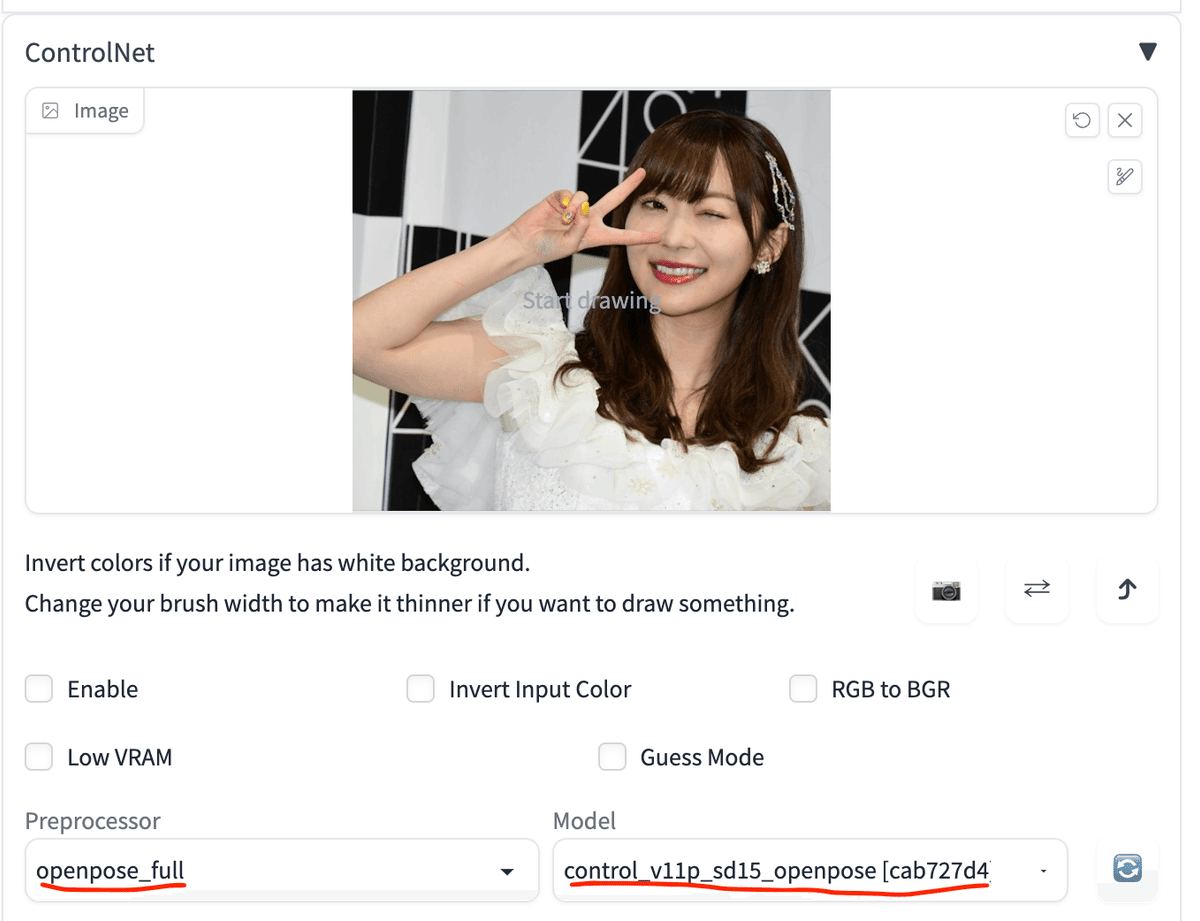
あとはいつもどおりwebuiを起動して、ControlNetと利用方法はいつもと同じ。Enableして、openpose_fullとほにゃらら_openposeのモデルを選択してGenerate。(注:画像はこちらのニュース記事のものを利用させていただきました。)
そうすると、ほーら簡単!

・・てあれ?
シード幾つか探索してて一番良さげなのでも上。
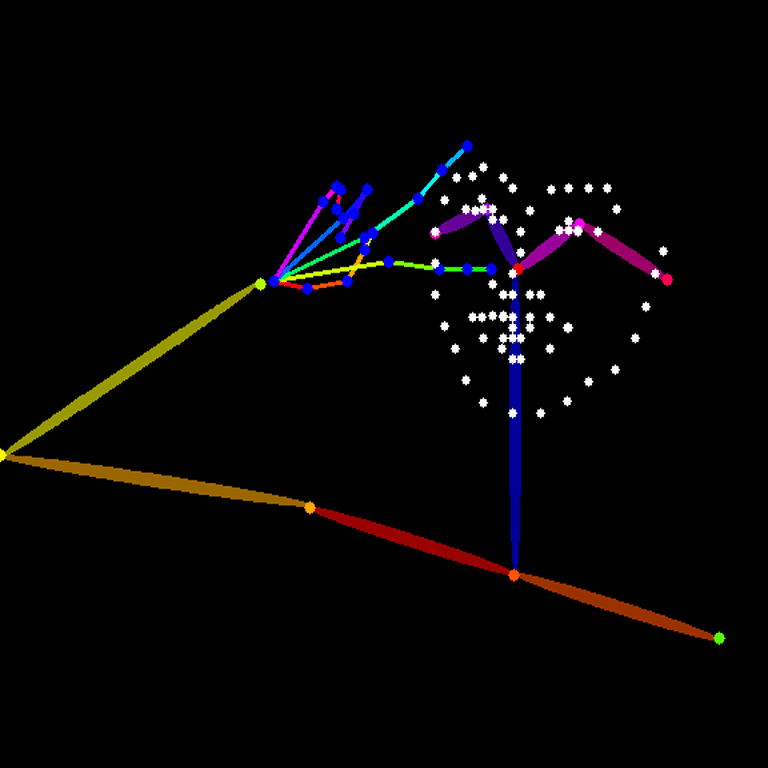
アノテーションを見ると手はバッチリ。目は微妙か??
Detailed Eyesとかloraとか切ってもダメ。
削りまくってみる。

よくはなったが。
もう、v sign足してみる!!


おおおお!!!
とどめのwinkだ!! いけぇ!!
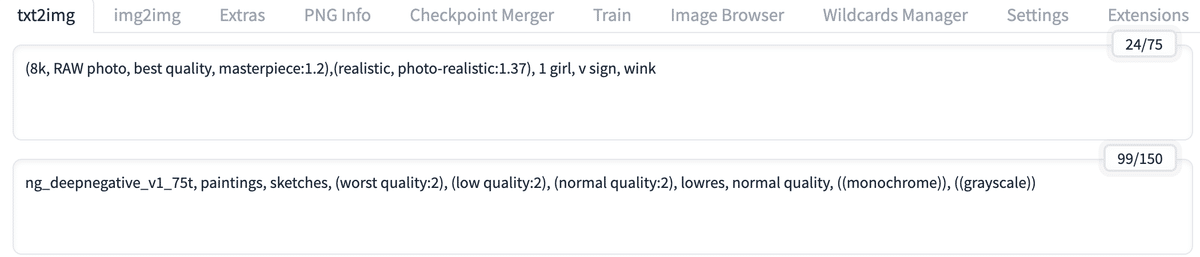

ってうぉい!!!
一旦おわり。あとはみなさま頑張って。。。
おわりに
1週間ほど前から気になっていたので、実際導入して動いたことを確認して一旦安心しました。
使いこなしは結構大変だったりノウハウは必要みたいですが、みなさまも試してみてくださいー!
それではまた!