The Avatar NPC System Tutorial

This article provides an overview of how to use the world asset featuring the "Avatar_NPC" system. We will guide you through the setup process using the "EuropeanHouse" world asset as an example.
Installing VCC
Installing VCC (VRChat Creator Companion) allows you to manage the necessary assets for creating VRChat content in Unity. You can download VCC from the official VRChat website.

Once downloaded, proceed with the installation. If Unity is not installed on your PC, Unity Hub and the compatible version of Unity will be installed along with VCC. Follow the on-screen instructions to complete the installation.
Creating a New Project
Create a World project in Unity 2022 or later using VCC.
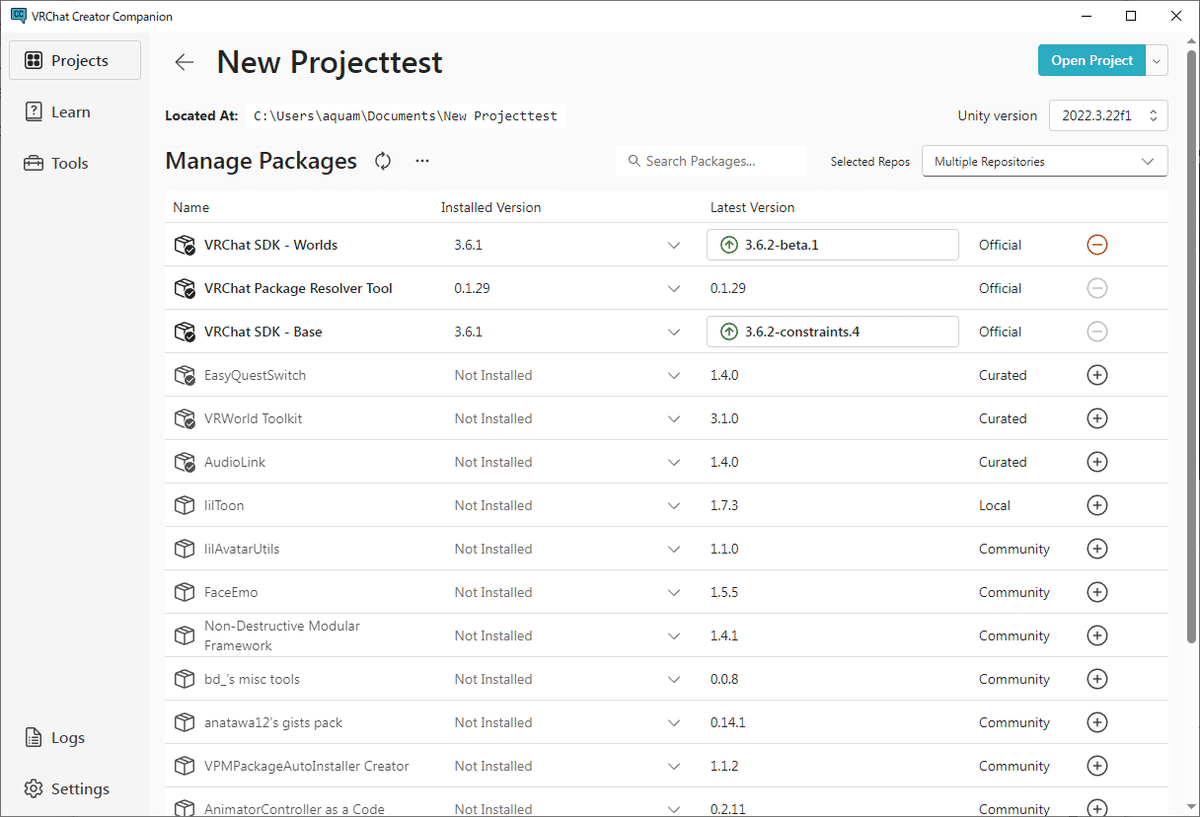
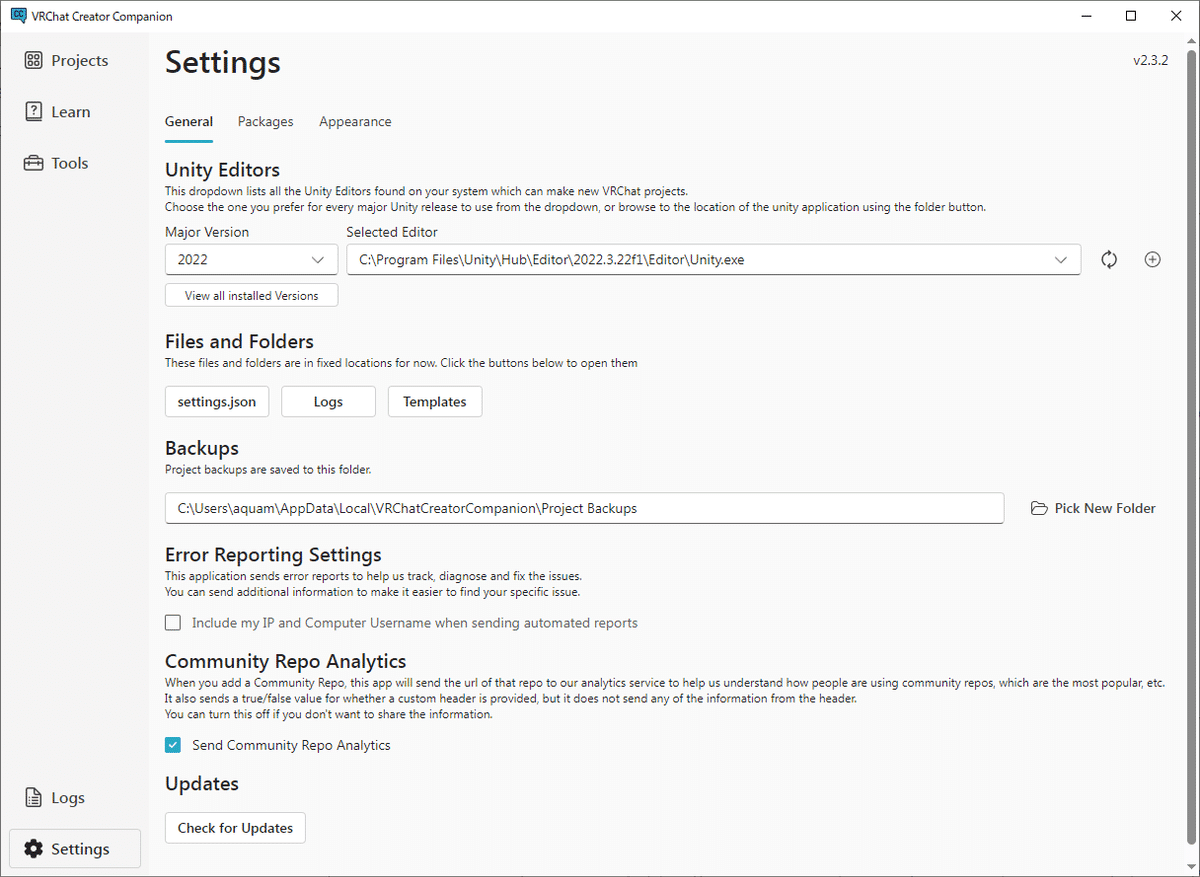
ou can check the installed version of Unity under "Settings." As of August 2024, the recommended Unity version is "2022.3.22f1.
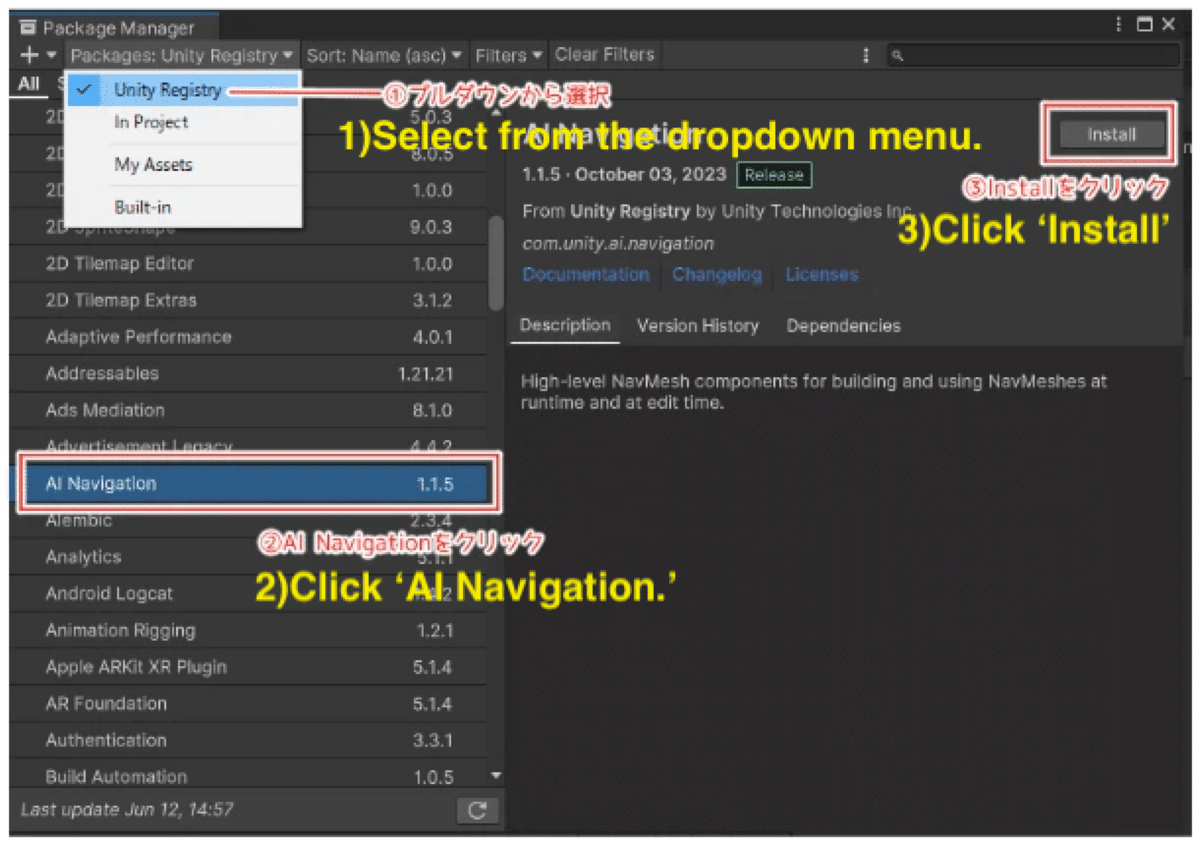
Importing Packages
Once Unity is open, go to the toolbar and select Window > Package Manager. Choose "Packages: Unity Registry" and install "AI Navigation."
Next, import the packages in the following order:
"AvatarNPC_With_SetupTool.unitypackage"
The setup world unity package (e.g., EuropeanHouse_AvatarNPC.unitypackage)
Drag and drop each unitypackage into the "Assets" section of the "Project" tab to import them.
Note: The setup scene includes QvPen, which is not bundled in the package. Please install it as needed.
Opening the Scene File
Double-click the "EuropeanHouse_NPC.unity" scene file located in Assets > WCK_EuropeanHouse.
A pop-up window for installing "TMP Importer" (used for displaying debug text) will appear.

You can close it by clicking the ✕ button in the top right corner. However, to prevent this pop-up from appearing every time you open the scene, click "Import TMP Essentials" and then "Import TMP Examples & Extras" to install TMP.

The scene is already set up as a world. When you press the play button, the sample NPC "Agent_Shapell" will start moving around the world. Once you've confirmed it's working, press the play button again to stop the movement and proceed to the next step.
Setting Up Avatars as NPCs
The included "EasySetupTool" is an automation tool that allows you to easily convert models set up as avatars for VRChat into agents (NPCs) for the AvatarNPC system.
As of August 2024, this tool is compatible with humanoid avatars only. It does not support non-humanoid avatars.
Additionally, it does not automatically convert PhysBone to DynamicBone. If you want to add DynamicBone effects to hair or clothing, please use a tool like this one for conversion.
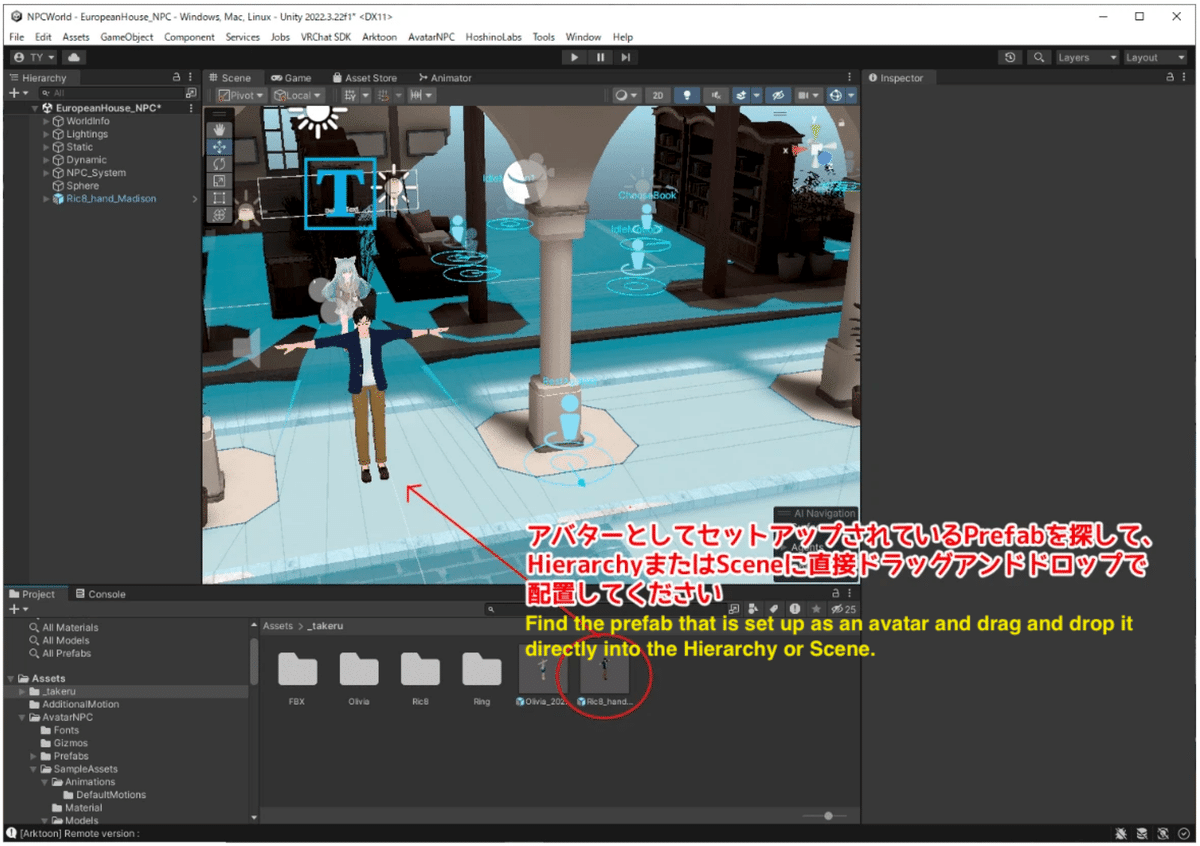
Using the EasySetupTool
Place the avatar you want to convert into an NPC into the scene. Drag and drop the avatar's prefab into the Hierarchy and move it to the desired location for NPC movement.
If you're moving a custom or modified avatar into the world's project, please refer to this article for guidance.
VRChat向け:アバターのPrefab化とExportpackage|竹流 (note.com)
Once the avatar is placed, go to the toolbar and open AvatarNPC > Easy Setup Tool.

◆Setting Built-in Action Triggers
This feature allows you to set specific actions for the NPC that are independent of the built-in action triggers. Currently, only the FindPlayerTrigger (a prefab for actions and triggers when an NPC detects a player) can be set. By setting this prefab, the NPC will automatically follow the player.
In the "Built-in Action Triggers" section of the Basic Settings tab, click the "+" button and set AvatarNPC > Prefabs > Actions > InAgentAction > FindPlayerTrigger.prefab. This will enable the NPC to approach players when detected.

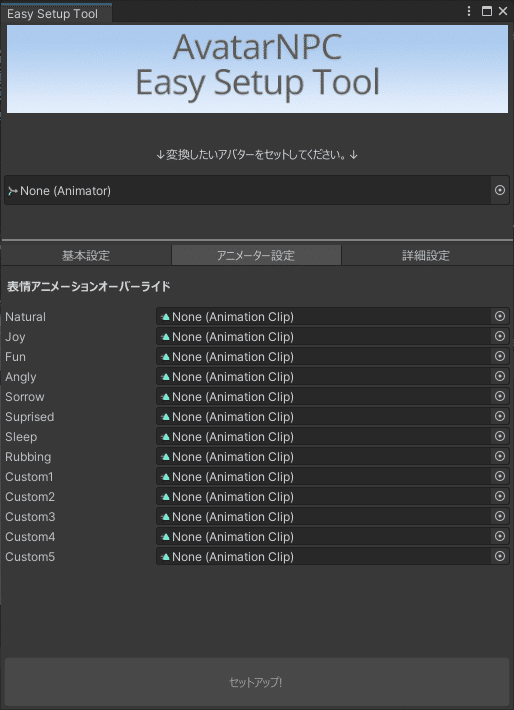
◆Facial Animation Override:
This function allows you to replace each facial animation with a custom animation clip. You can set Natural, Joy, Fun, Angry, Sorrow, Suprised, Sleep, Rubbing, and Custom1-5 (for expressions like blushing).
Set the avatar's default or custom facial animations for each item. It's fine if some or all items are left unset.
◆Advanced Settings
As of August 2024, you can set the folder location for saving the animator controller for the NPC. The default setting is usually sufficient.

◆Setup
Once you've set up the avatar in the scene, select it in the tool and click "Setup!"

This completes the basic setup of the AvatarNPC. When you press the play button, the NPC will respond to the world's actions.
After confirming that everything works correctly, press the play button again to stop the movement.
Uploading the World
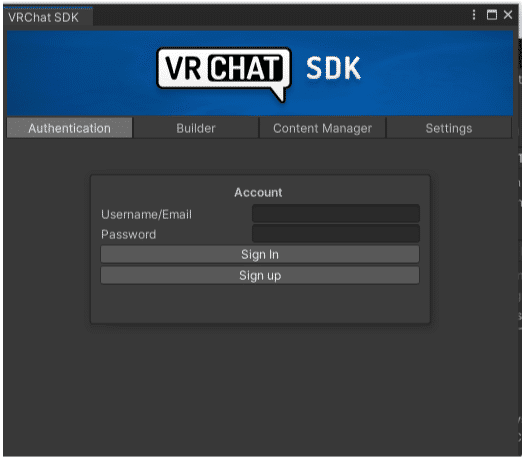
Click VRChat SDK > Show Control Panel on the toolbar.

Log in with your VRChat account under the Authentication tab.
Set the following items and click "Build and Upload":
Name (World Name)
Description (World Description)
Thumbnail (Capture a thumbnail from the scene)
Check if it's safe to upload data to VRChat
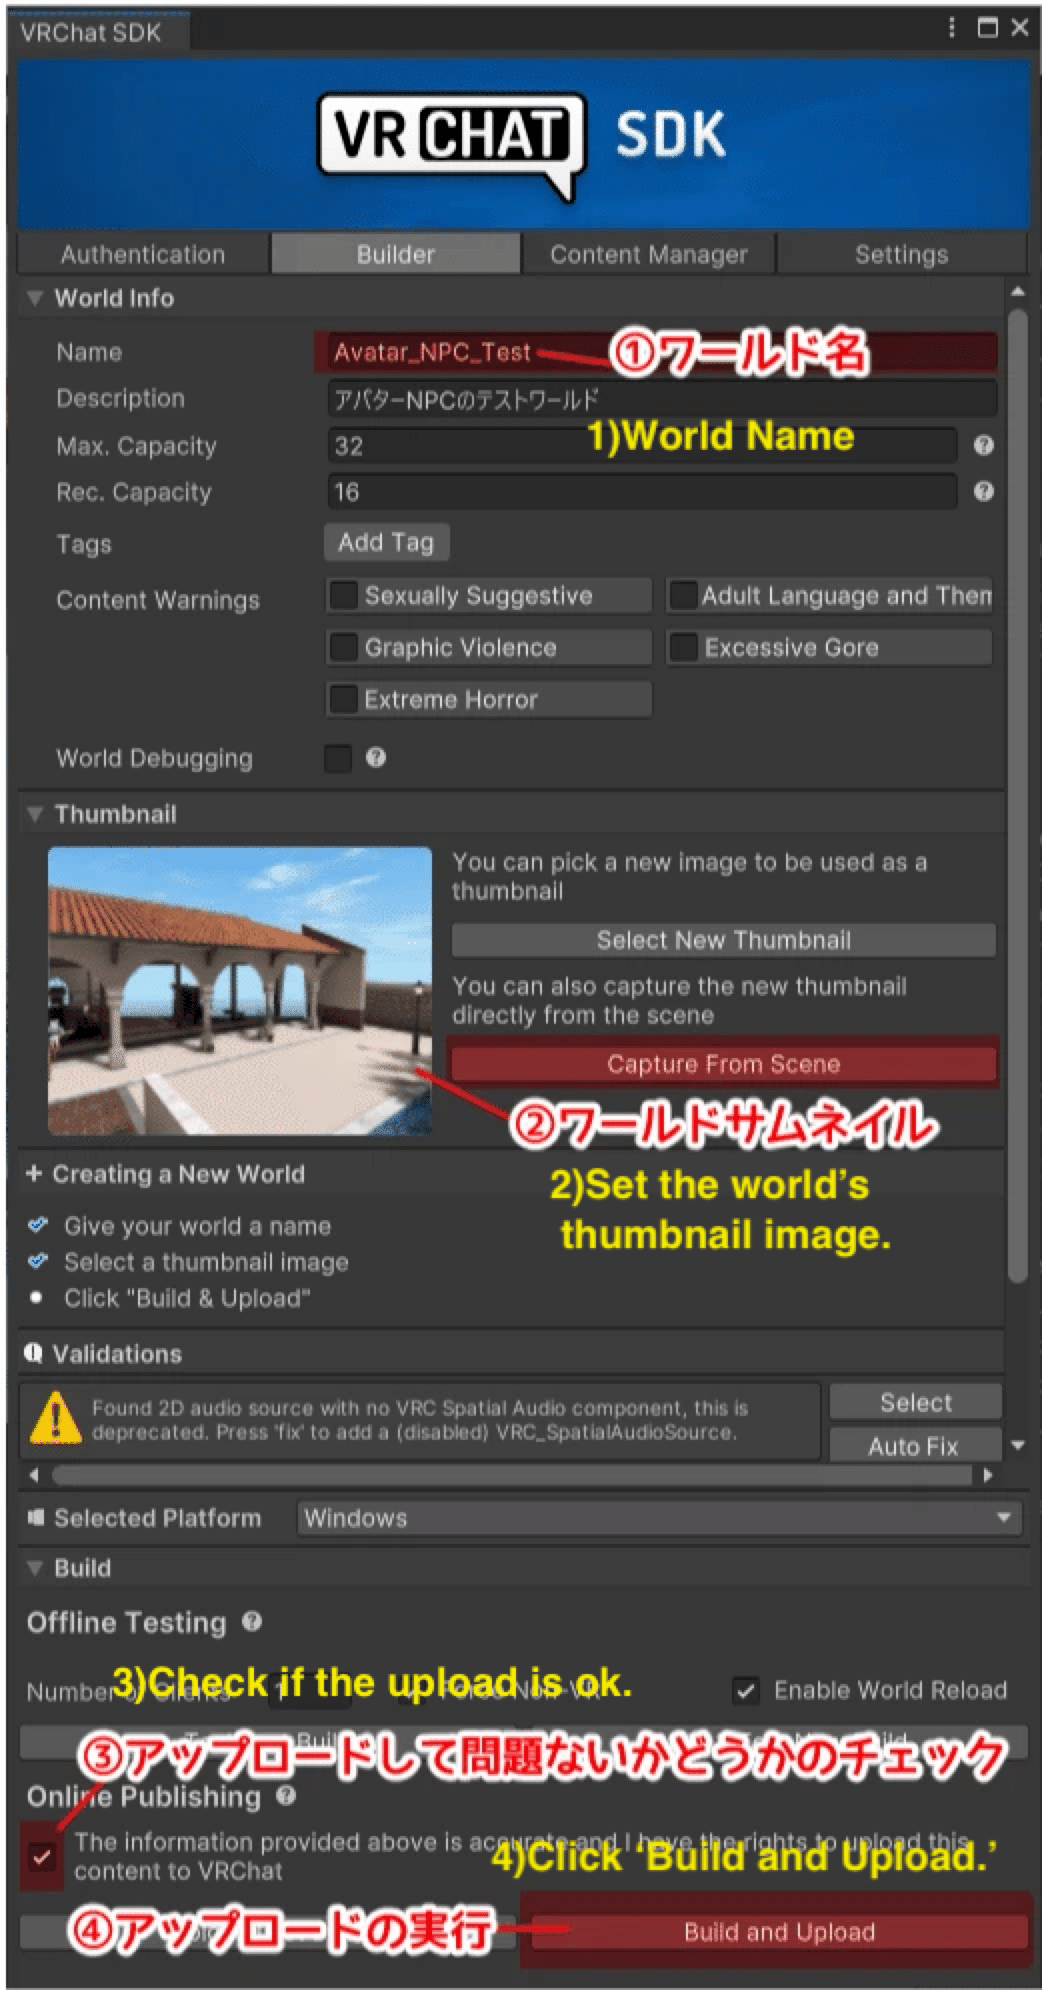
After clicking "Build and Upload," wait for the upload to complete. Once "Success" is displayed, your world upload is complete.。
Fine-tuning the NPC's RubIK
The NPCs set up with the "EasySetupTool" include a "RubIK" feature, which responds when you pat their head. However, the settings are roughly based on the avatar's bone positions, so fine-tuning this feature allows for more accurate interaction.
In the Hierarchy, select the "RubIK" inside the avatar you set up as an NPC. The avatar should be set up as "AvatarName_agent," so open it and find "RubIK."

Adjust the position and size of the green circle (Rub Distance: the distance at which the rub function is activated) and the red circle (Max RubIntensity Distance: the distance at which the rub function has the maximum effect) so that they roughly cover the entire face.
※ If the center of the circle is misaligned with the middle of the head, adjust the position of "Rub_HeadCenter" within the avatar's Head bone. When you click "Rub IK," red, green, and blue arrows will appear, allowing you to adjust the height with the green arrow and the depth with the blue arrow.

Next, adjust the position and size of both eyes.
The avatar includes a feature that closes the eyes when patted, and you can set the distance at which the eyes start closing with the yellow circle (Eye Close Distance) and the distance at which they are fully closed with the red circle (Eye Close End Dist).

Set the eye-closing shape key to "Right Eye Close Shape Key" and "Left Eye Close Shape Key."
※ The shape key names must be entered correctly, as any spelling errors will prevent the function from working.
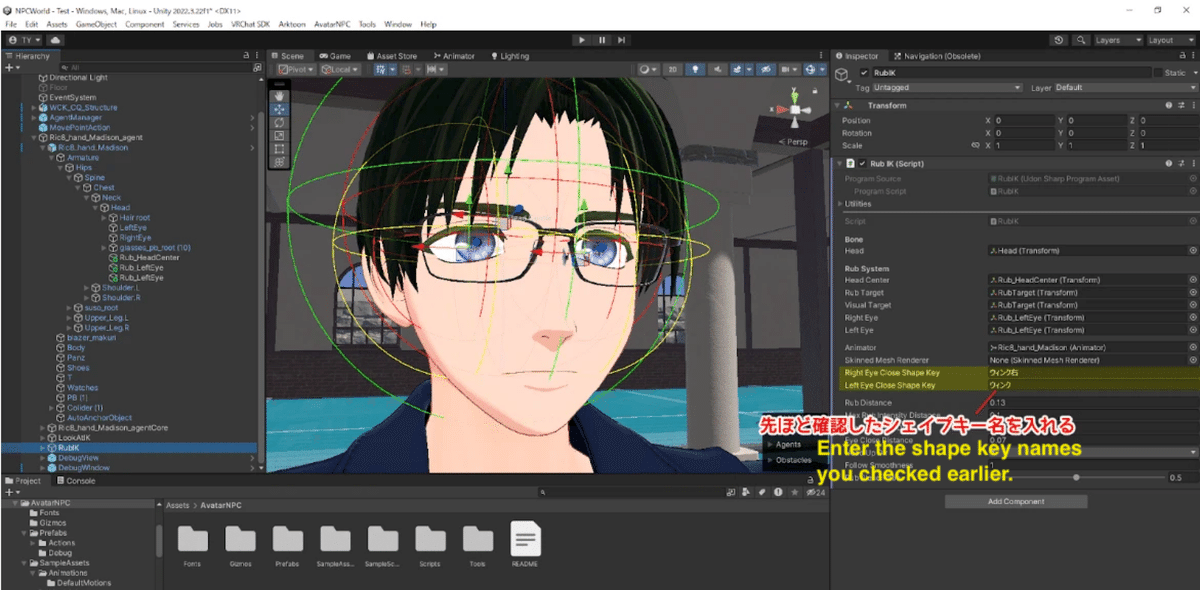
Next, assign the mesh containing the eye-closing shape keys to the "Skinned Mesh Renderer."
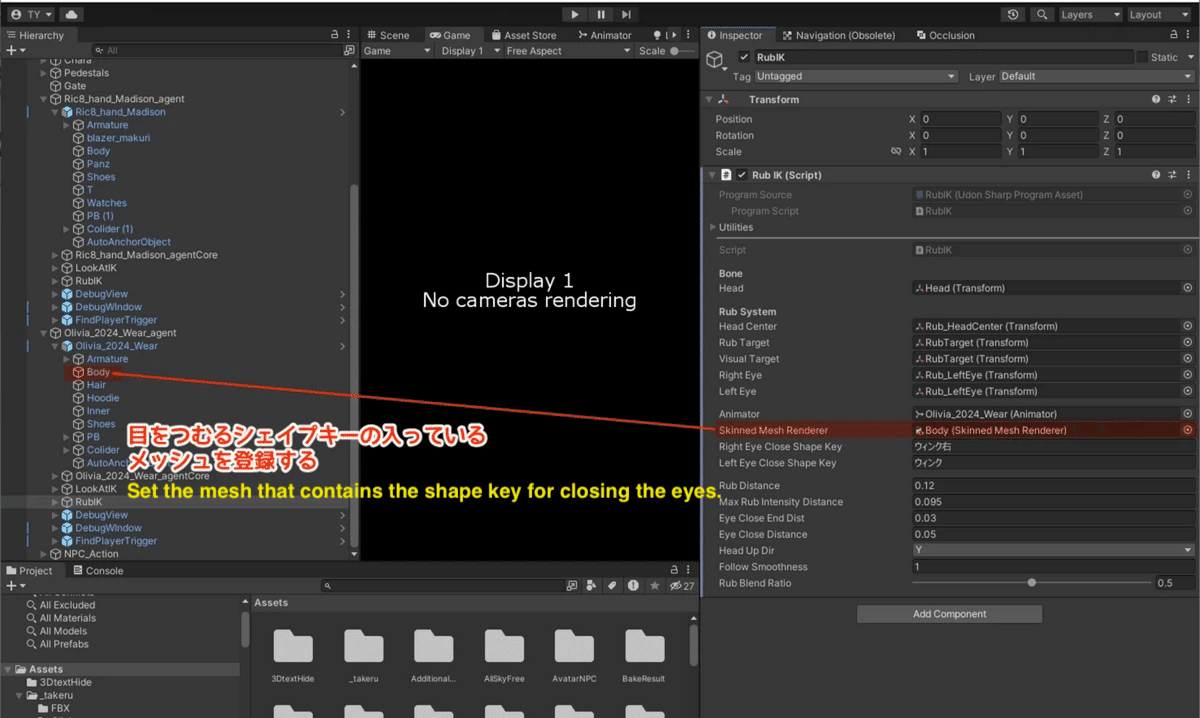
※ The eye-closing settings take priority over the "Rubbing" expression registered in the facial animation override. If you do not set the "Right Eye Close Shape Key" and "Left Eye Close Shape Key," "Rubbing" will be used as the default.
Implementing Auto Blinking
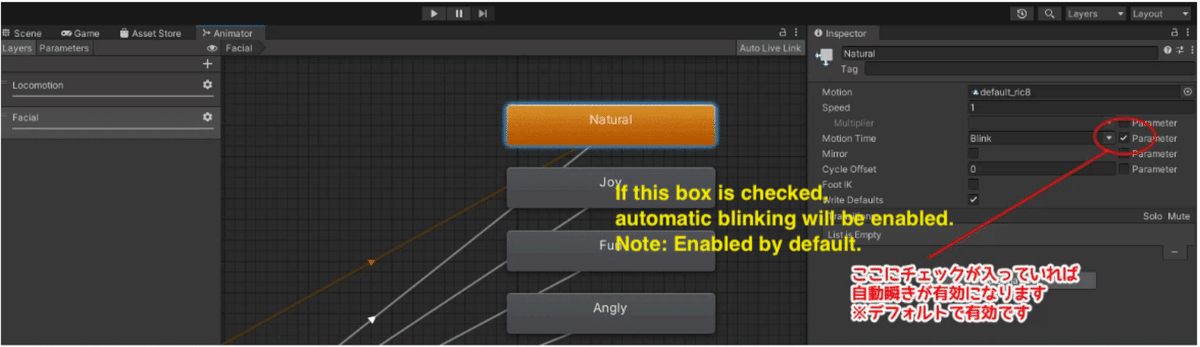
For the Natural animation, create an animation with the eyes open at frame 0 and closed at the final frame (the duration can be set as desired). Set the Motion Time in the Natural state to the Blink parameter to enable auto-blinking. Auto-blinking is on by default, so follow the images provided to set up the Natural animation.
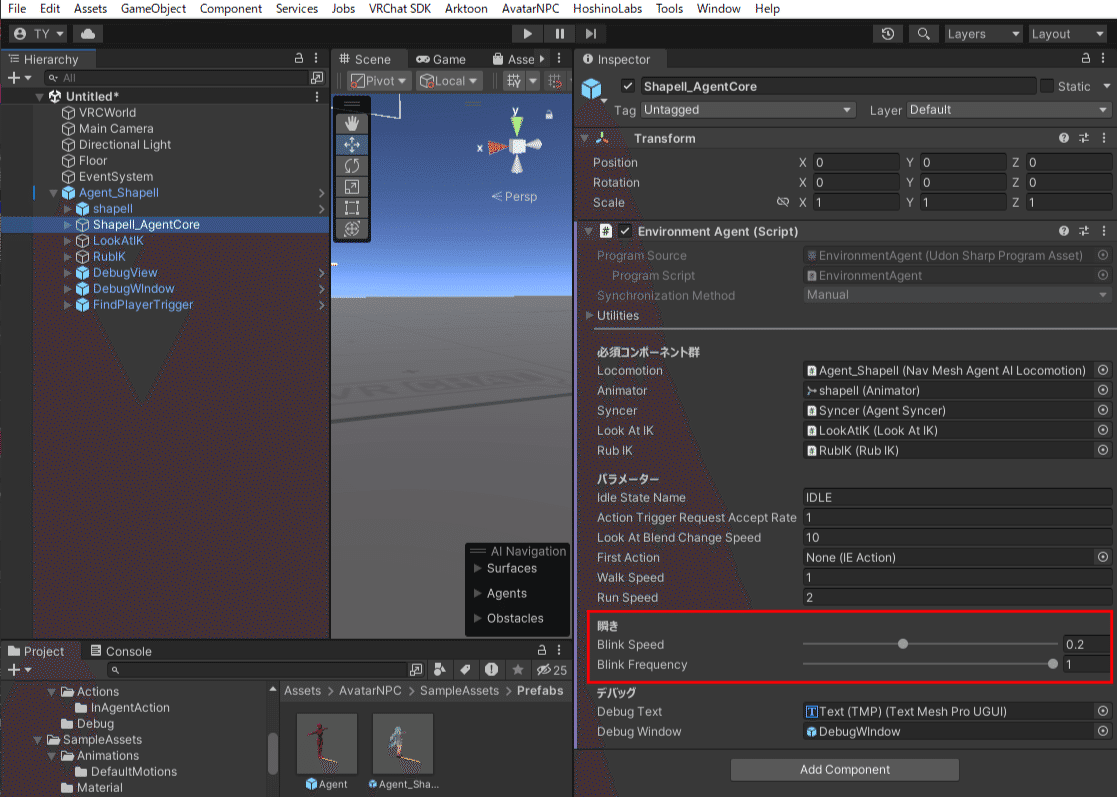
You can adjust the blinking speed and frequency in the Environment Agent component.
This concludes the overview.
Enjoy your NPC life!
この記事が気に入ったらサポートをしてみませんか?