
Swift4 でTableViewを使ってみる2 「セクション機能を使いこなそう」


今回も、私のメモを書いていくぞ!
今回解説するのは、TableView の機能の一つ、セクションだ。
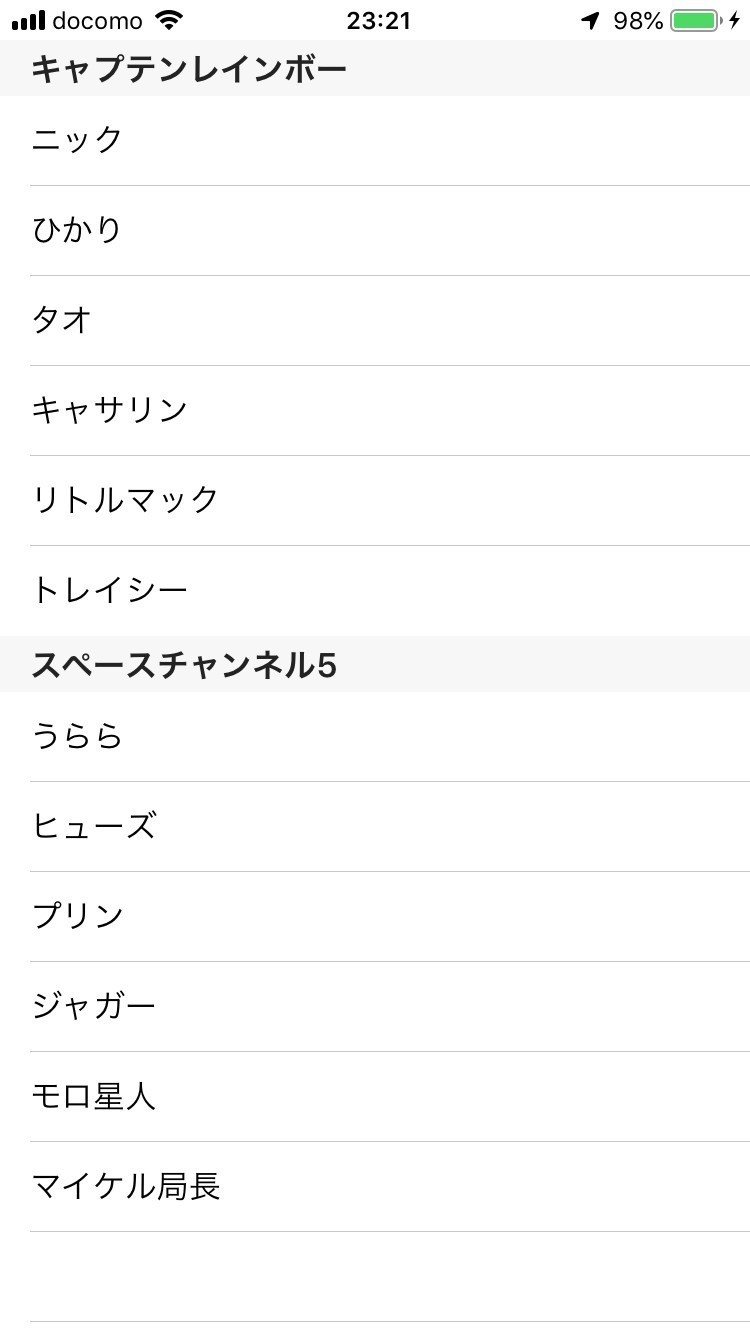
セクションを使えば、カテゴリーごとにリストを分けたり、リストとリストの間に空間を作って、見やすくしたりできるぞ。今回は、セクションを使って、キャプテンレインボー スペースチャンネル5 とカテゴリー分けをしていくぞ!
コードは前回の、「Swift 4 で TableView を使ってみる」を使用するので前回を見ていない人はそこから始めよう。
まず、必要な関数を準備するぞ!
以下を、
//MARK:関数設定
   let List = ["ニック","ひかり","タオ","キャサリン","リトルマック","トレイシー"]
こんな感じに変更しよう!
//MARK:関数設定
   let List = ["ニック","ひかり","タオ","キャサリン","リトルマック","トレイシー"]
   let List2 = ["うらら","ヒューズ","プリン","ジャガー","モロ星人","マイケル局長"]
   let sectionTitles = ["キャプテンレインボー","スペースチャンネル5"]
そして、その下に、セクションを設定するためのコードを追加しよう!
内容は以下の通りだ。
func numberOfSections(in tableView: UITableView) -> Int {
       //セクションの数
       return 2
   }

   func tableView(_ tableView: UITableView, titleForHeaderInSection section: Int) -> String? {
       //セクションのタイトルを設定する。
       return sectionTitles[section]
   }
NumberOfSectionsではセクション数を、
tableview titleForHeaderInsectionでは、セクションのタイトル(今回の場合は、キャプテンレインボーとスペースチャンネル5)を設定しているぞ!
 func tableView(_ tableView: UITableView, numberOfRowsInSection section: Int) -> Int {
       //一つのセクションに入れるCellの数を指定する。
}
次に、上記の部分を変更するぞ。numberOfRowsInSectionでは、1セクションに入れる、C ellの数を定義しているが、今回はセクションが2つあるのでセクションごとに、Cellの数を変えなくてはいけない。なので以下のように変更しよう!
func tableView(_ tableView: UITableView, numberOfRowsInSection section: Int) -> Int {
       //一つのセクションに入れるCellの数を指定する。
       if section == 0{
           return List.count
       }else if section == 1 {
           return List2.count
       }else{
           return 0
       }
   }
これで、SectionごとにIfで条件分けを行い、
Secitonが0の時は、キャプテンレインボーのリスト数
Sectionが1の時は、スペースチャンネル5のリスト数
Sectionが上記以外の時は、0
を代入する処理になっているぞ!
次に、Cellに内容を入れていくぞ!
func tableView(_ tableView: UITableView, cellForRowAt indexPath: IndexPath) -> UITableViewCell {
       //Cellの内容を設定する。
}
の部分だな!これは以下のように変更しよう!
func tableView(_ tableView: UITableView, cellForRowAt indexPath: IndexPath) -> UITableViewCell {
       //Cellの内容を設定する。
       let cell = tableView.dequeueReusableCell(withIdentifier: "Baka_Cell" , for: indexPath)
       if indexPath.section == 0 {
           cell.textLabel?.text = List[indexPath.row]
       }else if indexPath.section == 1{
           cell.textLabel?.text = List2[indexPath.row]
       }
       return cell
   }
ここの変更も同じで条件文を設定してセクションごとに、内容を取得する処理になっているぞ!簡単だな!処理としては、
Seciton 0 の時は、List[行数](行数が1の場合はニック)を取得
Seciton 0 の時は、List2[行数](行数が1の場合はうらら)を取得
return cell 取得した情報をテーブルビューに反映
この処理を、各セル数分繰り返す。
となっているぞ!では、実行してみよう!おそらく以下のような表示になるはずだ!
今回はここまでだ!また会える日があるといいな!
最後に、今回使ったコード全文を乗せておくぞ!参考にしてくれ!
import UIKit
class ViewController: UIViewController, UITableViewDelegate, UITableViewDataSource {

   //MARK:関数設定
   let List = ["ニック","ひかり","タオ","キャサリン","リトルマック","トレイシー","ロボ警部"]
   let List2 = ["うらら","ヒューズ","プリン","ジャガー","モロ星人","マイケル局長"]
   let sectionTitles = ["キャプテンレインボー","スペースチャンネル5"]

   func numberOfSections(in tableView: UITableView) -> Int {
       //セクションの数
       return 2
   }

   func tableView(_ tableView: UITableView, titleForHeaderInSection section: Int) -> String? {
       //セクションのタイトルを設定する。
       print(section)
       return sectionTitles[section]
   }

   func tableView(_ tableView: UITableView, numberOfRowsInSection section: Int) -> Int {
       //一つのセクションに入れるCellの数を指定する。
       if section == 0{
           return List.count
       }else if section == 1 {
           return List2.count
       }else{
           return 0
       }
   }

   func tableView(_ tableView: UITableView, cellForRowAt indexPath: IndexPath) -> UITableViewCell {
       //Cellの内容を設定する。
       let cell = tableView.dequeueReusableCell(withIdentifier: "Baka_Cell" , for: indexPath)
       if indexPath.section == 0 {
           cell.textLabel?.text = List[indexPath.row]
       }else if indexPath.section == 1{
           cell.textLabel?.text = List2[indexPath.row]
       }
       return cell
   }

   @IBOutlet weak var TableView: UITableView!

   override func viewDidLoad() {
       super.viewDidLoad()
       // Do any additional setup after loading the view, typically from a nib.
   }

}
この記事が気に入ったらサポートをしてみませんか?