
If you read it, you can make it! Scandinavian style house vol.1 Let's create the base of the world

In this series of articles, we will explain the process of world creation in Vket Cloud in several parts.
We will also explain the functions along the flow from the base to completion. Let's work hand in hand together!
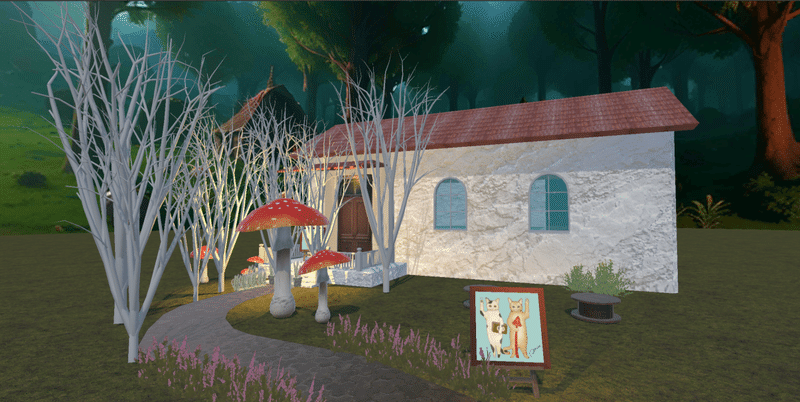
In this series, we will finally complete a "Nordic style house'' like the one shown in the image.
Let's work hard until it's completed!
If you have not installed Vket Cloud SDK, please refer to the article below to install it first.
■Introduction before starting
The world view we create is based on the work of artist YO-CO .
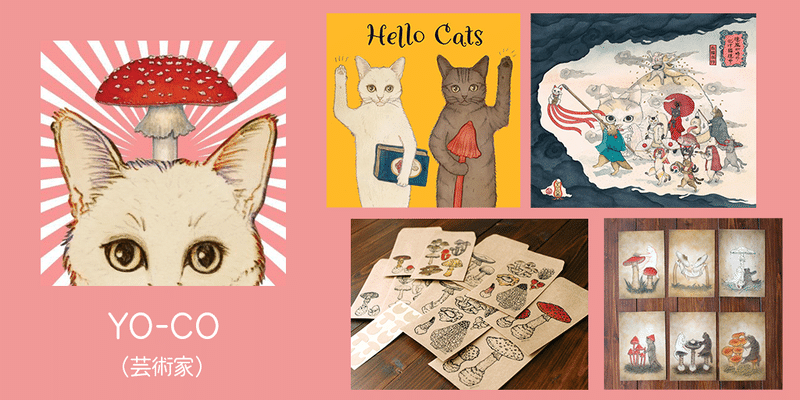
He produces paintings of all genres, with a focus on cats and mushrooms. We also hold solo exhibitions, department store events, and merchandise sales.
Since 2021, he has also been active as an NFT artist, and is currently a popular artist who is looking forward to working with a four-person group called YAMA.
OFFICIAL WEB SITE ➡ https://yo-co.net/
We will explain it while creating YO-CO's world.
①Creating a new world
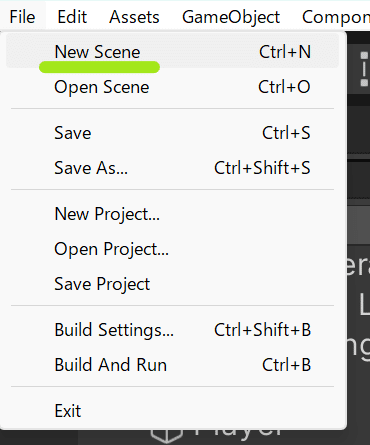
Launch Unity and create new scene data for the world by selecting "File > New Scene" .
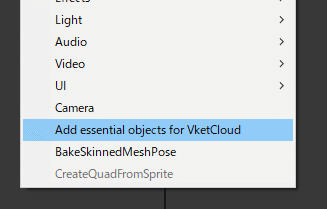
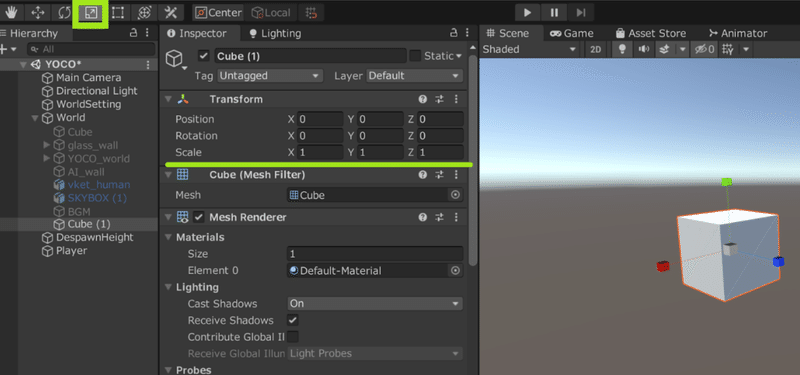
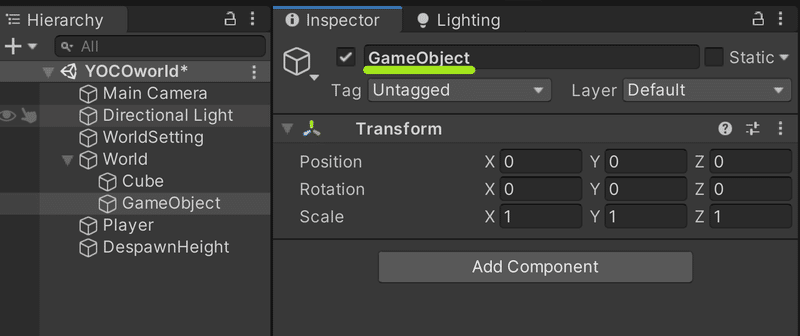
Next, right-click in the Hierarchy and call " Add essential Objects for VketCloud ".
If the Hierarchy looks like the image, preparation is complete.
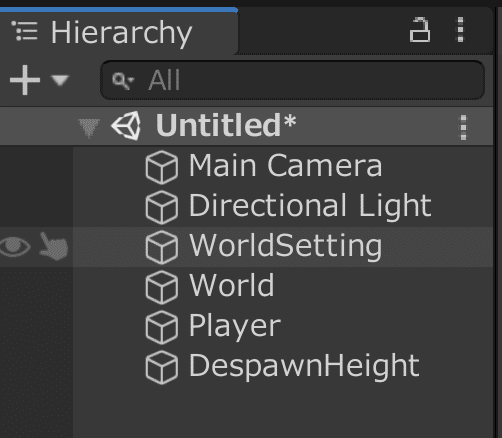
The explanation of each item is as follows.
Main Camera: not use
Directional Light: A light that illuminates the entire world
WorldSetting: Part that manages various information about the world
World: A place to put objects into the world
Player: Where the avatar first spawns
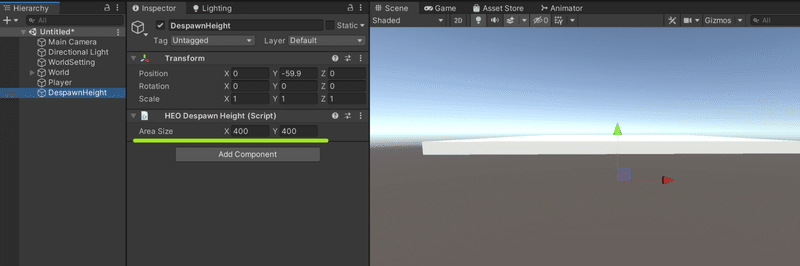
DespawnHeight: Despawn height
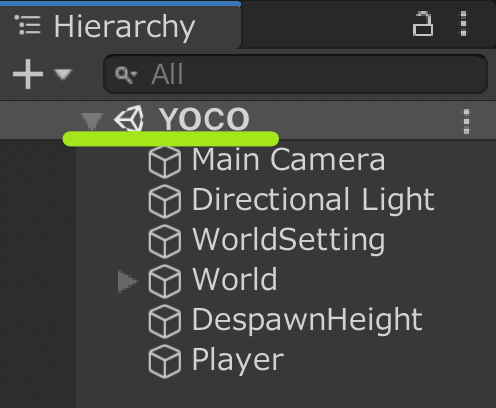
Now, name the scene and save it using "File>Save As..." . When naming a scene, please use half-width alphanumeric characters, as full-width or Japanese characters may cause errors.
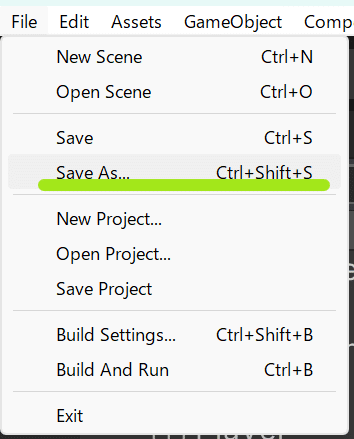
Once a name is given, "Untitled" next to the unity mark in the Hierarchy will change to the name you just gave.

② Place the object that will become the land
Next, let's place an object that will become land.
With "World" selected, right click > 3D Object > Cube and a white cube will appear on the scene.
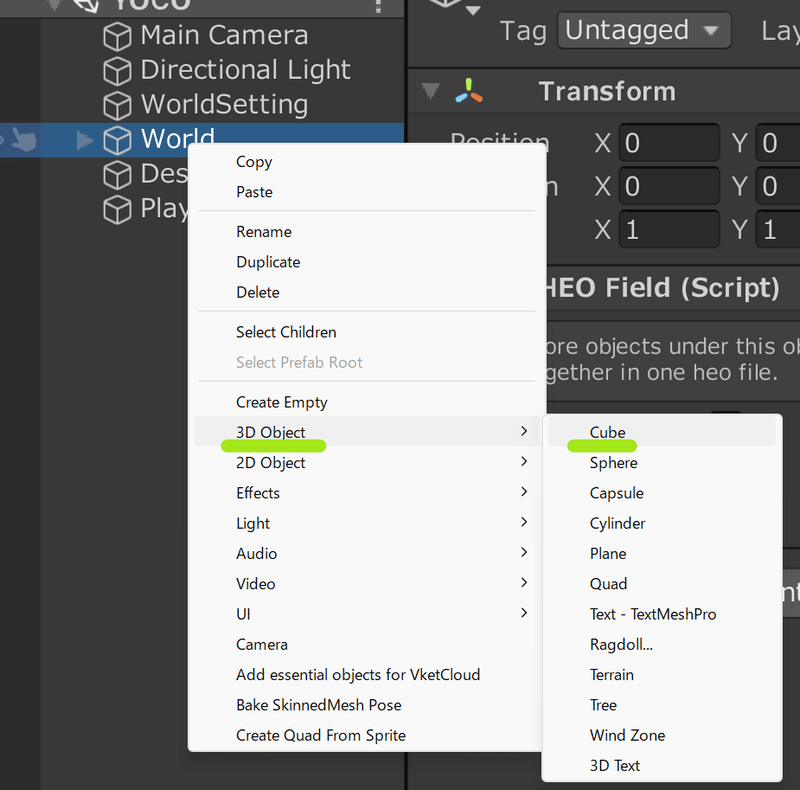
Let's change the size of the cube.
There are two ways to change the size directly in the scene by using the icon in the upper left as the "scale tool", and by changing the "Scale" value in the Inspector.
This time we set it to "X 300, Y 10, Z300".
Tools: Tools for editing the position, angle, and size of objects by clicking on the Scene screen
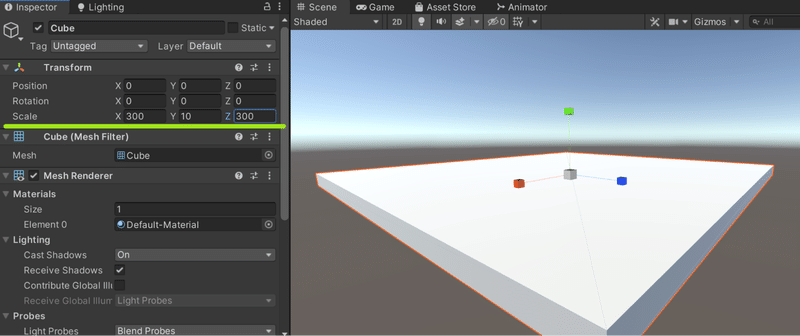
The "Cube" can be erected by the user without any additional settings. If you spread out the "Cube" and place the "Player" on top of it, which is the first place to land, you can stand on the spread Cube as the ground after building.
③ “Player” “DespawnHeight” “Avatars” settings
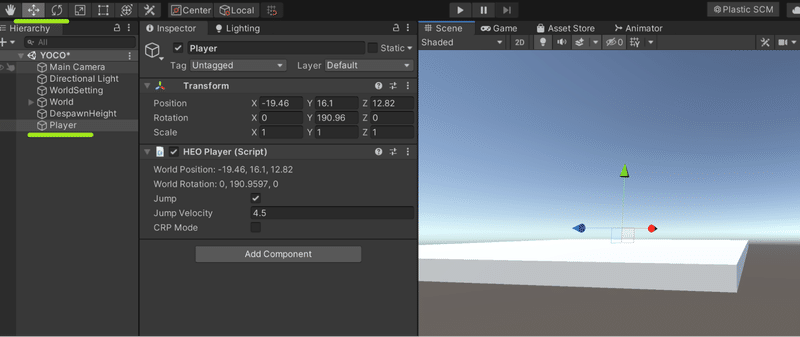
■“Player” (first landing position)
Be sure to place it on the surface of the Cube, slightly higher than the ground. If the avatar is close to the land or floor, or buried inside, the avatar will be unable to move after building.
When you land, you will stand facing the direction of the blue arrow, so use the "Move tool" and "Rotate tool" at the top of Hierarchy to adjust it.
■"DespawnHeight" (height to fall and return to normal)
Determines the height for determining whether to return to the initial entry position (respawn) when falling onto an area with no floor. Let's make it a little deeper than the land. Again, if the location is close to land or buried, the avatar may become unable to move or fall and appear repeatedly, so be careful.
Please set AreaSize one size larger than the land.
*About "AreaSize"
If you fall within this AreaSize range, you will be able to return to your original location, but if you fall outside of this area, you will continue to fall and will not be able to return to your original location.
It must be set to a size wider than the land (white part of the image) (black part of the image).
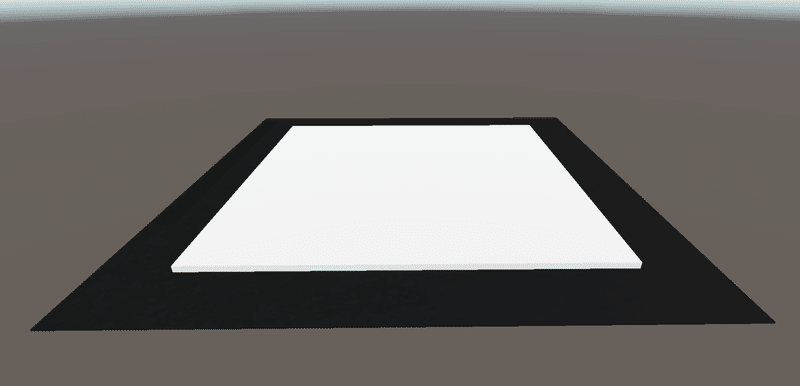
Since the land this time is 300 x 300, the AreaSize of "DespawnHeight" is set to 400 x 400.
■“Avatars”
Set up your avatar to build and go inside. Select " WorldSetting
" in Hierarchy > "Avatars" in Inspector > Select > Select from the list to specify the avatar that appears for the first time.
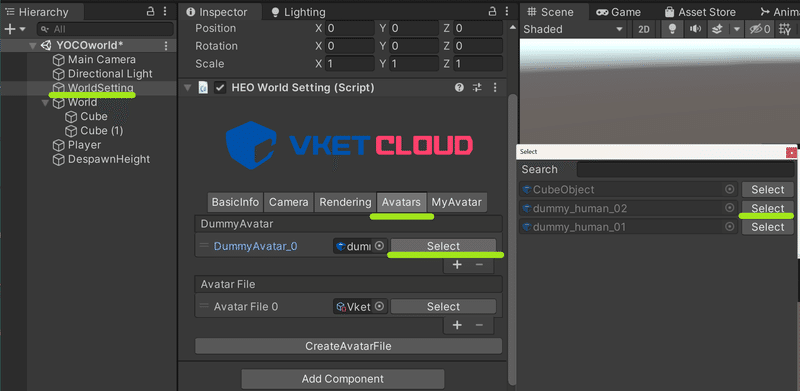
This time we will use Vketchan, which is included by default.
③Add BGM
Next, let's set up the BGM.
(If you do not want to add BGM, no special settings are necessary.)
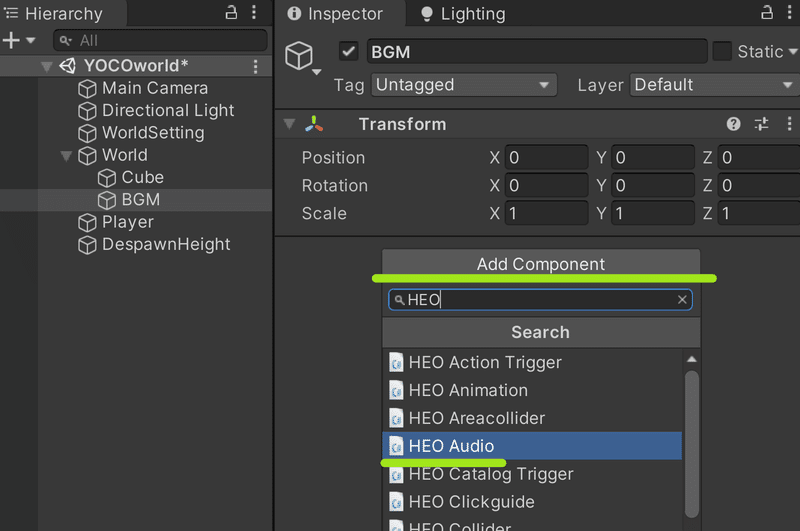
⑴ Right-click inside Hierarchy > Create Empty to create an empty object.
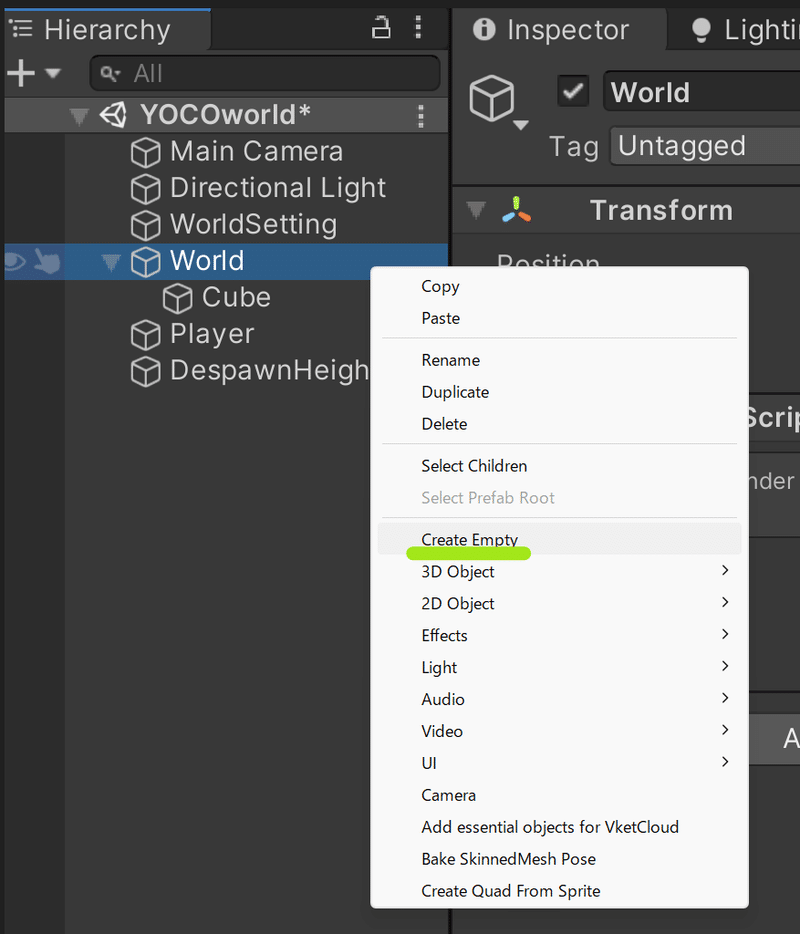
To make it easier to understand, let's name it "BGM". You can fill in your name by clicking on the name box in the Inspector.
Changing it in the inspector also changes the name in the hierarchy. Only alphanumeric characters
are allowed . Be careful not to enter Japanese as this will cause an output error!
⑵Click “Add Component” and add “ HEO Audio ” to the object. You can find it quickly by entering "HEO" in the search window.
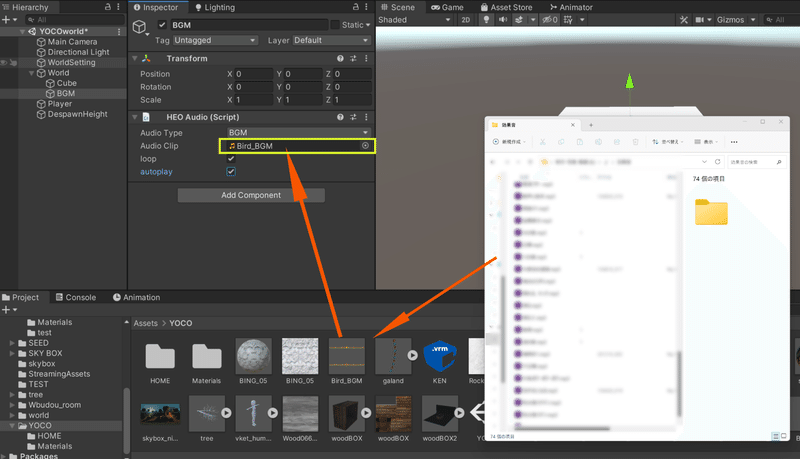
⑶ Drag and drop the MP3 sound source you want to put into Assets at the bottom of the Unity screen.
Drag and drop the sound source into the "Audio Clip" field in "HEOAudio".
Again, if the file name is in Japanese, it will cause an error. Be sure to enter alphanumeric characters.
⑷ If this continues, it will not be played even if you enter the world. By checking the "loop" and "autoplay"
items below, the sound source file will be played automatically and looped.
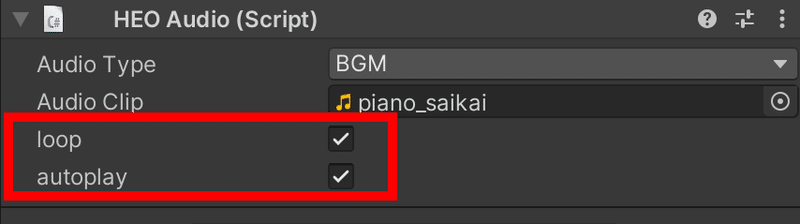
"loop": A loop setting that will be played repeatedly
"autoplay": A setting that will be played automatically when you enter the world
BGM settings are now complete!
④Try building
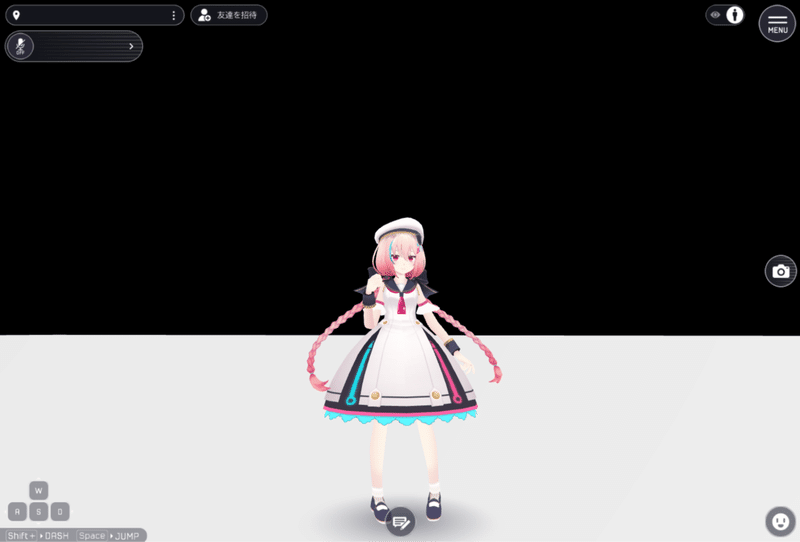
Once you have configured this, let's actually go inside!
In Vket Cloud, becoming an avatar and trying to enter the world is called "building."
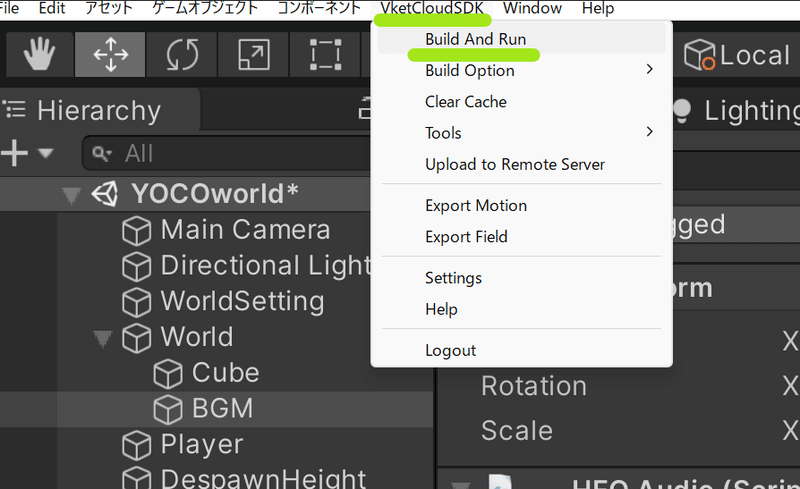
Click VketCloudSDK > Build And Run to launch your browser and start building.
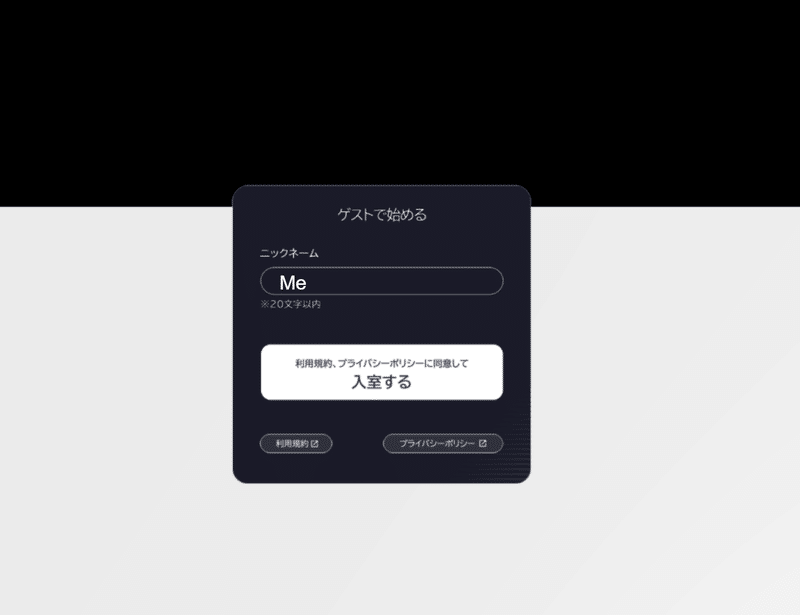
When loading is complete, a screen like this will appear first, so click the "Enter" button.
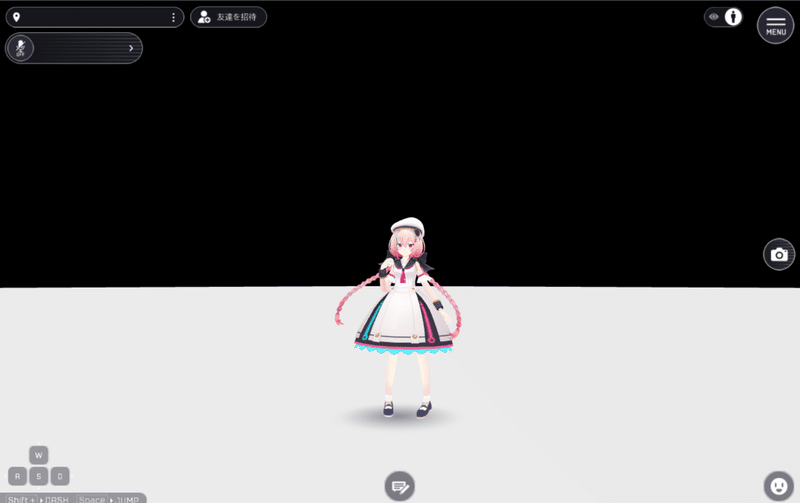
Your avatar will be displayed and you can move around freely.
Here,
・Is the size of the land you created as you imagined?
・If you fall off the floor, will you return to your original position?
・Can you hear the background music?
I'll check things like that.
If you have any concerns, return to the Unity screen, review the settings, build again, and check.
This time, we did the initial settings for creating the world, created the land, set the BGM, and tried building it.
Were you able to go inside safely?
In the next article, we would like to set up the material and create the background (skybox).
(OKEN)


この記事が気に入ったらサポートをしてみませんか?