How to Fix: VPN got blocked by Windows Firewall?

Many Internet users throughout the world are utilizing VPNs to secure and encrypt their data while keeping the browsing anonymous online. But recently, some users have reported that when they were trying to install or open their VPN client on Windows, it is blocked from the other security program or Firewall in place. So, if you want to know how to fix VPN blocked by Windows Firewall, then follow this article carefully.
SOURCE:-How to Fix: VPN got blocked by Windows Firewall?
Change the VPN
You should modify the VPN and check whether it fixes the problem. Usually, an established provider of VPN has a better client that will function great with Windows Firewall. You can use Private Internet Access (PIA) for a better VPN experience.
Adding an Exclusion
You can add an exclusion and get VPN working on Windows.
You should invoke the ‘Windows Defender Security Center.’
Then reach the settings of ‘Virus & Threat protection.’
You should click on the Exclusions option.
After that, click on the ‘Add or remove exclusions.’
Now, click on the option of ‘Add an exclusion’ then add the VPN client program.
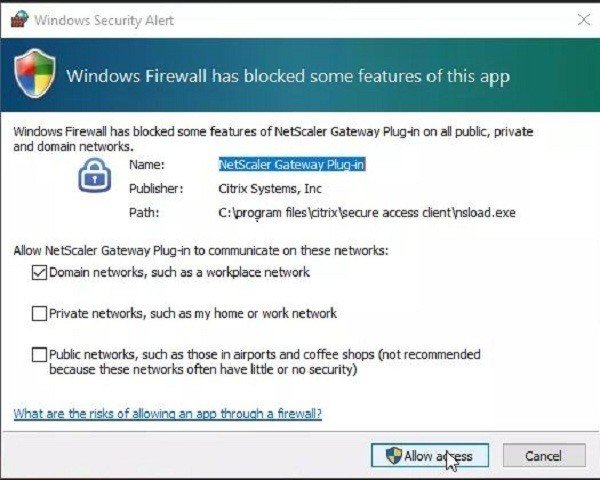
Modify Allow Application Settings
Change the allow apps settings to fix the VPN issue.
You should invoke the Control Panel.
After that, click on the ‘System and Security’ option.
Go to the ‘Windows Defender Firewall’ and click on it.
Reach the left side panel and choose the ‘Allow an app or a feature through Windows Firewall.’
You should select the Change Settings.
Then look for the VPN through the programs and apps list you would like to allow via the Firewall.
You have to check Private or Public to choose the type of network on which you would like to perform the VPN.
In case you cannot locate the VPN, select the ‘Allow another app’ option.
Now, click on the VPN and choose the Add button then select the OK button.
Modify Adapter Settings
Here is how you can change the adapter settings:
You should launch the Control Panel then click on the ‘Network and Internet’ option.
After that, go to the ‘Network and Sharing Center.’
Navigate to the left side panel and choose the ‘Change adapter settings.’
Select the File option.
Then choose the ‘New incoming connection’ option.
You should click on each user you would like to access the VPN connection.
Then mark the box of ‘Through the Internet’ option.
Go to the Next button.
Check the Internet protocols you would like the VPN to link to.
Reach the ‘Internet Protocol Version 4 (TCP/IPv4)’ and twice click on it.
You have to choose the ‘Control Panel’ once more and choose the ‘Windows Firewall’ option.
Thereafter, select the Advanced Settings option.
You have to change the ‘Inbound Rules’ option.
Go to the ‘Actions’ option.
Select the ‘New Rule’ option.
Reach the Wizard and select the Port and choose the next button.
Click on the ‘Allow the connection’ option then choose the Next button.
Once asked, ‘When does this rule apply?’ then choose each option and save the rule to all.
Pick a description and name.
Now, hit the Finish button.

Jack Arona is a Norton product expert and has been working in the technology industry since 2002. As a technical expert, Ava has written technical blogs, manuals, white papers, and reviews for many websites such as norton.com/setup.
この記事が気に入ったらサポートをしてみませんか?