An Unrefined Way to Display Stats on Your Tumblr Blog Without Tumblr API


You'll need:
Tampermonkey browser extension,
Google Sheets,
some coding experience (This is not a beginner friendly tutorial.)
How does this work?
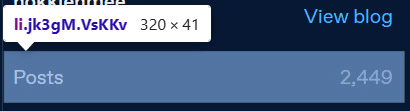
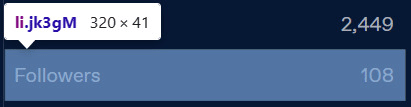
Go to www.tumblr.com/blog/your_username and inspect the page elements. We can see that these items are wrapped in a class called ".jk3gM".
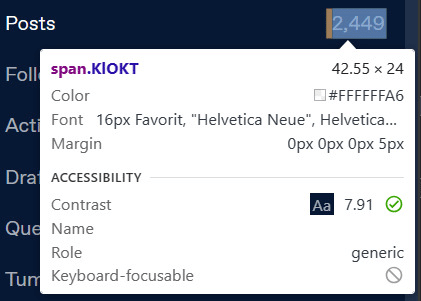
Whereas their values (2,449 and 108) are wrapped in an inner class called ".KIOKT".
Idea: We can write a Tampermonkey script that automatically extracts those values and appends them to a Google Sheet. This sheet will then act as a database. To display those values on our blog theme, we'll just have to read from that sheet instead of calling the Tumblr API.
Step 1: Set Up the Google Sheet
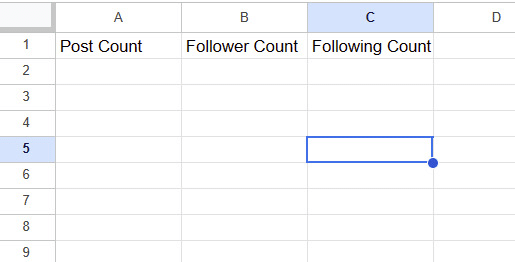
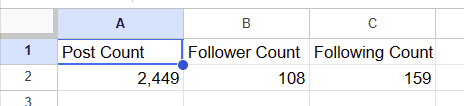
Create a new Google Sheet and organize your headers in this exact order:
Look at your address bar, your sheet URL will be in the form of:
https://docs.google.com/spreadsheets/d/SHEET_ID/edit#gid=0
Please note down your SHEET_ID as you will need to use this ID later.
Step 2: Open Apps Script
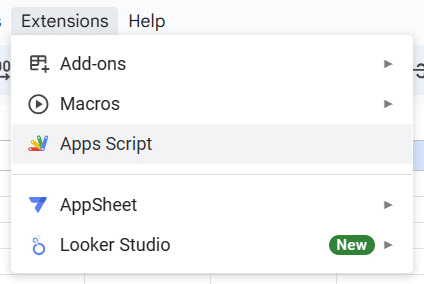
On the same sheet, navigate to the menu bar and select Extensions > Apps Script.
Replace everything in the editor with this code:
function doPost(e) {
  var sheet = SpreadsheetApp.openById("SHEET_ID").getSheetByName("Sheet1");
  var postData = JSON.parse(e.postData.contents);
  sheet.getRange("A2").setValue(postData.postCount);
  sheet.getRange("B2").setValue(postData.followerCount);
  sheet.getRange("C2").setValue(postData.followingCount);
  return ContentService.createTextOutput("Success");
}

function doGet() {
  var sheet = SpreadsheetApp.openById("SHEET_ID").getSheetByName("Sheet1");
  var range = sheet.getRange("A2:C2");
  var values = range.getValues();
  var data = {
    postCount: values[0][0],
    followerCount: values[0][1],
    followingCount: values[0][2]
  };
  return ContentService.createTextOutput(JSON.stringify(data))
    .setMimeType(ContentService.MimeType.JSON);
}
Replace SHEET_IDs with your actual sheet ID obtained in the previous step. This script contains the methods to write and read cells A2, B2, and C2 on your sheet.
Then press Deploy > New Deployment. Select Web App from the list:

Change "Who has Access" to "Anyone".
Press Deploy.
It will prompt you to authorize access for each deployment. As you try to authorize with your Google account, it will say "Google hasn't verified this app" but don't worry about it. Press Advanced on the bottom left > "Go to Untitled project (unsafe)"
If the deployment is successful, it will give you a WEB_APP link in the format of https://script.google.com/macros/s/.../exec. Note down this link somewhere as you'll need to use it later.
Step 3: Create a Script in Tampermonkey
Now head to the Tampermonkey Dashboard and press "+" to create a new script. Replace everything in the editor with this code:
// ==UserScript==
// @name         Tumblr Stats to Google Sheets
// @namespace    http://tampermonkey.net/
// @version      1.0
// @description  Automatically extracts Tumblr stats and writes to Google Sheets
// @author       hokkienmee
// @match        https://www.tumblr.com/blog/YOUR_TUMBLR_USERNAME
// @grant        GM_xmlhttpRequest
// ==/UserScript==

(function() {
    'use strict';

    function extractData() {
        let postCount = '';
        let followerCount = '';
        let followingCount = '';

        document.querySelectorAll('.jk3gM').forEach(element => {
            if (element.textContent.includes("Posts")) {
                const postsElem = element.querySelector('span.KlOKT');
                if (postsElem) {
                    postCount = postsElem.textContent.trim();
                }
            }
            if (element.textContent.includes("Followers")) {
                const followersElem = element.querySelector('span.KlOKT');
                if (followersElem) {
                    followerCount = followersElem.textContent.trim();
                }
            }
        });

        // Extract following count
        document.querySelectorAll('.a132D').forEach(element => {
            if (element.textContent.includes("Following")) {
                const followingElem = element.querySelector('span.jF6A2');
                if (followingElem) {
                    followingCount = followingElem.textContent.trim();
                }
            }
        });

        if (postCount && followerCount && followingCount) {
            writeToSheet(postCount, followerCount, followingCount);
        }
    }

    function writeToSheet(postCount, followerCount, followingCount) {
        const url = 'WEB_APP';  //Replace with your web app's URL

        GM_xmlhttpRequest({
            method: 'POST',
            url: url,
            headers: {
                'Content-Type': 'application/json'
            },
            data: JSON.stringify({
                postCount: postCount,
                followerCount: followerCount,
                followingCount: followingCount
            }),
            onload: function(response) {
                console.log('Data written to Google Sheets:', response.responseText);
            }
        });
    }

    setTimeout(extractData, 3000);
})();
Remember to change YOUR_TUMBLR_USERNAME to your actual username and WEB_APP to your actual web app link obtained in the previous step. This Tampermonkey script includes the methods to extract content from a web page and write it to Google Sheet.
Press Ctrl + S to save the script.
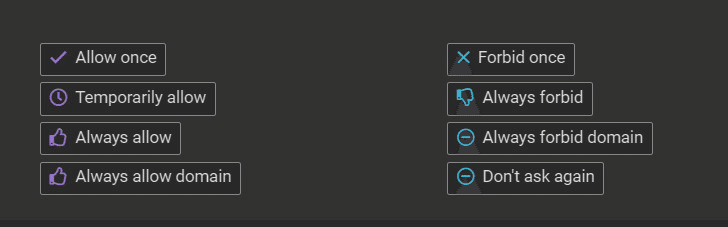
Visit www.tumblr.com/blog/your_blog_username. If this window pops up, select "Always allow":
Check to see if your Google Sheet has been updated with values. If you have done everything correctly, your A2, B2, C2 cells should now have values.
Step 4: Read Cells from Google Sheets
Now that we can write values to Google Sheet, we'll need a way to read that sheet and display its content on our blog theme.
Add this code right before the </body> tag. Replace WEB_APP with your web app link:
<!-- Tumblr Stats --->
<script>
document.addEventListener('DOMContentLoaded', function() {
fetch('WEB_APP')
.then(response => response.json())
.then(data => {
document.getElementById('postCount').textContent = data.postCount;
document.getElementById('followerCount').textContent = data.followerCount;
document.getElementById('followingCount').textContent = data.followingCount;
})
.catch(error => console.error('Error fetching data:', error));
});
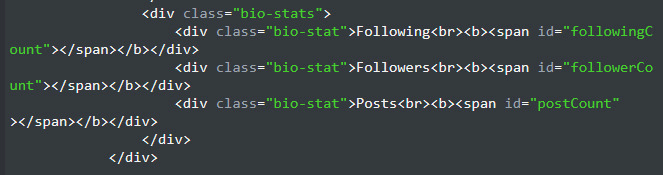
</script>Now you can use <span id="followingCount"></span>, <span id="followerCount"></span>, <span id="postCount"></span> wherever you want to display stats.
Sample code:
Result:

Notes & Quirks
The script is only executed when you visit www.tumblr.com/blog/your_blog_username. So, if you don't visit that page often, your new follower/following/post counts won't be updated.
I don't encourage refreshing your blog many times as Google might have their own rate limits.
If you have done everything correctly but no data can be written to your Google Sheet, it's very possible that Tumblr has changed their class names since the time of this article. (You'll need to change .jk3gM, span.KlOKT, .a132D, span.jF6A2 in the Tampermonkey script to the new class names)
この記事が気に入ったらサポートをしてみませんか?