LaTeX環境構築(win11)

パソコンを新調したのでローカル環境にLaTeXをインストール&設定しました。
0. 参考
私は基本的に$${\text{Lua} \LaTeX}$$派なので$${\text{Lua} \LaTeX}$$を中心に設定していきます。
次のサイトを参考にしました。
基本的に上の解説の内容をwin11でやっています。ほとんど変わりありません。めちゃくちゃわかりやすかったです。
大まかな手順
本体(TeXLive) をインストールする
エディター(vscode)をインストールする
コンパイル(latexmk)の設定をする
エディターの設定(json)して使いやすくする
1. TeXLive2023をインストール
下記のサイトからTeX Liveの最新版をインストールします。
install on Windows より install-tl-windows.exe をダウンロードしてインストールします。
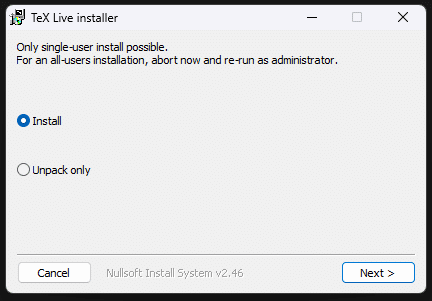
そのまま進んでいくと主要なプログラムと4000以上のパッケージのインストールが始まります。気長に待ちましょう。
インストールが終わった様子があれば、Windowsキー + R で検索窓からcmdと入力してコマンドプロンプトに latexと打ってみます。

TeXのバージョンが円周率になっていることにセンスを感じつつTeX live のインストールは完了です。
余談「パスを通す」とは
「パス(Path)」を通すとは, PCをたくさんの階がある高層ビルだと思うと、「どの階に目的のファイルやアプリが置いてあるか」を登録する作業みたいなものです。パスを通すことで、どの階(作業スペース)からもアプリが使えるようになります。
2. VScodeをダウンロード
下記のサイトからVScodeをインストールします。
2.1 拡張機能
インストールが済んだら拡張機能を入れましょう。
横のテトリスみたいなアイコンから拡張機能を検索して、 vscode-pdfとLaTeX Workshopを入れておきます。
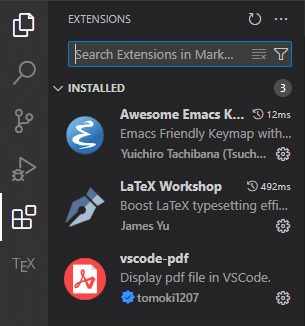
(一番上のAwesome Emacs Keymapについては後述。
ショートカットが変更されるので最初は入れないほうがいいです)
2.2 コンパイルしてみる
適当なフォルダーにmain.texを作成します。
今回はドキュメント に #0000 LaTeX setup test というフォルダーを用意して

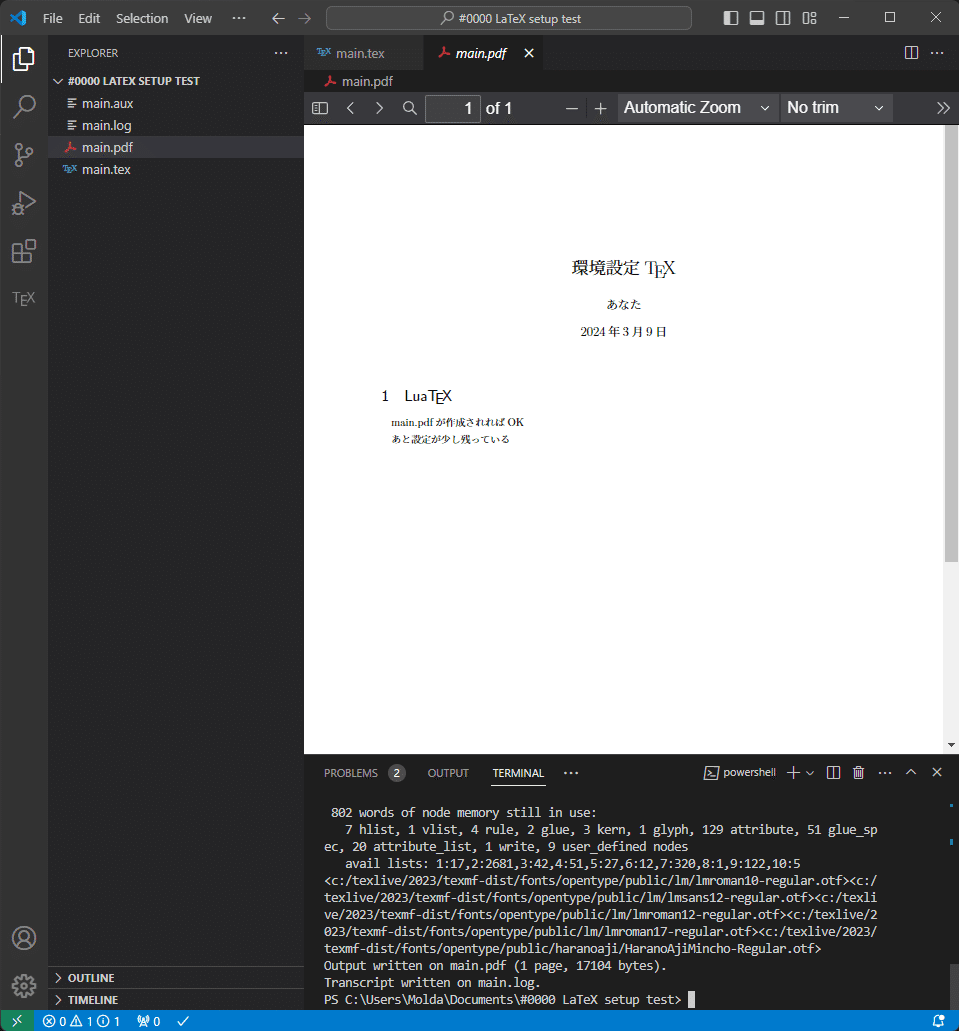
VScodeからフォルダーを開きます。新しいファイルとして main.tex を作成

main.tex に以下を貼り付けて保存します。
\documentclass{ltjsarticle}
\begin{document}

\title{環境設定\TeX }
\author{あなた}
\maketitle
\section{Lua\TeX }

main.pdfが作成されればOK

あと設定が少し残っている

\end{document}
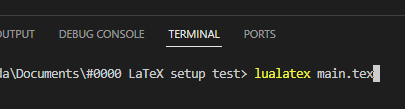
Ctrl + @でターミナルを表示します。
lualatex main.tex を実行すると pdf が作成されます。
3. latexmk の設定
latexmkの設定をします.
latexmk派とlatexmkrc派があります. $${\latex}$$のコマンドを実行する順序や回数を指定するツールです.
Cドライブのユーザーのところに latexmk.txtというテキストファイルを作成します。

次の内容を latexmk.txt にコピペします
# Build commands for a normal LaTeX document
$latex = 'uplatex %O -kanji=utf8 -no-guess-input-enc -synctex=1 -interaction=nonstopmode %S';
# Build command for pdfLaTeX
$pdflatex = 'pdflatex %O -synctex=1 -interaction=nonstopmode %S';
# Build command for LuaLaTeX
$lualatex = 'lualatex %O -synctex=1 -interaction=nonstopmode %S';
# Build command for XeLaTeX
$xelatex = 'xelatex %O -no-pdf -synctex=1 -shell-escape -interaction=nonstopmode %S';
# Build command for Biber, BibTeX
$biber = 'biber %O --bblencoding=utf8 -u -U --output_safechars %B';
$bibtex = 'upbibtex %O %B';
# Build command for makeindex
$makeindex = 'upmendex %O -o %D %S';
# Build command for dvipdf
$dvipdf = 'dvipdfmx %O -o %D %S';
# Build command for dvips
$dvips = 'dvips %O -z -f %S | convbkmk -u > %D';
$ps2pdf = 'ps2pdf.exe %O %S %D';

# Options specifying how to create the PDF
## $pdf_mode = 0; Do not create PDF.
## $pdf_mode = 1; Create PDF using $pdflatex.
## $pdf_mode = 2; Create PDF from .ps file using $ps2pdf.
## $pdf_mode = 3; Create PDF from .dvi file using $dvipdf.
## $pdf_mode = 4; Create PDF from .dvi file using $lualatex.
## $pdf_mode = 5; Create PDF from .xdv file using xdvipdfmx.
$pdf_mode = 4;

# PDF viewer configuration
$pdf_previewer = "start %S";  # "start %S": Display with existing software associated with .pdf.
拡張子を表示する
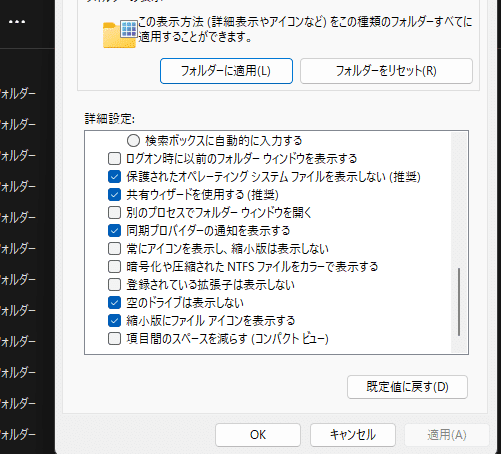
win11だと最初から拡張子が隠れています。ファイルエクスプローラの
・・・>オプション>表示>登録されている拡張子は表示しない
をチェック外しておきました。
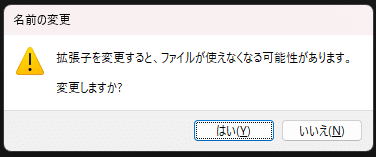
latexmk.txt を 保存して、名前の変更からファイルの拡張子.txtを消して latexmkという名前にします。
この時点でVScodeの緑矢印からコンパイルできるようになっているはずです。texファイルの内容を少し変えてテストしましょう。
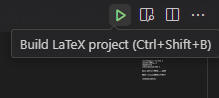
ショートカット
Ctrl + Alt + B でコンパイルできます
Ctrl + Alt + V で pdf 表示できます
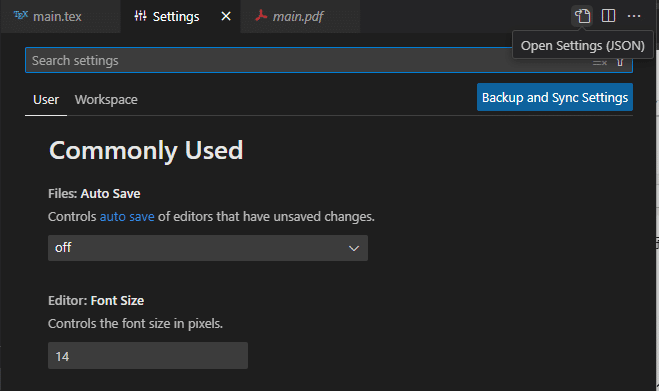
4. setting.jsonの設定
VScode上で Ctrl + , を押して設定を開いて右上のマークからJSONを開きます。
最初はsetting.jsonには
{
    "workbench.colorTheme": "Visual Studio Dark",
}
というなっていて、設定がほぼありません。 ここに latex workshop関連の設定を追加します。
, と}の間に次の内容をコピペします。
    "editor.wordSeparators": "./\\()\"'-:,.;<>~!@#$%^&*|+=[]{}`~? 、。「」【】『』()!?てにをはがのともへでや",

    "latex-workshop.latex.tools": [

        // Build command for LuaLaTeX using latexmk
        {
            "name": "Latexmk (LuaLaTeX)",
            "command": "latexmk",
            "args": [
                "-f", "-gg", "-lualatex", "-synctex=1", "-interaction=nonstopmode", "-file-line-error", "%DOC%","-outdir=out"
            ]
        },
        // Build command for XeLaTeX using latexmk
        {
            "name": "Latexmk (XeLaTeX)",
            "command": "latexmk",
            "args": [
                "-f", "-gg", "-pv", "-xelatex", "-synctex=1", "-interaction=nonstopmode", "-file-line-error", "%DOC%"
            ]
        },
        // Build command for upLaTeX using latexmk
        {
            "name": "Latexmk (upLaTeX)",
            "command": "latexmk",
            "args": [
                "-f", "-gg", "-pv", "-synctex=1", "-interaction=nonstopmode", "-file-line-error", "%DOC%"
            ]
        },
        // Build command for pLaTeX using latexmk
        // Useful for recycling old LaTeX templates with document classes like jreport or jsreport
        {
            "name": "Latexmk (pLaTeX)",
            "command": "latexmk",
            "args": [
                "-f", "-gg", "-pv", "-latex='platex'", "-latexoption='-kanji=utf8 -no-guess-input-env'", "-synctex=1", "-interaction=nonstopmode", "-file-line-error", "%DOC%"
            ]
        }
    ],

    // Definition of LaTeX build recipes
    "latex-workshop.latex.recipes": [
        // Build recipe for LuaLaTeX documents
        {
            "name": "LuaLaTeX",
            "tools": [
                "Latexmk (LuaLaTeX)"
            ]
        },
        // Build recipe for XeLaTeX documents
        {
            "name": "XeLaTeX",
            "tools": [
                "Latexmk (XeLaTeX)"
            ]
        },
        // Build recipe for LaTeX (upLaTeX) documents
        {
            "name": "upLaTeX",
            "tools": [
                "Latexmk (upLaTeX)"
            ]
        },
        // Build recipe for LaTeX (pLaTeX) documents
        {
            "name": "pLaTeX",
            "tools": [
                "Latexmk (pLaTeX)"
            ]
        }
    ],

    // Configuration for building LaTeX documents with magic comments
    "latex-workshop.latex.magic.args": [
        "-f", "-gg", "-pv", "-synctex=1", "-interaction=nonstopmode", "-file-line-error", "%DOC%"
    ],

    // File extensions to be deleted during cleanup
    "latex-workshop.latex.clean.fileTypes": [
        "*.aux", "*.bbl", "*.blg", "*.idx", "*.ind", "*.lof", "*.lot", "*.out", "*.toc", "*.acn", "*.acr", "*.alg", "*.glg", "*.glo", "*.gls", "*.ist", "*.fls", "*.log", "*.fdb_latexmk", "*.synctex.gz",
        // for Beamer files
        "_minted*", "*.nav", "*.snm", "*.vrb",
    ],

    // Whether to run cleanup of temporary files on build failure
    "latex-workshop.latex.autoClean.run": "onBuilt",

    // PDF viewer settings
    "latex-workshop.view.pdf.viewer": "tab",

    // Whether to automatically build on saving .tex files
    "latex-workshop.latex.autoBuild.run": "never",

    "[tex]": {
        // Allow completion during snippet suggestion
        "editor.suggest.snippetsPreventQuickSuggestions": false,
        // Set tab size to 2
        "editor.tabSize": 2
    },

    "[latex]": {
        // Allow completion during snippet suggestion
        "editor.suggest.snippetsPreventQuickSuggestions": false,
        // Set tab size to 2
        "editor.tabSize": 2
    },

    "[bibtex]": {
        // Set tab size to 2
        "editor.tabSize": 2
    },

    // ---------- LaTeX Workshop ----------

    // Enable autocompletion of package commands and environments
    "latex-workshop.intellisense.package.enabled": true,

    // Output generated files to the "out" directory
    "latex-workshop.latex.outDir": "out",
エラーが出てない(コピペの位置があってる)ことを確認したら、保存して閉じます。
out というフォルダに中間ファイルやpdf生成されたり, 必要のないファイルは自動で削除されると思います。
5. おまけ:Emacsキーバインドの設定
(追記: 現在は使ってません)
拡張機能のところで Awesome Emacs Keymapを入れます。
保存やコピペ、取り消しなどのショートカットがEmacs準拠になります。
これを使えばファイルの編集中に、マウスや矢印キーを触る機会が減ります。マウスを触る機会が減れば、文書作成速度が数%します(慣れれば…)。せっかくローカルにインストールしたのなら、最高の環境にしたいよね。
VScodeのデフォルトのショートカットもなるべく覚えて、キーボードだけで完結させよう。
もちろんVimが使いたい人はVimのショートカットを設定しましょう。
ショートカットの設定をいじります
VScodenの歯車からキーボードショートカットを選択
次のように変更します。
ビルド: Ctrl + Shift + V
プレビュー: Ctrl + Shift + V
keybindings.json の中身
[
    {
        "key": "ctrl+shift+b",
        "command": "latex-workshop.build",
        "when": "!config.latex-workshop.bind.altKeymap.enabled && !virtualWorkspace && editorLangId =~ /^latex$|^latex-expl3$|^doctex$|^rsweave$|^jlweave$|^pweave$/"
    },
    {
        "key": "ctrl+alt+b",
        "command": "-latex-workshop.build",
        "when": "!config.latex-workshop.bind.altKeymap.enabled && !virtualWorkspace && editorLangId =~ /^latex$|^latex-expl3$|^doctex$|^rsweave$|^jlweave$|^pweave$/"
    },
    {
        "key": "ctrl+shift+v",
        "command": "latex-workshop.view",
        "when": "!config.latex-workshop.bind.altKeymap.enabled && !virtualWorkspace && editorLangId =~ /^latex$|^latex-expl3$|^doctex$|^rsweave$|^jlweave$|^pweave$/"
    },
    {
        "key": "ctrl+alt+v",
        "command": "-latex-workshop.view",
        "when": "!config.latex-workshop.bind.altKeymap.enabled && !virtualWorkspace && editorLangId =~ /^latex$|^latex-expl3$|^doctex$|^rsweave$|^jlweave$|^pweave$/"
    }
    ,
    {
        "key": "ctrl+alt+z",
        "command": "editor.action.insertSnippet",
        "args":{"snippet": "\\$ ${1:formula} \\$$0"},
        "when": "editorLangId == latex"
    },
    {
        "key": "ctrl+alt+k",
        "command": "workbench.action.terminal.focus",
    },
    {
        "key": "ctrl+alt+j",
        "command": "workbench.action.focusActiveEditorGroup",
    },

]
6. おまけ:Gitの設定
このままだとパソコンが壊れた場合、ファイルにアクセスできません。クラウドなどに保存しておきましょう。個人的にはGitの非公開レポジトリがおすすめです。Githubデスクトップをインストールして、アカウントを連携すればバックアップも完璧です。疲れたので解説省略
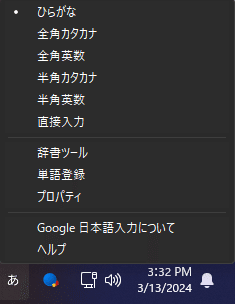
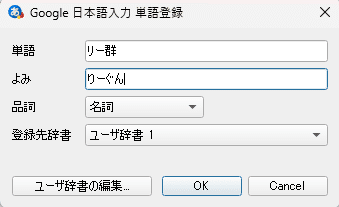
7. おまけ:google 日本語入力
Microsoft IMEより若干使いやすいgoogle 日本語入力をインストールして、数学用語の単語登録をしましょう。
おわり
設定しながらnote書いたので間違ってたら申し訳ありません。
この記事が気に入ったらサポートをしてみませんか?