M5Stack Core2 タッチパネルテスト2 M5Button.hで、ボタン操作の基本をテストしてみた。

タッチパネル操作するときに、タッチしたり、ドラッグしたり、ダブルタップ、スワイプしたりと、いろいろな操作をします。M5Core2は、情報をどうやって、取得するのか、不思議でした。調べていくと…..
M5Button.hの中のM5Buttonsクラス、そのメンバ、EventクラスとButtonクラスが使えそうだ。ボタン操作に特化していますが、ここから始めます。
英語コメントをがりがり読みながら、使えそうなメソッドを、テストしてみました。
まずは、ヘッダーファイルのコメントを読んでいって内容を把握します。
0.M5Button.hの使い方コメント
ファイル冒頭に、詳細コメントがあります。
== M5Button: Buttons, Gestures and Events ==

  * Hardware button support that is 100% Arduino Button Library compatible.

  * Buttons on the screen, either as labels above the original M5Stack's
    hardware buttons or anywhere on the touch screen of the Core2.

  * Zone and Point objects to work with screen locations and areas. Functions
    for distance, direction and more.

<略>
==M5Button: Buttons, Gestures and Events ==
*ハードウェアボタンは100%アルデュイーノライブラリ互換。
*画面上のボタンは、M5Stackのハードウェアボタン上のラベルか、
Core2のスクリーン上のどこかに、表示されます。
*Zoneオブジェクト、 Pointオブジェクトは、画面位置と領域で機能す
る。距離、方向などの関数があります。
<略>以降、M5のボタン操作の解説が続きます。
M5Core2のボタン類はすべてこのファイル内のクラスが担当していそうです。このコメントを読み進めていきます。
== Point and Zone: Describing Points and Areas on the Screen == 座標関連
The Point and Zone classes allow you to create variables that hold a pointor an area on the screen.
Pointクラス:Point(x, y) 画面座標の保持。
Zoneクラス:Zone(x, y, w, h) 画面上の矩形領域の保持。
The PointAndZone library also provides the low-level support for direction from one point to another and for screen rotation translations.
The documentation in src/utility/PointAndZone.h provides more details about rotation and examples covering most of the above.
ハードウェアボタンの説明もありますが、タッチパネルで使えそうな説明を拾っていきます。
== Buttons Using the Touch Screen ==
Note: It may make sense to also read the documentation in the M5Touch.h file, as tells you about the touch sensor and the lower-level touchinterface that is underneath the M5Button library.
注:M5Touch.hファイルのドキュメンテーションも読むと良いでしょう。これは、タッチセンサーとM5Buttonライブラリの下にある低レベルのタッチインターフェースについて説明しています。
M5Touch.hのメソッドを先に学習したほうが、よさそうです。
1.Core2タッチスクリーン上にボタンを作成する。
タッチスクリーン上に情報を持つボタンスイッチをつくるためのクラス、
Buttonクラスを使用します。Buttonクラスは、M5Buttonsクラスメンバです。ButtonクラスはZoneクラスを継承しています。
Buttonクラスコンストラクタを見てみます。
class Button : public Zone {
 public:
  static std::vector<Button*> instances;
  Button(int16_t x_, int16_t y_, int16_t w_, int16_t h_, bool rot1_ = false,
         const char* name_ = "", ButtonColors off_ = {NODRAW, NODRAW, NODRAW},
         ButtonColors on_ = {NODRAW, NODRAW, NODRAW},
         uint8_t datum_ = BUTTON_DATUM, int16_t dx_ = 0, int16_t dy_ = 0,
         uint8_t r_ = 0xFF);
Buttonクラスコンストラクタは、メンバイニシャライザリストで、基底コンストラクタZone(x_, y_, w_, h_, rot1_)に引数を渡しています。実行順は、基底クラスコンストラクタの実行が最初に行われます。
//M5Button.cpp


/* static */ std::vector<Button*> Button::instances;

Button::Button(int16_t x_, int16_t y_, int16_t w_, int16_t h_,
               bool rot1_ /* = false */, const char* name_ /* = "" */,
               ButtonColors off_ /*= {NODRAW, NODRAW, NODRAW} */,
               ButtonColors on_ /* = {NODRAW, NODRAW, NODRAW} */,
               uint8_t datum_ /* = BUTTON_DATUM */, int16_t dx_ /* = 0 */,
               int16_t dy_ /* = 0 */, uint8_t r_ /* = 0xFF */
               )
    : Zone(x_, y_, w_, h_, rot1_) {
  _pin = 0xFF;
  _invert = false;
  _dbTime = 0;
  strncpy(_name, name_, 15);
  off = off_;
  on = on_;
  datum = datum_;
  dx = dx_;
  dy = dy_;
  r = r_;
  init();
}
ボタンの原点、幅、高さ、回転方向、ボタン名、オフ時の色指定。オン時の色指定。datumは、ボタンに表示される文字列のアライメント設定。
dx,dyは、アライメント調整オフセット
rは、ボタン矩形の描画時に、4つ角の丸み半径。
//These enumerate the text plotting alignment (reference datum point)
#define TL_DATUM 0  // Top left (default)
#define TC_DATUM 1  // Top centre
#define TR_DATUM 2  // Top right
#define ML_DATUM 3  // Middle left
#define CL_DATUM 3  // Centre left, same as above
#define MC_DATUM 4  // Middle centre
#define CC_DATUM 4  // Centre centre, same as above
#define MR_DATUM 5  // Middle right
#define CR_DATUM 5  // Centre right, same as above
#define BL_DATUM 6  // Bottom left
#define BC_DATUM 7  // Bottom centre
#define BR_DATUM 8  // Bottom right
//使用例
ButtonColors onCol = {BLACK, WHITE, WHITE};
ButtonColors offCol = {RED, WHITE, WHITE};
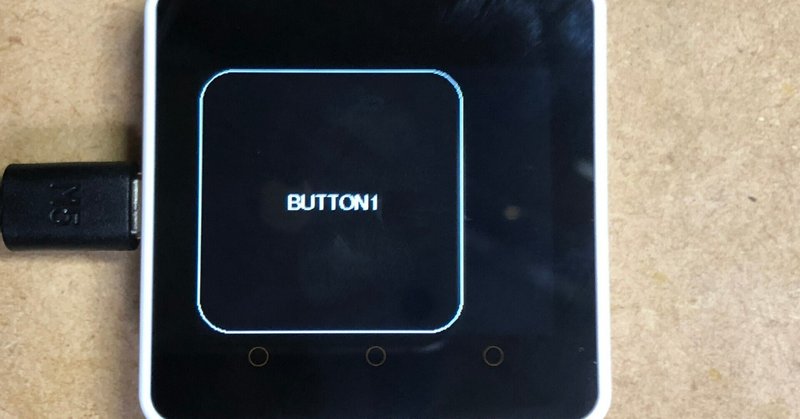
Button myButton(0, 0, 240, 240, false, "BUTTON1",onCol, offCol,MC_DATUM,0,0,30);2.ボタンイベントを扱えるようにする
解説コメントをのぞいてみると、たくさんの状況を把握するためには、
Eventを扱いましょう、ということらしい。
== Events ==

  Buttons (and gestures, but we'll get to those later) have a set of simple
  functions to see if they are pressed or not. These Arduino-compatible
  functions work fine for that purpose. But if you want to detect whether a
  button received a short tap, or even a double-tap on many buttons
  simultaneously, you find yourself writing quite a bit of code for that.

  Events are M5Button's way of making it easier to react to events on
  hardware buttons or the touch screen. For this you need to define one or
  more event handler functions. This is done like this:

    void myHandler(Event& e) { ... }

  It's important to do it exactly this way, only changing the name of the
  function. You can then set things up so that this function receives events.

  Here's an events-based sketch for the Core2. We'll base it on the same
  buton we've seen before.


    #include <M5Core2.h>

    ButtonColors onCol = {BLACK, WHITE, WHITE};
    ButtonColors offCol = {RED, WHITE, WHITE};
    Button myButton(10, 10, 200, 100, false, "I'm a button !", onCol, offCol);

    void setup() {
      M5.begin();
      myButton.addHandler(touched, E_TOUCH);
      myButton.addHandler(released, E_RELEASE);
    }

    void loop() {
      M5.update();
    }

    void touched(Event& e) {
      Serial.println("Touched!");
    }

    void released(Event& e) {
      Serial.println("Released!");
    }
addHandler関数を使えばよさそう。
void Button::addHandler(EventHandlerCallback fn,
                        uint16_t eventMask /* = E_ALL */) {
  BUTTONS->addHandler(fn, eventMask, this, nullptr);
}
イベントタイプの解説。イベントタイプ EventType
Let's first look at all the possible events and when they are fired. The
  first three events always happen when a finger touches the display.

  E_TOUCH, E_MOVE and E_RELEASE

    The E_TOUCH and E_RELEASE events fire when a button is pressed and
    released. On a touch sensor, E_MOVE will fire every time it detects the
    finger has moved. These events cannot be prevented from firing, like most
    of the other ones. So every time your finger touches the display it will
    fire E_TOUCH and then E_MOVEs until finally, when you release your
    finger, an E_RELEASE.

  E_PRESSING and E_LONGPRESSING

    There are also events that happen while the button is still pressed.
    These are E_PRESSING and E_LONGPRESSING. E_PRESSING happens as soon as
    M5Button is sure that's not just a short tap (more later). The maximum
    time for a tap is settable, but defaults to 150 ms. So if the button is
    still held 150 ms after E_TOUCH, E_PRESSING fires. Just once, unless you
    have set up a key repeat, more about that later too. Then at some point
    you might get a E_LONGPRESSING, if you have set up a duration for that to
    happen.

  E_TAP, E_DBLTAP, E_PRESSED, E_LONGPRESSED and E_DRAGGED

    Unless the keypress is cancelled (more later), exactly one of these events
    will fire after the button has been released, after E_RELEASE has fired.
    Think of these as final decisions on what kind of keypress this was.
    (E_TAP takes a tiny bit longer before it fires because M5Button needs to
    make sure it wasn't a doubletap, in that case E_DBLTAP wil fire instead.)

    So tap and doubletap are sort of obvious, E_LONGPRESSED fires if the key
    was pressed more that the set time in ms. E_DRAGGED fires if the finger
    has moved outside of the button area when it was released. E_PRESSED is
    fires in all other cases.

  E_GESTURE

    Doesn't really fit in with the others, but is the event that gets fired
    when a gesture is detected.
イベント発生時のイベント情報オブジェクトの内容
The second thing to look at more closely is the 'Event' object itself. When
  you set up a handler function like this

    void myhandler(Event& e) {

  what that means is you're creating a function that recives a (reference to)
  an event. That event has all sorts of properties that we can look at.


    e.type

      The type of event, such as E_TOUCH or E_TAP from above. The event
      itself, when you evaluate it, also returns the type. What that means is
      that "if (e.type == E_TAP) .." is equivalent with "if (e == E_TAP) .."

    e.finger

      0 or 1, whether this is the first or second finger detected on the
      touch screen. Left at zero on the M5Stack with buttons.

    e.from and e.to

      Points that say from where to where this event happened. Left at
      invalid for the M5Stack with buttons.

    e.duration

      Duration of the event in milliseconds.

    e.button

      Pointer to the button attached to the event. What that means is that you
      can use all the methods for button as long as you precede them with
      "e.button->". Note the '->' there because this is a pointer to an
      object.

    e.gesture

      e.gesture is a pointer to the gesture attached to the event, and may be
      null if the event is not a gesture. So unless you know for sure this
      event is a gesture (because handler attached to that gesture or because
      you asked for E_GESTURE events only), this pointer needs to be tested
      using "if (e.gesture)" before using -> methods on it, oterwise your
      program will crash.

    other methods

      Additionally, you can ask for the name of the event as text by using
      "e.typeName()" and get the name of the gesture or button with
      "e.objName()". "e.direction()" gives the direction, for instance of a
      gesture or of an E_RELEASE event, where it gives direction between
      E_TOUCH and E_RELEASE. "e.isDirectionTo(0,30)" will output true if the
      swipe was upwards, plus or minus 30 degrees.
以上の内容を踏まえて、プログラミングしてみました。
3.実行コード
イベント発生時にコールバック関数に渡されるイベント情報の内容を把握したいので、シリアルに値を出力してみました。
#include <M5Core2.h>


#define LCDWIDE 320
#define LCDHEIGHT 240

ButtonColors onCol = {BLACK, WHITE, WHITE};
ButtonColors offCol = {RED, WHITE, WHITE};
Button myButton(0, 0, 240, 240, false, "BUTTON1",onCol, offCol,MC_DATUM,0,0,30);

Point stPt,endPt;
bool  fdrag;

void myBtnHndler(Event& e)
{
    Serial.printf("%8s %10s ",e.objName(),e.typeName());
    Serial.printf("direction:%3ddeg ",e.direction());
    Serial.printf("duration :%6dms ",e.duration);
    Serial.printf("From:(%3d,%3d) To:(%3d,%3d) ",e.from.x,e.from.y,e.to.x,e.to.y);
    if(e.type==E_MOVE)
    {
        if(!fdrag)
        {
            fdrag=true;
        }
    }else
    {
        if(e.type==E_RELEASE && fdrag)
        {
            fdrag=false;
            Serial.printf("drag distance:%4d", e.from.distanceTo(e.to));
        }
    }
    Serial.println("");
}


void setup()
{
    M5.begin();

    myButton.draw();
    myButton.addHandler(myBtnHndler);
}


void loop()
{
    M5.update();

    delay(1);
}
ドラッグした時の長さを表示しています。E_MOVEが連続して、E_RELEASEが
発生したときに2点間の距離を計算できます。
<追伸>direction方向 指の移動している方向を角度でとらえているみたいです。

この記事が気に入ったらサポートをしてみませんか?