
How to make a slspec file

Summary
There is a MRI scan order called "interleaved," in which every other slice is acquired consecutively. Diffusion-weighted images are often acquired by this method. If a subject moves violently even within a single volume scan, the slices will not be connected properly, resulting in a zigzag pattern when viewed in sagittal or coronal sections (see the figure above). I have summarized the method of correcting this problem using FSL(FMRIB Software Library) tool, eddy with "mporder" option.

Postscript (October 5, 2023)
I made a program in python (jupyter-notebook) that does almost exactly what you see below. pandas library is required. If you just want the result and are not reluctant about github or jupyter-notebook, please try from the following link.
https://github.com/Kikubernetes/slspec
What is a slspec file?
FSL's eddy tool is used to correct for eddy currents, but it also corrects for the subject's body motion. Normally, it only corrects for body motion between volumes, but with the --mporder option, it also corrects for body motion within a volume. In order to use this, you should provide a slspec file with the option of "--slspec=your_slspec.txt". Slspec file is a list of slice numbers(which indicates its position in the volume) arranged in order of acquisition. If you are using multiband, the slices taken at the same time should be listed side by side. The slice number is counted from the 0th like index in python.
The following example is a quote from the FSL userguide. In this case, there are 15 images in one volume, the multiband is 3, slice order is interleaved. If the first, sixth, and eleventh images were taken first, slspec.txt will be like:

This is not automatically created at this time, so you will need to create it yourself. It is quite a hassle, but as long as you don't change the scanning method, you can use it all the time.
Below is a summary of a relatively easy way to create it using excel and terminal (or a text editor).
Obtaining slice timing
Let's assume that we have an image of interleaved acquisition, multiband 2 with 74 slices in the z-axis direction. First, convert the DICOM image to a nifti file using dcm2niix. This automatically creates a json file. In this file, look for the entry "SliceTiming":.
"SliceTiming": [
0,
4.72432,
0.248649,
4.97297,
0.497297,
5.22162,
0.745946,
5.47027,
0.994595,
5.71892,
1.24324,
5.96757,
1.49189,
6.21622,
1.74054,
6.46486,
・・・and so on・・・
It is written like this. Copy and paste just the numbers into a text editor. (Let's say "temp.txt")

Then there will be a lot of tabs in it, so use the command to delete them. (You can also use "Find and Replace" in the editor.)
cat temp.txt | sed 's/\t\t//g' >> order.csv Processing in Excel
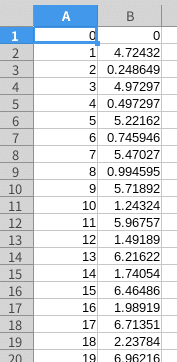
If you open the resulting csv file in Excel or libreoffice, it will look like this.

To the left of this column, insert a column of sequential numbers starting from 0, which indicates the slice position. (To insert a sequential number in excel, enter 0 and return, then pull the cross mark in the lower right corner.)
Now we sort column B in ascending order (select "sort the entire data"), then we get the following.

In this case, column A represents the slice position starting from 0, and column B represents the time it was taken. For example, in the table above, the 0th slice (= really the 1st slice) and the 37th slice (= the 38th slice) were taken simultaneously at time 0, then the 2nd slice and the 39th slice were taken at time 0.248649, and so on. As a reminder, the slices in the slspec file must be placed in the same order (with the simultaneous slices written next to each other). The order of the slices is counted from zero. So, the first slices taken are

If we put the slices in the same way, we get the following:

This is also an Excel function that allows you to create a sequential number starting from 0 and every 2, and a sequential number starting from 37 and every 2, respectively. (Put the first two and then do the same as above.) Since this image has 74 slices, the next pair of (36, 73) will begin with (1, 38) and ends with (35, 72).

In the same way, we can make the row of sequential numbers of 1, 3, 5..., 38, 40, 42... . Here is the final form.

Paste it directly into a text editor and name it slspec.txt. A tab-delimited text file will be created. Although it is not explicitly stated, the delimiter in the figure on the FSL website looks like a space, so you may want to use "Find and Replace" to change the delimiter to a space.
How to use it with eddy
The FSL site above has more information on how to use it, but I'll put up an example of the commands.
eddy_cuda10.2 --imain=eddy_in.nii --mask=eddy_mask.nii --acqp=eddy_config.txt --index=eddy_indices.txt --bvecs=bvecs --bvals=bvals --topup=my_topup_file --slm=linear --repol --out=dwi_post_eddy --verbose --mporder=6 --slspec=slspec.txt --s2v_niter=5 --s2v_lambda=1 --s2v_interp=trilinear"--mporder=6 --slspec=slspec.txt --s2v_niter=5 --s2v_lambda=1 --s2v_interp=trilinear" This part of the command is related to motion correction in the volume. See the above site for details on individual options.
If you are using dwifslpreproc of MRtrix3, you can run the command with the option -nocleanup first, and it will spit out the files necessary for eddy in the directory dwifslpreproc-tmp-XXXXXX. The eddy command used is recorded in command.txt. You can easily compare before and after correction by adding the following part --mporder=6 after this eddy command and executing it in the directory.
Left below is before motion correction, right is after. Though it is not perfect, the zigzag pattern has disappeared considerably.


Extra
Until recently, it was not possible to get slice timing with dcm2niix for GE MRI, but the latest version allows it.
この記事が気に入ったらサポートをしてみませんか?