How to use Among Us Tracker

Operating environment
No need to install the application.
Runs in a Web browser!
Chrome is recommended, but other browsers will work fine.
We recommend that you use a PC device.
You can also use it on a smartphone Web browser, but we do not recommend it because it makes the screen difficult to read.
PWA is supported.
It can be launched with a single tap like an app.
To install as a PWA, click the "💻" mark on the right side of the address input bar of your browser. (The following is an example for Chrome)
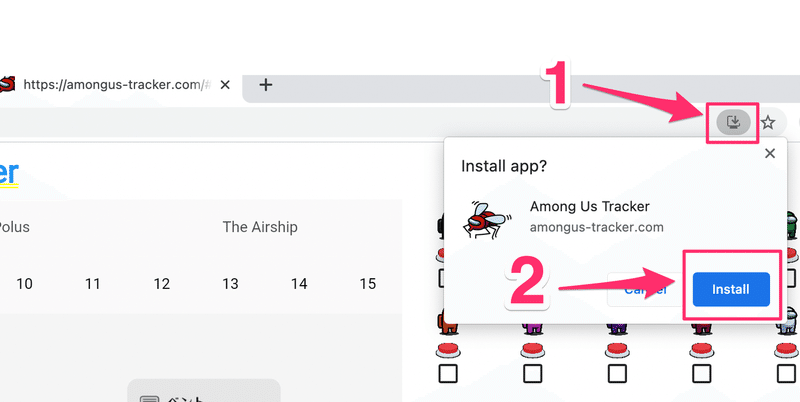
You will be able to launch it from Launchpad (on macOS).

Select players
Open the settings screen by clicking "Settings" in the upper right corner.

Select the player you want to use.
Click to toggle between "selected" and "unselected" states.
You can also enter a name.
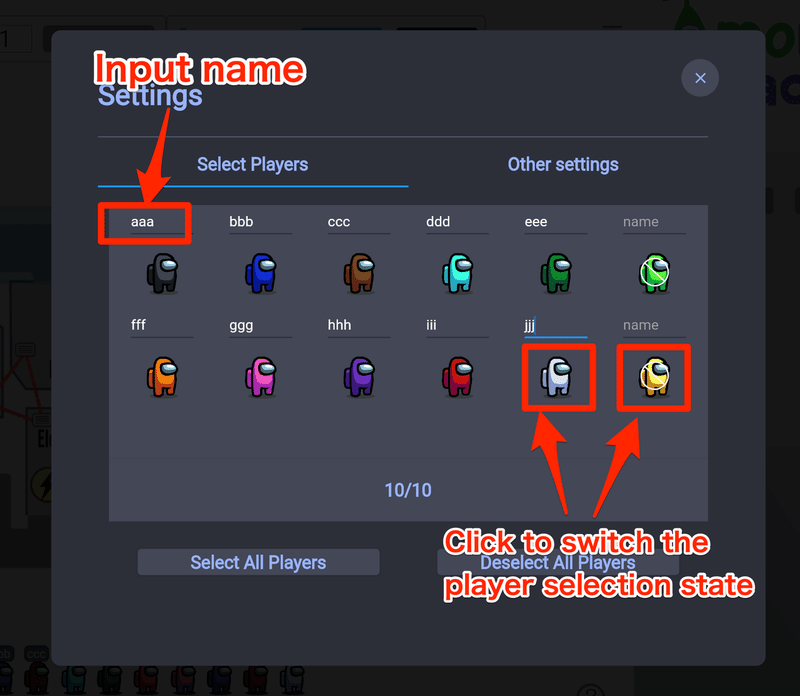
When you close the settings screen, the changes will be reflected in the main screen.
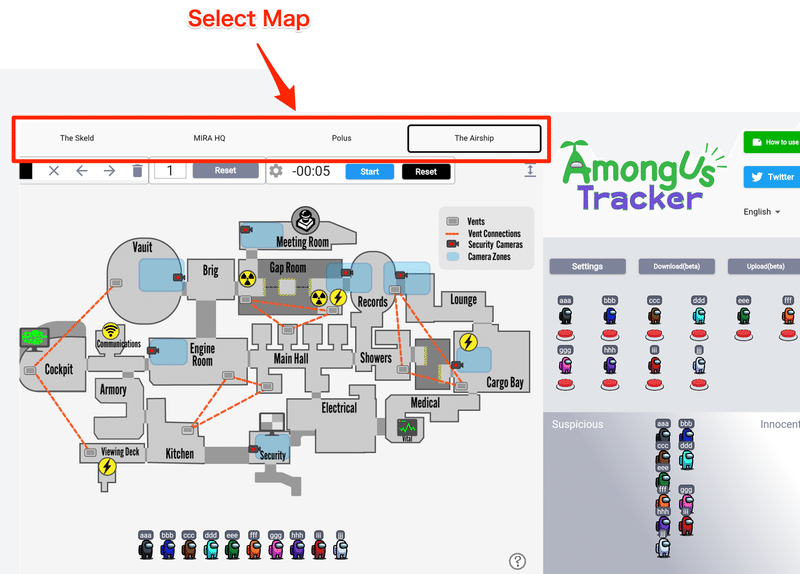
Select the Map
Select the map you want to play next, and you are ready to go.
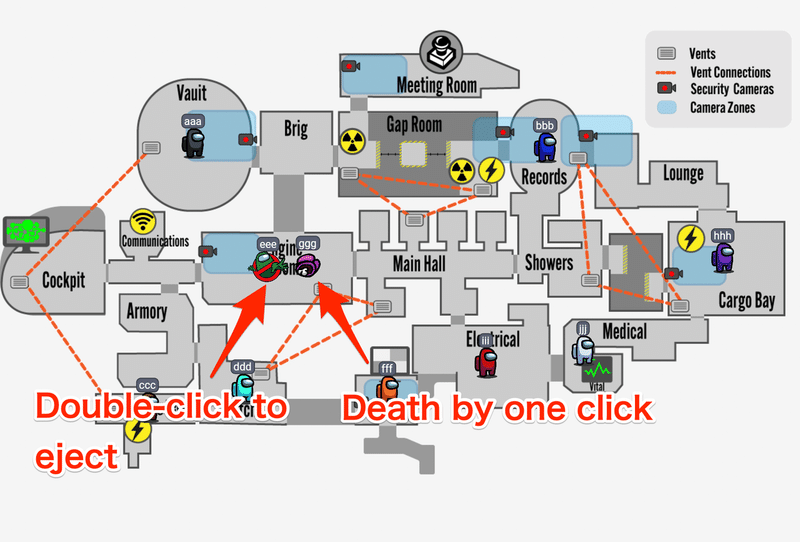
Place the players on the map
When play begins and it's time for discussion, listen to each player and place players on the map by dragging and dropping.
One click will change the player to dead, and double click will change the player to banished.
Record the movement path as a line
You can record the movement path of each player as a line.
Select a color and draw a path.
There are three ways to select colors.
・Use the color palette.
・Move the player.
・Mouse hover on the player (needs to be set)

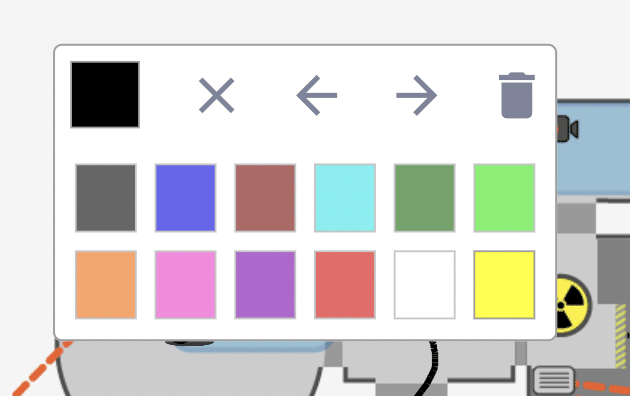
Using the color palette to change colors
Mouse hover over the color palette to select the color of the line.
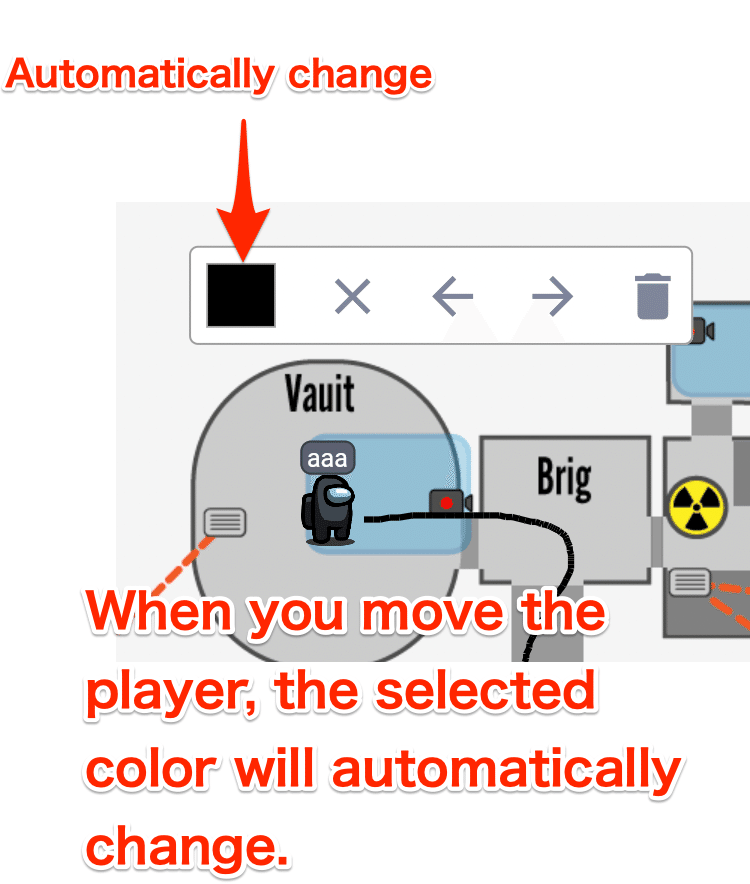
Move the player to change the color
You can also move the player to change the color of the lines.
Change color by hovering the mouse over the player (requires configuration)
If you want to change the color more quickly, you can change the line color by simply hovering the mouse over the player.
If you want to change the color more quickly, just hover the mouse over the player to change the line color. Go to "Settings" and select "Other Settings" and turn on "Change Color by Mouse Hover".

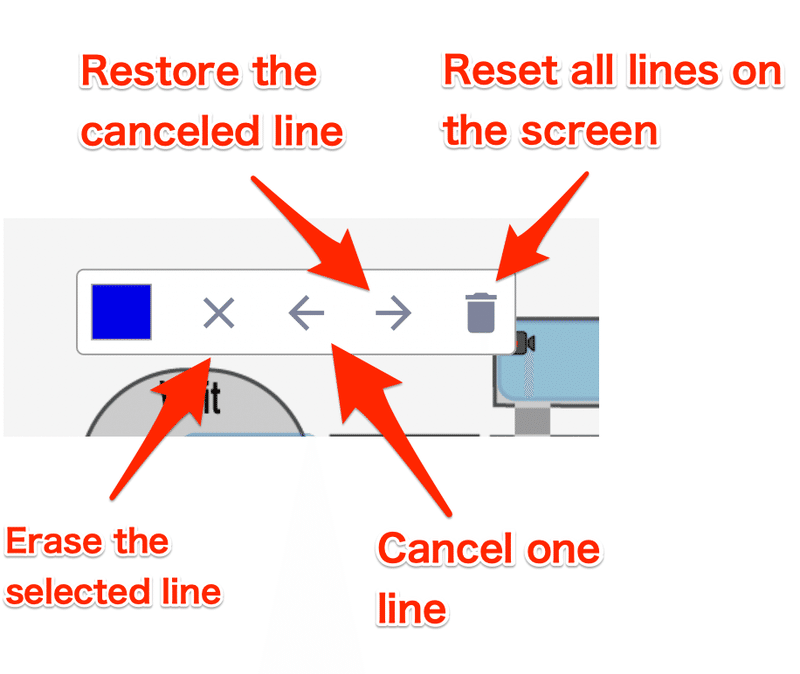
Erase a line, go back one step, and restore a canceled line
You can undo or restore the path you drew.
You can use the icons in the upper right corner.
You can also use Ctrl + z (Command + z on macOS) to "Undo previous line" and Ctrl + shift + z (Command + shift + z on macOS) to "Revive undone line".
Resetting all lines on the screen will not reset lines in other incidents.
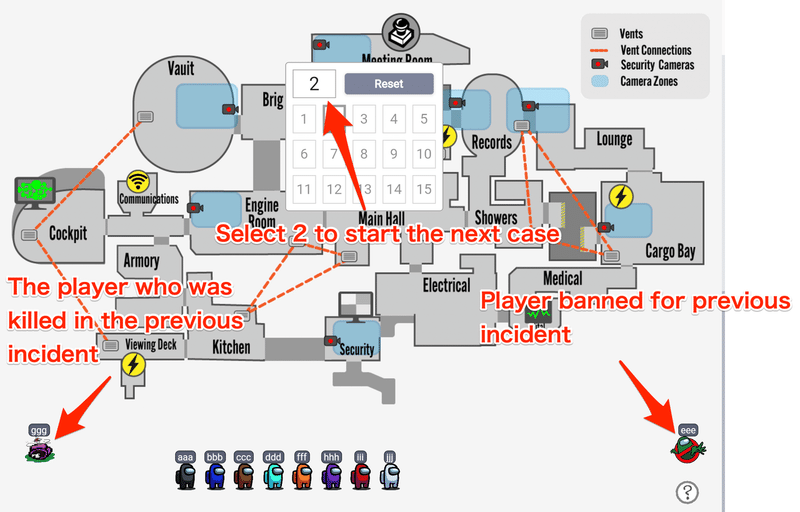
Switching between cases
When the next case starts, you can switch cases by selecting a number.
The next incident will reflect "Players who have died before" and "Players who have been banished before".
You can also check the previous incident at any time by clicking on the number.
Repeat this series of operations to narrow down the culprit.
Also, if you are the Imposter, use the location of each player to create your own alibi.
Mapping of suspicious players
The lower right area is for mapping players who look like Imposters and players who look like crew.
Feel free to map them based on what they say.

Reset data
Click the Reset button to reset all records.
The "Select Map", "Select Player Color", and "Entered Player Name" will not be reset.

Timer
Waiting time・・・A certain amount of waiting time is required before the timer starts.
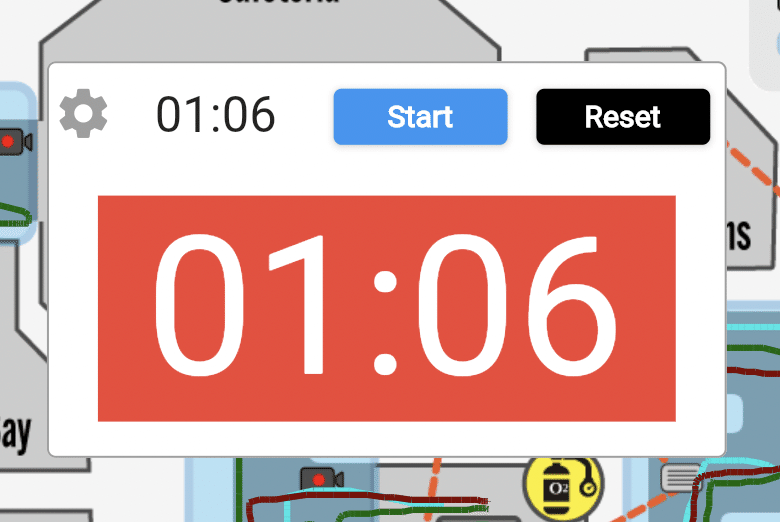
Kilcool timer・・・ When the time is up, the color changes.
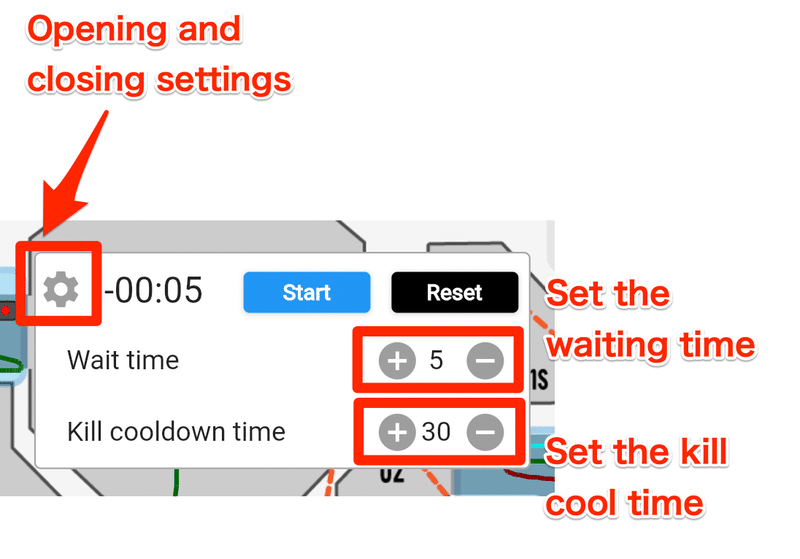
The color turns yellow after the first kill cool time and red after the second kill cool time.

Data storage and recovery functions
This function allows you to save and restore data.
Name and player status can be saved and restored.
Use it to look back on your game.
You can also rename the downloaded data files.
As this is a beta version, downloaded data may not be uploaded without notice.

We are also sending out information on Twitter!
We'll keep you updated as needed, so please follow us!
If you have any requests or questions, feel free to message or tweet me!
この記事が気に入ったらサポートをしてみませんか?