シンプルAPIで構築したStable-Diffusion SDXL専用の画像生成サーバーを公開(変数を試す)-2

前回はサーバプログラムとそのテストプログラムの説明と公開をしました。今回はシリーズ2回めで、各変数の影響について見ていきます。全て
Stable-Diffusion SDXL専用画像生成サーバーを用いています。
プロンプト
説明するまでもないと思います。SDXLモデルの場合は従来のような単語を並べる方法の他に、文章を入力することも可能です。
"masterpiece, best quality, 1girl, solo, flower, long hair, outdoors, letterboxed, school uniform, day, sky, looking up, short sleeves, parted lips, shirt, cloud, black hair, sunlight, white shirt, serafuku, upper body, from side, pink flower, blurry, brown hair, blue sky, depth of field"

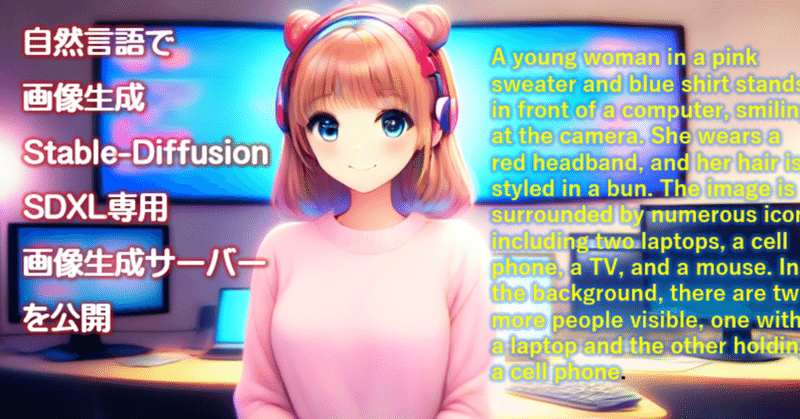
プロンプトを文章に変えます。
A young woman in a pink sweater and blue shirt stands in front of a computer, smiling at the camera. She wears a red headband, and her hair is styled in a bun. The image is surrounded by numerous icons, including two laptops, a cell phone, a TV, and a mouse. In the background, there are two more people visible, one with a laptop and the other holding a cell phone.

見事に生成されています。
単語でのプロンプトに戻しますが、異なるプロンプトです。
"masterpiece, best quality, 1girl, solo, long hair, white shirt, serafuku, brown hair,looking at viewer,blush,smile, bangs,blue eyes, simple background,t-shirt,white background,closed mouth,standing,white t-shirt,shorts, short shorts,headphones,black shorts,light brown hair,blue shorts ,running"

heightとwidth
SDXLではデフォルトが1024x1024です。プロンプトテスト時にはwidth:512として横長の画像を生成しました。最後のプロンプトのままデフォルトを試します。無指定だとデフォルトになります。guidance_scaleも無効にしています。(サイズが変わるとguidance_scaleの設定も変えなくてはいけません)
デフォルトサイズで生成

縦長画像の生成 width=512に変更し、2枚生成(seedが違う)

seed
seedはプロンプトに次いで画像生成に大きなインパクトを与えます。毎回同じ画像を出すなら同じseedを用いますし、次々と新しい画像を生成するのであればランダムなseedを用いて生成します。
Stable-Diffusion-SDXLサーバでは以下の3パターンに対応できるように引数を準備しています。
・ランダムでseedの初期値をサーバが作成する(seedをランダムに決める)
"auto_seed":True,とし、seedを指定せず
・ランダムseedの作成の初期値を与える(マニュアルseed指定)
"auto_seed":False,とし、seedを指定する
・pipelineが持つランダムseedを用いいる(デフォルトseed指定)
"auto_seed":False,とし、seedを指定しない

左下 auto_seed:True、seedsを指定しない 右下 auto_seed:False、seedを指定しない
FreeU
FreeU は、UNet のスキップコネクションとバックボーンファンクションマップによる再バランスをすることで画質を向上させるテクニックです。今までの画像はfreeu:Trueでした。freeu:Falseで無効設定をします。freeuを有効にすると鮮やかさが増します。
左 freeu:False 右 freeu:True

guidance_scale
ガイダンス スケールは、guide_scale > 1 に設定することで有効になります。ガイダンス スケールを高くすると、テキスト プロンプトと密接にリンクした画像の生成が促進されますが、通常は画質が低下します。
(引用:Diffusers)

num_inference_steps
ノイズ除去ステップの数。通常、ノイズ除去ステップを増やすと、推論が遅くなりますが、画像の品質は高くなります。(引用:Diffusers)
SDXLモデル+LCM-LoRAの場合、デフォルトは
guidance_scale=1.0、num_inference_steps=4です。以下のサンプルではあまり差は出ていませんが、i2iやコントロールネットでは大きく差が出ます。

Prompt weighting
Prompt weightingはプロンプトの重み付けにより、プロンプトの特定の部分を強調または強調解除する方法が提供され、生成される画像をより詳細に制御できるようになります。(引用:Diffusers)
プロンプトを以下のように設定しました。
左は (ball)1.5でballを強調、右は (ball)0.6" で弱めています。
"prompt_embe0":"a red cat playing with a (ball)1.5",
"prompt_embe1":"a red cat playing with a (ball)0.6"

strength
strengthはプロンプトの強さの程度を指定します。以下はi2iの例です。弱すぎるとエラーになり、強いと入力画像の影響が薄まり、プロンプトに忠実になります。
"prompt":"masterpiece, best quality, 1girl, solo, flower, long hair, outdoors, letterboxed, school uniform, day, sky, looking up, short sleeves, parted lips, shirt, cloud, black hair, sunlight, white shirt, serafuku, upper body, from side, pink flower, blurry, brown hair, blue sky, depth of field",
左から、0.3・0.5・0.7・0.8です。0.8になると何となく外形は入力の面影を残していますが、細部の形状は反映されずプロンプトに忠実になっています。

まとめ
いくつか重要なパラメータを変化させてStable-Diffusion SDXL専用画像生成サーバーの機能を確認し、パラメータの変化がどのように画像に影響を与えるか試しました。基本的な項目ばかりですが、適切な数値を事前に見ておくことはStable-Diffusion SDXL専用画像生成サーバーを使うあたり、重要なことだお思います。