
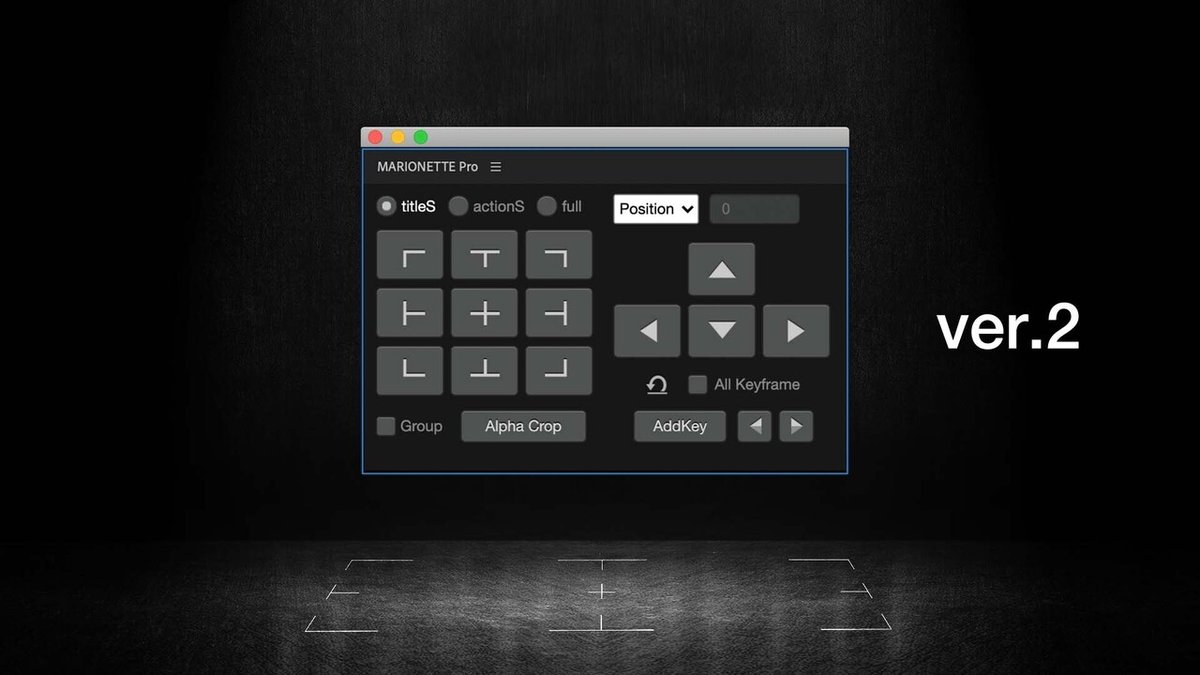
"MARIONETTE Pro" Extension for Premiere Pro that manipulates clips.

Updated to ver 2. New features are added to this note.
- Full support for All Keyframe Control.
When using All Keyframe Control, clips with keyframes can be snapped to a position or center point on the left panel without disrupting the movement of the keyframe.
- An InputBox that can be operated by entering numerical values such as "+" and "-" is provided.
- MARIONETTE shortcut keys can be used for panel selection.
- Improvement of UI.
Available on Adobe Exchange.
Features common to the standard version
Click on each of 9 placement buttons.
Snap clips to the area.
⌘(Ctrl) + click
Move Anchor point (in clip)
⌘(Ctrl) + option(Alt) + click
Move Anchor point (in the area)
Click here for other details.
Features of the Pro version
Left side panel
Horizontal Snap
shift + Left/Center/Right button
Vertical Snap
shift + option(Alt) + Up/Center/Down button
Out screen Snap
shift + ⌘(Ctrl) + option + Left/Right/Up/Down button
Alpha Crop
Crop effect is applied to PNG/GIF/WebP files by the size of the alpha channel.
For PSD/TIFF files, you need to launch Photoshop. In the case of PSD and TIFF files, the process is passed to Photoshop once. This may take a little longer to process and may not open properly in Photoshop, so PNG is recommended.
If the same PSD or TIFF file as the clip to which Alpha Crop is applied is opened in Photoshop, the crop effect will be applied in its current state. Use this method if you are importing PSDs as separate layers in Premiere.
This allows you to snap within the area or move anchor points within a clip regardless of the size of the clip. Snap is possible even if the crop effect is turned off (fx mark is turned off) in the Effects Control Panel.
Alpha Crop cannot be used on objects created with Premiere's Rectangle tool, Ellipse tool, or Essential Graphics.
Right side panel
Even when multiple clips are selected on the timeline, operations such as moving the position, scaling, and adding key frames are performed at the same time.
Select an item from the pull-down menu
- Position
- Scale
- Rotation
- Anchor
- Opacity
- Center
Amount of change of the direction buttons
⌘(Ctrl) + direction button
0.1
shift + direction button
10
shift + ⌘(Ctrl) + direction button
50 (45 degrees for Rotation.)
Continuous change by pressing and holding the button.
Smart Scaling
Scale operations can be scaled while maintaining the ratio, even if the scale between clips is different or the vertical / horizontal scale is different.
option(Alt) + direction buttons to scale vertically or horizontally only.
All Keyframe Control
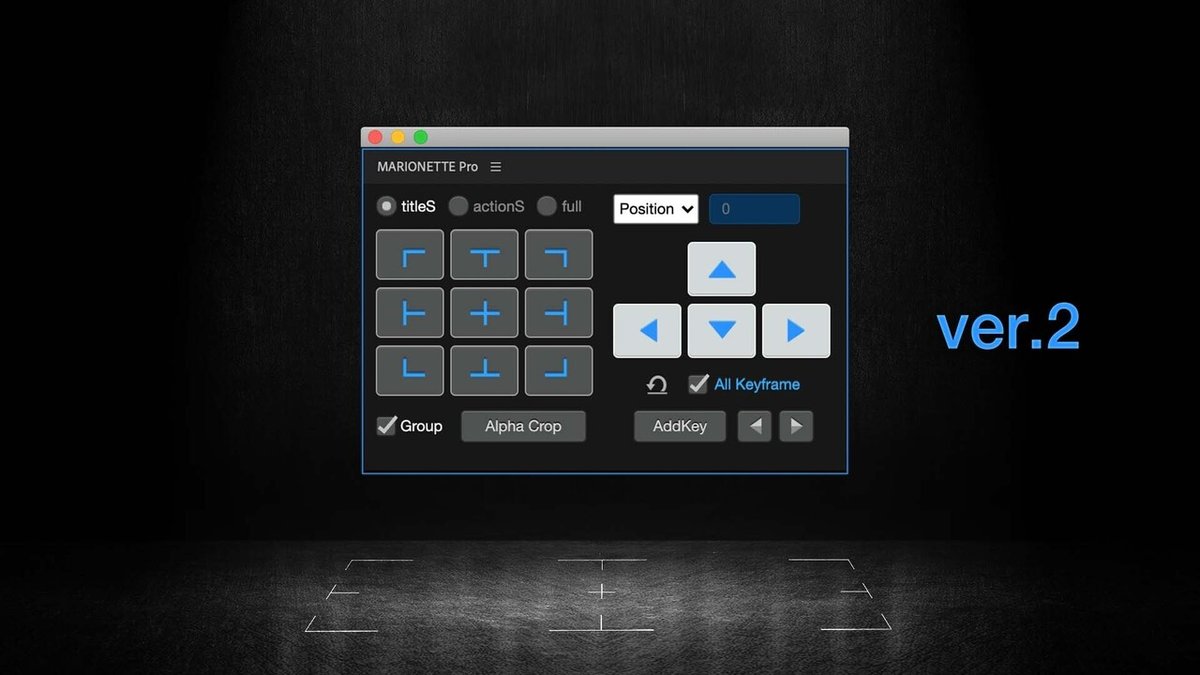
When “All Keyframe” is checked, the same amount of value is applied to the keyframes of the item selected in the pull-down menu. Even after animation is applied, you can move the position and anchor point.
All Keyframe Control is also applied when operating the placement panel on the left. Allows snapping of clips with motion within an area and placement of the center point at each point. (New!!!)
AddKey
Add a keyframe for the item selected in the pull-down menu. Keyframes can be added simultaneously even when multiple selections are made.
Click again to delete the keyframe. (New!!!)
Go to previous/next keyframe (◀︎▶︎ next to AddKey)
shift + click to move to the keyframe of all items.
Reset
Reset the selected item in the pull-down menu to its default value.
When you select Position
⌘ + Reset: Reset horizontally only
option + Reset: Reset vertically only
When you select Scale
⌘ + Reset: Set to same value as for vertically
option + Reset: Set to same value as horizontally
The panel can be arranged vertically.

* * *
Ver.2 New feature "InputBox".
The function to specify a numerical value for the item selected in the pull-down menu has been added, as is common in After Effects, but you can also increase or decrease the current value by adding "+", "-", "*", or "/" before or after the numerical value. Enter a numerical value in the "InputBox" and press the Enter key to confirm.
When Position, Anchor, Center.
Enter key changes the horizontal value.
Option(Alt)+Enter key changes the vertical value.
When using Scale, press
The Enter key is used to zoom in/out while maintaining the aspect ratio.
Option(Alt)+Enter key for vertical only.
⌘(Ctrl)+Enter key for horizontal only.
Pressing the Shift key at the same time reverses the direction.
Ver.2 New feature "MARIONETTE ShortcutKey".
Panel shortcut key-like functions (valid only when an extension panel is selected).
For example.
Snap to each point in the area with the "1-9" keys.
Select the "Position" item by pressing the "P" key and the "Scale" item by pressing the "S" key.
Press "Shift+P" to add or remove a position keyframe.
"Shift+S" key adds or deletes a scale keyframe. And so on.
Play/Stop by "Space" key after selecting a panel, which was not possible in Ver. 1.
The "←" and "→" keys can be used to move one frame at a time (+Shift for 10 frames, etc.).
Please download this PDF file for a list of shortcut keys and functions.
Notes.
Shortcut keys are valid only when the panel is selected (blue frame) and you click inside the panel.
- When launching extensions.
- When using the shortcut key "Select previous/next panel" in PremierePro.
- When you switch to another application and come back.
- When auto save is displayed.
When this happens, the panel has a blue border, but the panel is out of focus. You need to click again inside the panel. Unfortunately, there is no shortcut to make the extension panel selected.
On macOS, when the panel is floating (not docked with other panels), clicking inside the panel will not put a blue border on the panel. It is recommended to use the panel docked with other panels.
When you click on the MARIONETTE extension panel to select it and it becomes a blue box, Premiere shortcut keys are basically ignored.
However, on macOS, some shortcut keys seem to take precedence over the MARIONETTE shortcut keys, which are set in Premiere Pro.
For example, ⌘+↑/↓ will adjust the value by 0.1 in MARIONETTE's Direct Mode (when the direction buttons are white), but Premiere's default is "Select previous/next clip", which takes precedence. keyboard shortcut in Premiere If you eliminate this shortcut in the settings, the MARIONETTE shortcut key will be enabled.
Apparently, shortcuts that combine modifier keys (⌘, Option, Shift) may take precedence in Premiere if the same shortcut as MARIONETTE is set in Premiere. MARIONETTE is not yet able to properly control this.
Other corrections and changes
- Fixed a problem in which the value of the crop effect was set to "nan" when Alpha Crop was performed on a PSD or TIFF, if the unit in Photoshop Preferences was not pixels.
- Fixed a problem in which snapping and center point movement did not work properly when the pixel aspect ratio was not 1:1 in clips (and sequence settings).
- Fixed a problem in which Alpha Crop could not be performed if the file name or folder name of the selected clip contained the character "#".
- Changed the color of operation buttons for All Keyframe, Group, etc.
- Supported Alpha Crop for WebP format clips.
* * *
MARIONETTE Pro allows you to control motion effects when multiple selections are made. So what can you do with it? It's going to be a Premiere experience like never before.
And MARIONETTE Pro will continue to evolve.
* * *
MARIONETTE Pro was also introduced in SG EDIT!
Best regards,
884tak
もしもサポートいただけたら、そのお金は私の愛猫のエサ代となります。猫の笑顔が見たいです。