
AWS EC2上でElasticsearchを構築2

3.EC2インスタンス SSH接続
AWS EC2インスタンスにTera Termを使ってSSH接続を行います。
Tera Termを立ち上げてからホスト(T)にEC2インスタンスのIPアドレスを指定します。
続行(C)をクリック
ユーザ名(N)にec2-userを記載
RSA/DSA/ECDSA/ED25519鍵を使うにチェックを入れて
秘密鍵(K)に画面右の『...』ボタンから秘密鍵を選択
設定したらOKを押す
EC2インスタンス SSH接続完了
4.Amazon Correttoのインストール
Elasticsearch,logstashでJava17が必要
今回はOpenJDK ディストリビューションであるAmazon Correttoの17をインストールして使う。特権ユーザーに変更して以下インストール作業実行する
sudo su -

yum install java-17-amazon-corretto
レスポンスで下記バージョン情報が出ればOK
5.Logstashのインストール
参考URL:https://www.elastic.co/guide/en/logstash/current/installing-logstash.html
5.1.ElasticGPGキーのインポート
※標準出力には何も出ないが問題なし
sudo rpm --import https://artifacts.elastic.co/GPG-KEY-elasticsearch/etc/yum.repos.d/配下に「logstash.repo」ファイルとして
以下の内容で.repoファイルを作成する。
※enabled=1でリポジトリを有効化(任意)
install時にレポジトリの指定が不要
vi /etc/yum.repos.d/logstash.repo[logstash-8.x]
name=Elastic repository for 8.x packages
baseurl=https://artifacts.elastic.co/packages/8.x/yum
gpgcheck=1
gpgkey=https://artifacts.elastic.co/GPG-KEY-elasticsearch
enabled=1
autorefresh=1
type=rpm-md5.2.Logstashのインストール
version 指定する場合(ver 8.1.2)
yum install -y logstash-8.1.2最新versionでLogstashをinstall する場合
yum install logstash5.3.Logstash 起動と自動起動設定
systemctl daemon-reload

systemctl enable logstash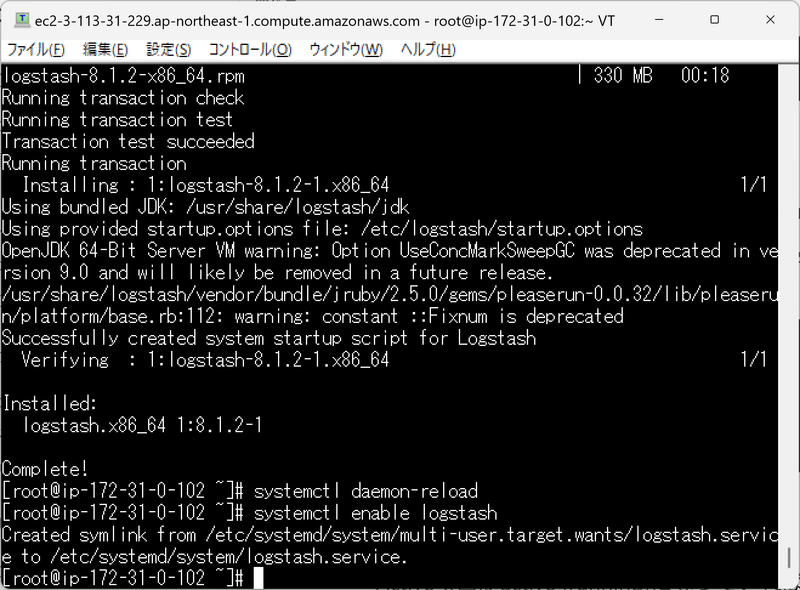
systemctl start logstash

systemctl status logstash
6.Elasticsearchのインストール
参考URL:https://www.elastic.co/guide/en/elasticsearch/reference/current/rpm.html
6.1.リポジトリの作成
/etc/yum.repos.d/配下に「elasticsearch.repo」ファイルとして
以下の内容で.repoファイルを作成する。
vi /etc/yum.repos.d/elasticsearch.repo※enabled=0でリポジトリを無効(任意)
install時にレポジトリの指定が必要
[elasticsearch]
name=Elasticsearch repository for 8.x packages
baseurl=https://artifacts.elastic.co/packages/8.x/yum
gpgcheck=1
gpgkey=https://artifacts.elastic.co/GPG-KEY-elasticsearch
enabled=0
autorefresh=1
type=rpm-md
6.2.Elasticsearchのインストール
sudo yum install --enablerepo=elasticsearch elasticsearchレスポンス(一部)
version8.0からyumでinstallした際に下記のように
elastic(スーパーユーザー)の初期のパスワードが設定されている。
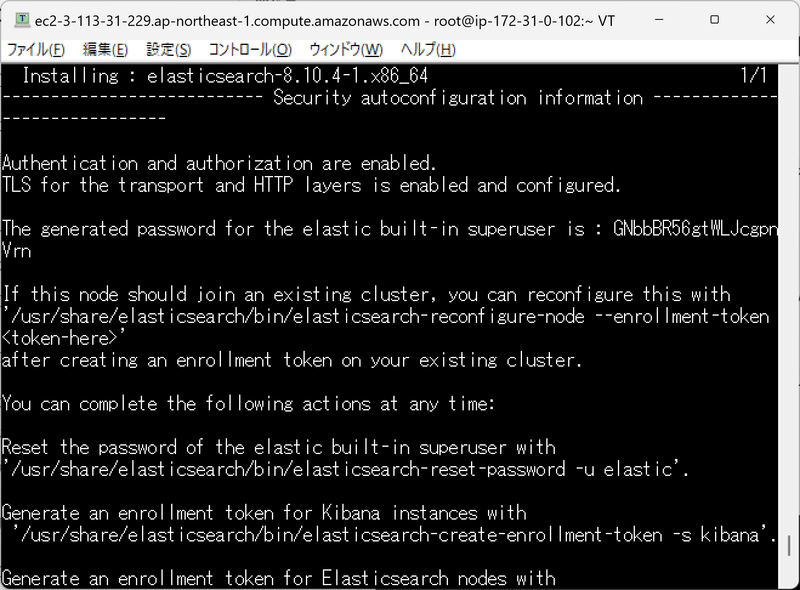
※Vol.3でセキュリティを設定する際に初期パスワード使用するので必ずメモをする
built-in superuser is : XXXXXXXXX <<ーーーーーー 初期パスワード
6.3.jvm.optionsの編集
vi /etc/elasticsearch/jvm.optionsヒープサイズのコメントの後に2行追加
################################################################
## IMPORTANT: JVM heap size
################################################################
##
## The heap size is automatically configured by Elasticsearch
## based on the available memory in your system and the roles
## each node is configured to fulfill. If specifying heap is
## required, it should be done through a file in jvm.options.d,
## and the min and max should be set to the same value. For
## example, to set the heap to 4 GB, create a new file in the
## jvm.options.d directory containing these lines:
##
## -Xms4g
## -Xmx4g
##
## See https://www.elastic.co/guide/en/elasticsearch/reference/7.15/heap-size.html
## for more information
##
################################################################

-Xms1g
-Xmx1g
・・・・
#-Djava.io.tmpdir=${ES_TMPDIR}
-Djava.io.tmpdir=/var/log/elasticsearch
6.4.elasticsearch.yml設定
discovery.typeパラメータを設定します。
vi /etc/elasticsearch/elasticsearch.yml#----------------------- BEGIN SECURITY AUTO CONFIGURATION -----------------------
#
# The following settings, TLS certificates, and keys have been automatically
# generated to configure Elasticsearch security features on 01-01-2023 13:37:00
#
# --------------------------------------------------------------------------------
# Enable security features
xpack.security.enabled: true
xpack.security.enrollment.enabled: true
# Enable encryption for HTTP API client connections, such as Kibana, Logstash, and Agents
xpack.security.http.ssl:
enabled: true
keystore.path: certs/http.p12
# Enable encryption and mutual authentication between cluster nodes
xpack.security.transport.ssl:
enabled: true
verification_mode: certificate
keystore.path: certs/transport.p12
truststore.path: certs/transport.p12
# Create a new cluster with the current node only
# Additional nodes can still join the cluster later
#cluster.initial_master_nodes: ["ip-172-31-0-102.ap-northeast-1.compute.internal"]
discovery.type: single-node # ◆◆追記◆◆
# Allow HTTP API connections from anywhere
# Connections are encrypted and require user authentication
http.host: 0.0.0.0
# Allow other nodes to join the cluster from anywhere
# Connections are encrypted and mutually authenticated
#transport.host: 0.0.0.0
#----------------------- END SECURITY AUTO CONFIGURATION -------------------------
6.5.Elasticsearch起動と自動起動設定
systemctl daemon-reload
systemctl enable elasticsearch
systemctl start elasticsearch
systemctl status elasticsearch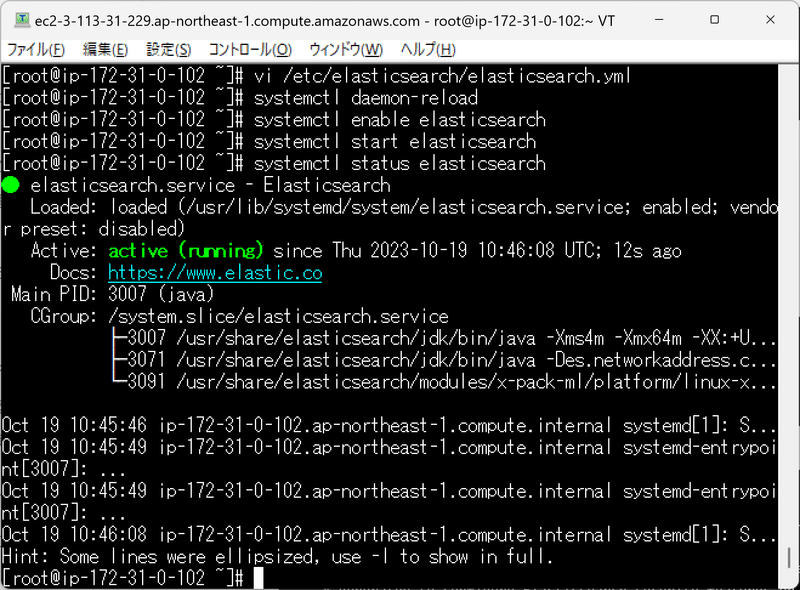
7.Kibanaのインストール
参考URL:https://www.elastic.co/guide/en/elasticsearch/reference/current/rpm.html
7.1.リポジトリの作成
/etc/yum.repos.d/配下に「kibana.repo」ファイルとして
以下の内容で.repoファイルを作成する。
vi /etc/yum.repos.d/kibana.repo※enabled=1でリポジトリを有効化(任意)
install時にレポジトリの指定が不要
[kibana-8.x]
name=Kibana repository for 8.x packages
baseurl=https://artifacts.elastic.co/packages/8.x/yum
gpgcheck=1
gpgkey=https://artifacts.elastic.co/GPG-KEY-elasticsearch
enabled=1
autorefresh=1
type=rpm-md
7.2.Kibanaのインストール
yum install kibana7.3.kibana.ymlの編集
vi /etc/kibana/kibana.yml# For more configuration options see the configuration guide for Kibana in
# https://www.elastic.co/guide/index.html
# =================== System: Kibana Server ===================
# Kibana is served by a back end server. This setting specifies the port to use.
server.port: 5601
# Specifies the address to which the Kibana server will bind. IP addresses and host names are both valid values.
# The default is 'localhost', which usually means remote machines will not be able to connect.
# To allow connections from remote users, set this parameter to a non-loopback address.
server.host: "0.0.0.0"
# Enables you to specify a path to mount Kibana at if you are running behind a proxy.
# Use the `server.rewriteBasePath` setting to tell Kibana if it should remove the basePath
# from requests it receives, and to prevent a deprecation warning at startup.
# This setting cannot end in a slash.
#server.basePath: ""
# Specifies whether Kibana should rewrite requests that are prefixed with
# `server.basePath` or require that they are rewritten by your reverse proxy.
# Defaults to `false`.
#server.rewriteBasePath: false
# Specifies the public URL at which Kibana is available for end users. If
# `server.basePath` is configured this URL should end with the same basePath.
server.publicBaseUrl: "http://localhost:5601"
# The maximum payload size in bytes for incoming server requests.
#server.maxPayload: 1048576
# The Kibana server's name. This is used for display purposes.
#server.name: "your-hostname"
# =================== System: Kibana Server (Optional) ===================
# Enables SSL and paths to the PEM-format SSL certificate and SSL key files, respectively.
# These settings enable SSL for outgoing requests from the Kibana server to the browser.
#server.ssl.enabled: false
#server.ssl.certificate: /path/to/your/server.crt
#server.ssl.key: /path/to/your/server.key
# =================== System: Elasticsearch ===================
# The URLs of the Elasticsearch instances to use for all your queries.
elasticsearch.hosts: ["http://localhost:9200"]
#i18n.locale: "en"
i18n.locale: "ja-JP" 7.4.kibana.yml修正箇所まとめ
server.port: 5601

server.host: "0.0.0.0"

server.publicBaseUrl: "http://localhost:5601"

elasticsearch.hosts: ["http://localhost:9200"]

i18n.locale: "ja-JP"
7.5.Kibana 起動と自動起動設定
systemctl daemon-reload
systemctl enable kibana
systemctl start kibana
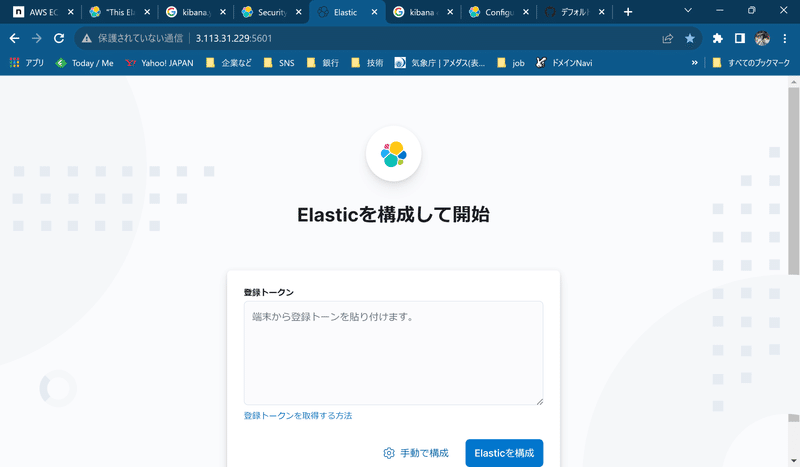
systemctl status kibana8.ブラウザ確認
ブラウザで http://<TeraTermにログインしたIP Adrress>:5601 でKibanaにアクセスします。
アクセスするとEnrollment tokenが求められます。
8.1.上記画面が出てこず、「This Elastic installation has strict security requirements enabled that your current browser does not meet」が求められた場合
kibanaのJSなどに問題があり、csp.strict: true を指定してある場合にこのメッセージを表示します
セキュリティ的には問題ですが、falesにします
下記に修正し、再度、Kibana 起動します
vi /etc/kibana/kibana.yml

csp.strict: false
8.2.登録トークンの作成
次のコマンドは、Kibana インスタンスをクラスターに登録するための登録トークンを作成します。
指定された URL は、elasticsearch-create-enrollment-token ツールがローカル Elasticsearch ノードにアクセスしようとする場所を示します。
sudo /usr/share/elasticsearch/bin/elasticsearch-create-enrollment-token -s kibana --url "https:localhost:9200"8.3.登録トークンの作成が失敗した場合の対応
JVMの問題以外の場合です
「BaseRunAsSuperuserCommand を拡張する CLI ツールはローカル ノードにのみ接続すべきである」、つまりローカルノードで実行すると機能します。しかし、クラスター内の elasticsearch コンテナーで実行すると、機能しません。
解決策は、次のように スクリプトをそれぞれ実行するです。
/usr/share/elasticsearch/bin/elasticsearch-reset-password -i -u elastic --url https://localhost:9200

/usr/share/elasticsearch/bin/elasticsearch-create-enrollment-token -s kibana --url https://localhost:9200
再度アクセストークンの実行
sudo /usr/share/elasticsearch/bin/elasticsearch-create-enrollment-token -s kibana --url https://localhost:9200

eyJ2ZXIiOiI4LjEwLjQiLCJhZHIiOlsiMTcyLjMxLjAuMTAyOjkyMDAiXSwiZmdyIjoiZjVhMDI5OGI2NDAxZmRlNjcxM2I2MjM4N2Q5NTMzMmNkYzg1YThhMzhhMTE4YWZmZGRjMThiYTQ4ZTRiMDlmZCIsImtleSI6IlFOVUFTSXNCdHR4Ui1pREtUX2pjOkxCTHlxV0twUkkyUl9TdkVqMy1URFEifQ==
貼り付けをすると次に検証です
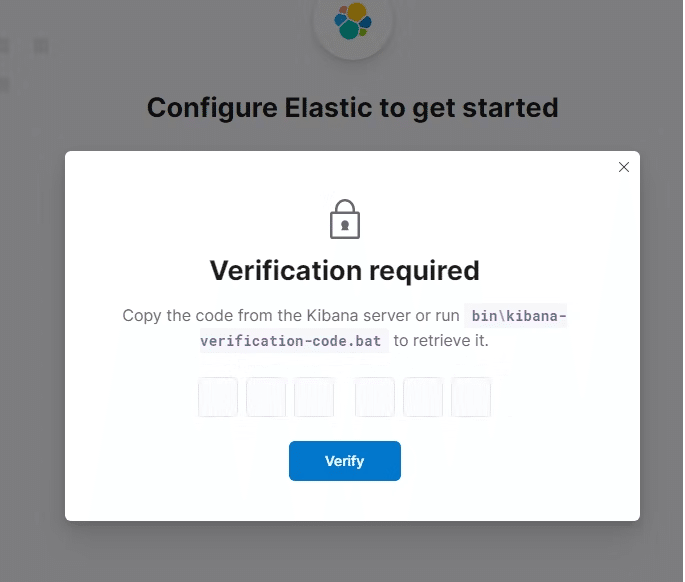
sudo /usr/share/kibana/bin/kibana-verification-code

Your verification code is:  406 603
コードを張り付けるとElasticを構成して開始します
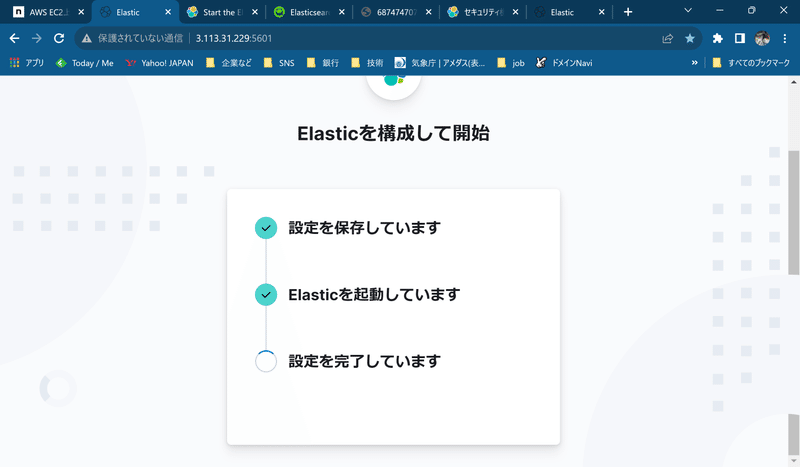
8.4.確認
構成が終了すると、ログイン画面が表示されます
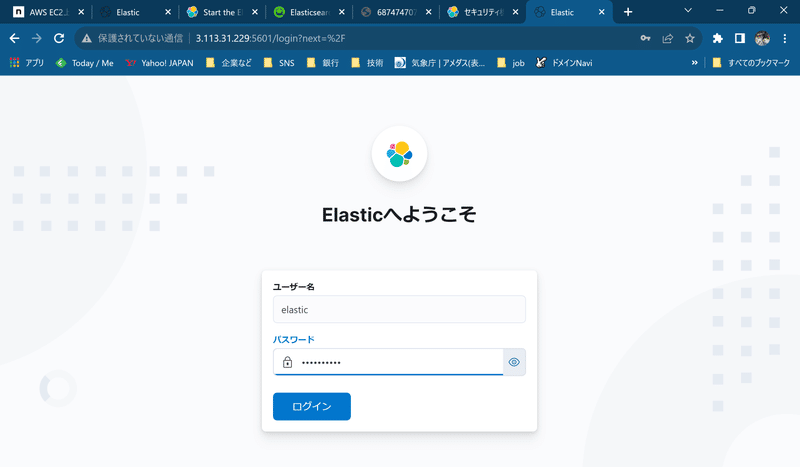
一人で閲覧

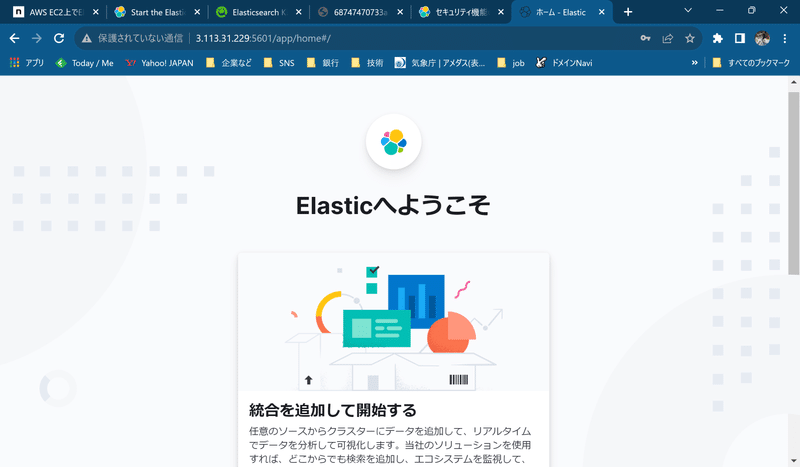
これで構築が完了です
次回は試してみましょう
この記事が気に入ったらサポートをしてみませんか?