円を並べてみる、ただそれだけで:後編

円を並べるだけという超単純な作例、前編では並べた円の大きさを変えて遊んでみました。
前編を読んでくださって、wo(@kanikaniudon)さんと JunKiyoshi(@junkiyoshi)さんが作品を作ってくださいました。
199日目@deconbatch さんの記事を参考に円で遊んでみた!https://t.co/aaOuXuQKzV
— 𝔀𝓸 (@kanikaniudon) June 15, 2020
ぎり遅刻https://t.co/qLbms3mvvO#p5js #まいにちうぇぶおえかき #dailycodingchallenge #creativecoding pic.twitter.com/6Mn0pxgR62
deconbatchさんのブログからインスパイア。 Source code -> https://t.co/pKPhoM1AHo #openframeworks #programming #creativecoding #プログラミング pic.twitter.com/XozZfO4nC1
— JunKiyoshi (@junkiyoshi) June 15, 2020
嬉しいです。ありがとうございます!🙂
さあ、それでは後編でも引き続き遊んでいきましょう。
今回のコードは p5.js で書きました。
OpenProcessing や p5.js Web Editor に貼り付けて実行することも可能です。
この記事は全文無料でお読みいただけます。もしお気に召しましたら投げ銭お願いしますね。😉✨
![]()
基本のコード
前編のコードは最終的にこのような形になりました。
/*
* A grid alignment of any size circles.
* This work is licensed under a Creative Commons Public Domain Mark 1.0 License.
*/

function setup() {
   createCanvas(640, 480);
   colorMode(HSB, 360, 100, 100, 100);
   noFill();
   strokeWeight(1);
   noLoop();
}

function draw() {

   // キャンバス縦横どちらか最小の辺にちょうど収まるサイズを算出
   const minCells = 10;
   const cSize = min(width, height) / minCells;

   // 縦横の個数算出
   const xCells = floor(width  / cSize);
   const yCells = floor(height / cSize);

   // 描画
   const xMargin = (width  - (xCells - 1) * cSize) * 0.5;
   const yMargin = (height - (yCells - 1) * cSize) * 0.5;

   // サイズの倍率
   const sizeRate = 2.0;

   // 描画
   push();
   background(0, 0, 90, 100);
   translate(xMargin, yMargin);
   stroke(0, 0, 30, 100);
   for (let iX = 0; iX < xCells; iX++) {
	 for (let iY = 0; iY < yCells; iY++) {
	   circle(iX * cSize, iY * cSize, cSize * sizeRate);
	 }
   }
   pop();

}
実行結果はこう。
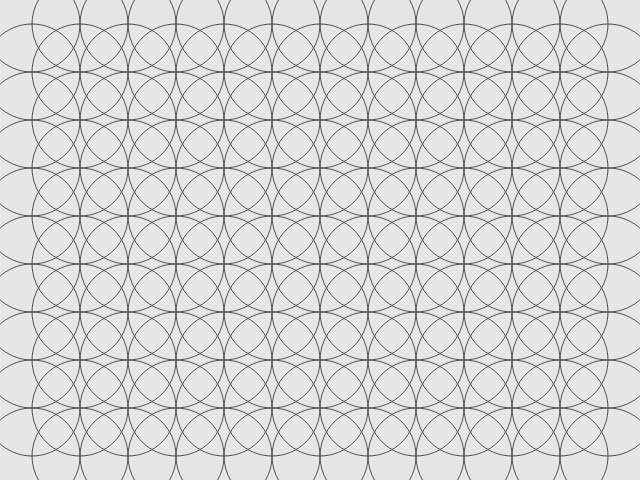
これを元に進めていきますね。
![]()
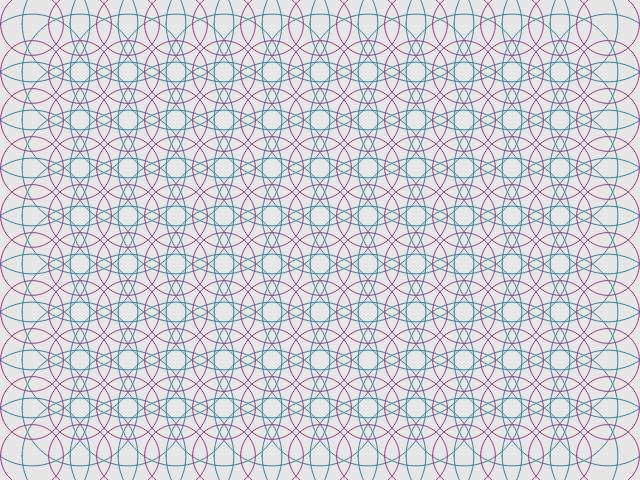
重ねてみる
まずは、円を並べたものを重ねてみましょう。
i の for ループで描画部分を囲って、サイズ 1倍と 2倍の円を重ねて描画します。
  background(0, 0, 90, 100);
  for (let i = 0; i < 2; i++) {
	// サイズの倍率
	let sizeRate = 1 + i;
	// 描画
	push();
	translate(xMargin, yMargin);
	stroke(0, 0, 30, 100);
	for (let iX = 0; iX < xCells; iX++) {
	  for (let iY = 0; iY < yCells; iY++) {
		circle(iX * cSize, iY * cSize, cSize * sizeRate);
	  }
	}
	pop();
  }
うん、エレガント!
サイズをランダムにして変化を楽しむのもいいですね。
let sizeRate = random(0.5, 3.0);
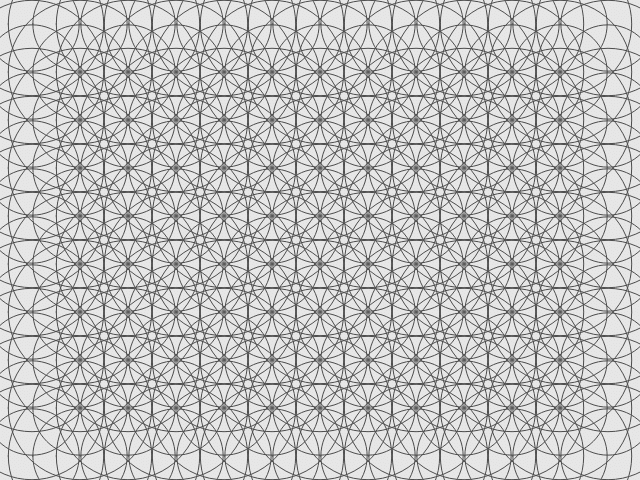
色もランダムにしてみましょう。
stroke(random(360), 60, 60, 100);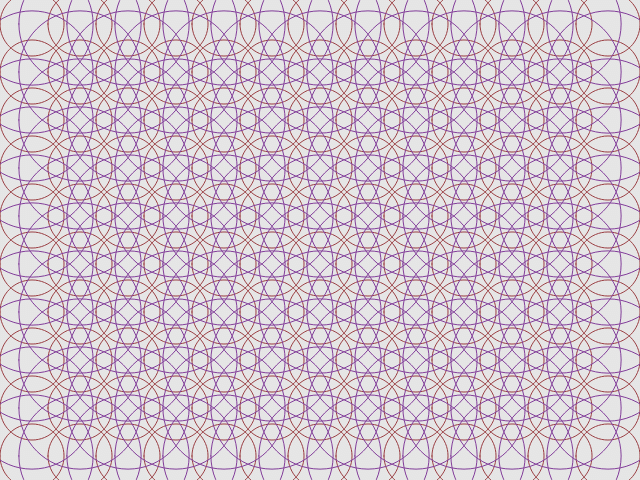
![]()
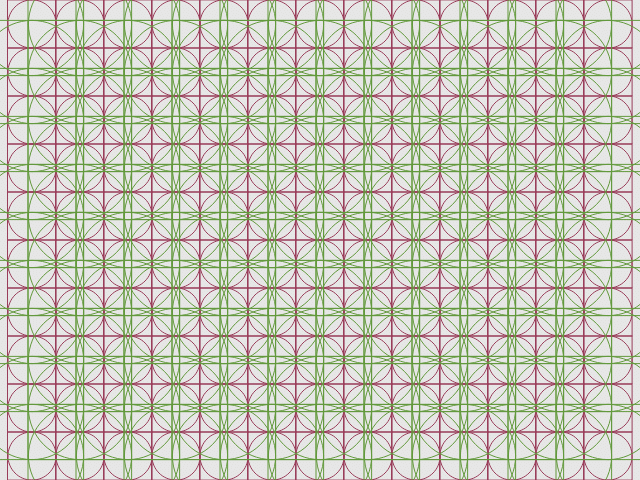
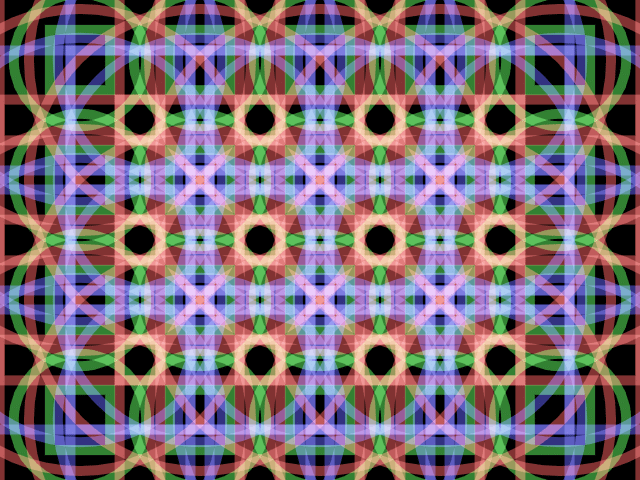
四角形も加えてみる
調子が出てきました!
『円を並べてみよう』と言っておきながら、調子に乗ってここに四角形も加えてみましょう。😆
circle(iX * cSize, iY * cSize, cSize * sizeRate);
rect(iX * cSize, iY * cSize, cSize * sizeRate, cSize * sizeRate);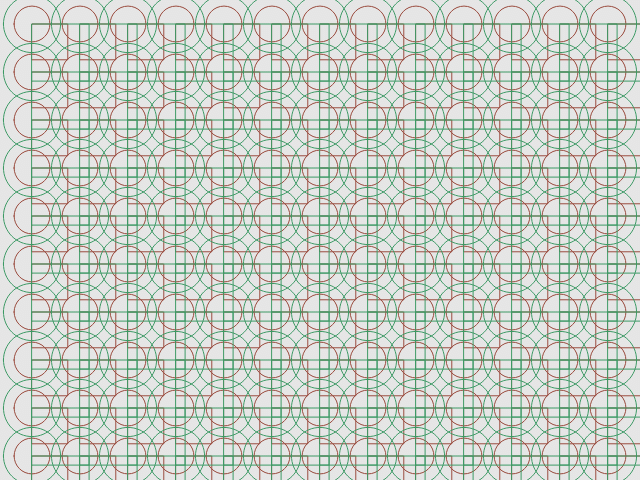
おっと、そのままだと円と四角で位置がずれてしまうので、 rectMode(CENTER) を入れましょう。
![]()
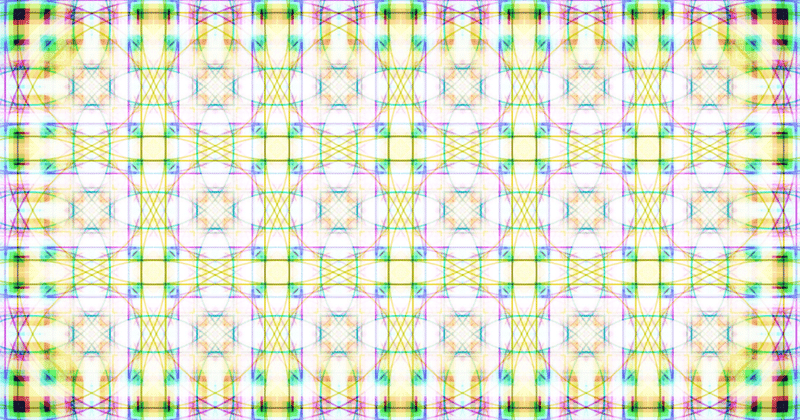
色の変化を楽しむ
最後に光の三原色(赤、緑、青)での作例を作ってみます。
3色しか使っていませんが、blendMode(SCREEN) を使うことで線が重なったところに様々な色が現れて綺麗ですよ。
/*
* A grid alignment of random size circles.
* three primary colors of light.
* This work is licensed under a Creative Commons Public Domain Mark 1.0 License.
*/

function setup() {
   createCanvas(640, 480);
   colorMode(HSB, 360, 100, 100, 100);
   rectMode(CENTER);
   noFill();
   strokeWeight(10);
   noLoop();
}

function draw() {

   // 何枚重ねるか
   const layers = 6;

   // キャンバス縦横どちらか最小の辺にちょうど収まるサイズを算出
   const minCells = 4;
   const cSize = min(width, height) / minCells;

   // 縦横の個数算出
   const xCells = floor(width / cSize);
   const yCells = floor(height / cSize);

   // 描画
   const xMargin = (width - (xCells - 1) * cSize) * 0.5;
   const yMargin = (height - (yCells - 1) * cSize) * 0.5;

   blendMode(BLEND);
   background(0, 0, 0, 100);
   blendMode(SCREEN);
   for (let i = 0; i < layers; i++) {
	 // サイズの倍率
	 let sizeRate = random(0.5, 3.0);
	 // 描画
	 push();
	 translate(xMargin, yMargin);
	 stroke((i * 120) % 360, 60, 50, 100);
	 for (let iX = 0; iX < xCells; iX++) {
	   for (let iY = 0; iY < yCells; iY++) {
	     if (i % 2 == 0) {
		   circle(iX * cSize, iY * cSize, cSize * sizeRate);
	     } else {
		   rect(iX * cSize, iY * cSize, cSize * sizeRate, cSize * sizeRate);
	     }
	   }
     }
     pop();
   }

}

function mouseClicked() {
   redraw();
}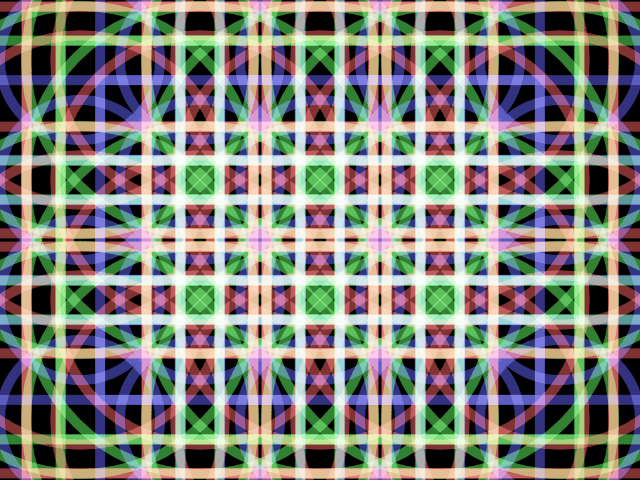
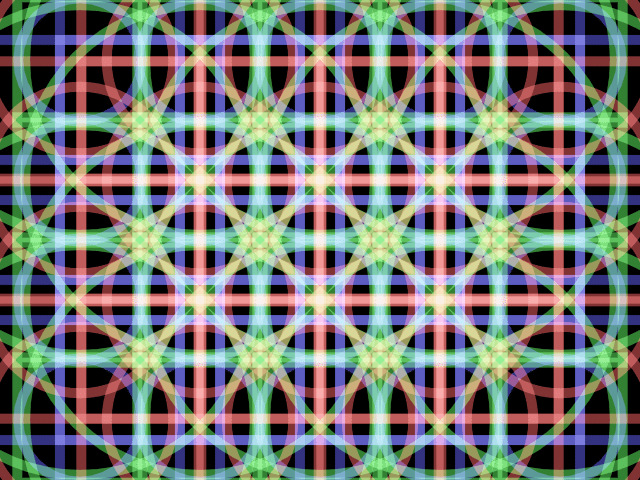
こんな感じで、ただ円を並べてみるだけでも結構いろいろ遊べますね。
最後の作例では blendMode() を使ったり、線の太さを変えたりしてみました。
blendMode() にもいろいろあるし、まだ fill() も試してないし、背景の色を変えても面白いかも知れません。重ねる数を変えてみたりとか、他にもいろいろ試してみる余地ありまくり! ぜひ遊んでみて下さい。💁♀️
![]()
🐦 Twitter でもいろいろ面白いの上げてるのでぜひフォローしてくださいね。
少女漫画雑誌の表紙の背景を作ってはいない。👸#p5js #processing pic.twitter.com/6NG6CGZ3y9
— deconbatch (@deconbatch) June 20, 2020
ここでこの記事はおしまいです。もしこの記事がお気に召しましたら投げ銭お願いします。😉✨
ここから先は
¥ 100
この記事が面白かったらサポートしていただけませんか? ぜんざい好きな私に、ぜんざいをお腹いっぱい食べさせてほしい。あなたのことを想いながら食べるから、ぜんざいサポートお願いね 💕