取引表示画面を作る

ということで、これからコーディングを始めていきます。
まずは取引表示画面を作っていきます。
「はじめまして。」の記事で以下のような画面例を出してみました。
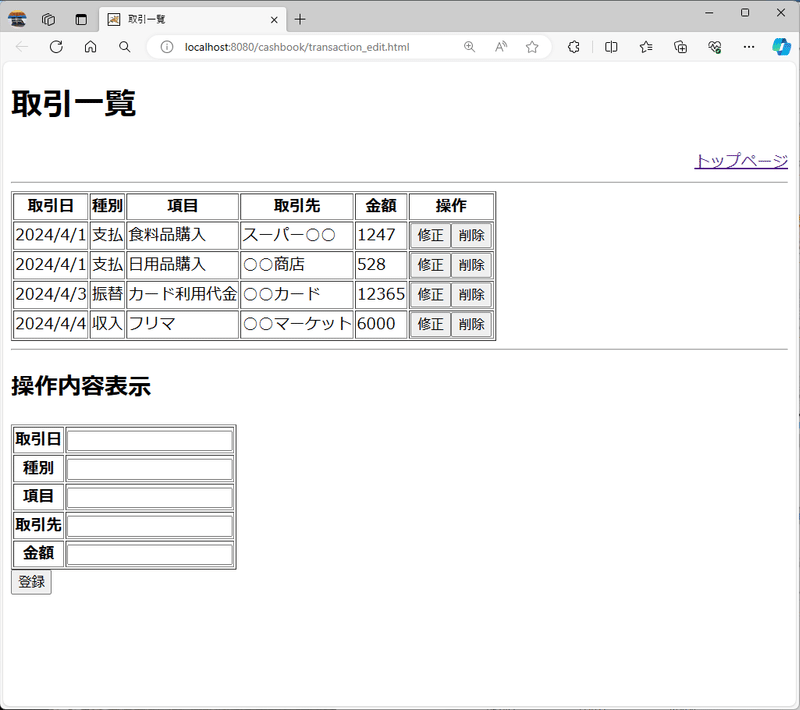
まずは画面上の取引一覧表を作っていこうと思います。
JSPファイルで表を動的に構成する場合には JSP Standard Tag Library (JSTL) の forEach タグを使用するのが定石になっています。
JSTLはJSPに機能タグを追加するもので、コレクションや配列といったオブジェクトの個々の要素をJSPで扱えるようにするものです。
JSTL の forEach タグを使用する場合、JSP ファイルの先頭、JSP ヘッダの直後に JSTL core を使用する宣言を記述します。
<%@ page language="java" contentType="text/html; charset=UTF-8"
    pageEncoding="UTF-8"%>
<%@ taglib prefix="c" uri="http://java.sun.com/jsp/jstl/core" %>
... 後略 ...
上の例の2行目、<%@ taglib … %> はタグを拡張するタグライブラリを使用する宣言で、prefix 属性はタグ名につけるプレフィックス、uri 属性はタグライブラリを特定するための URI を指定します。
上の例ですとプレフィックスに c、URI に JSTL core タグライブラリを使用するための URI が指定されているので、JSP 内で <c:forEach …> といった要素を記述すると JSTL core タグライブラリの forEach タグが選択されるという形になります (感覚的には xml の名前空間プレフィックスと同じようなものです)。
なお、JSTL は標準 Java ライブラリには含まれておらず、Tomcat のライブラリにも標準では含まれていないので、適当な場所からクラスライブラリをダウンロードして、Web アプリケーションに含める必要があります。
ダウンロードは Maven Central Repository から以下のものを取得します。
Home » jakarta.servlet.jsp.jstl » jakarta.servlet.jsp.jstl-api
> jakarta.servlet.jsp.jstl-api-3.0.0.jar
Home » org.glassfish.web » jakarta.servlet.jsp.jstl
> jakarta.servlet.jsp.jstl-impl-3.0.1.jar
これらのファイルを WEB-INF フォルダにある lib フォルダにコピーすることで JSTL が使用できるようになります。
なお、単に JSTL で検索を行うと JSTL 1.2 に対応したバージョンの jar ファイルが優先して検索されますが、これは今回使用している動的Webモジュールバージョン 6.0 と互換性がないため動作しません。
それでは取引一覧の表を作っていきます。
	<table border="1">
		<thead>
			<tr>
				<th>取引日</th>
				<th>種別</th>
				<th>項目</th>
				<th>取引先</th>
				<th>金額</th>
				<th>操作</th>
			</tr>
		</thead>
		<tbody>
			<c:forEach var="transaction" items="${transactionList}">
				<tr>
					<td>${transaction.date}</td>
					<td>${transaction.type}</td>
					<td>${transaction.description}</td>
					<td>${transaction.tradeTo}</td>
					<td>${transaction.amount}</td>
					<td>
						<form action="transaction_edit" method="post">
							<input type="hidden" name="id" value="${transaction.id}">
							<button>修正</button>
						</form>
						<form action="transaction_delete" method="post">
							<input type="hidden" name="id" value="${transaction.id}">
							<button>削除</button>
						</form>
					</td>
				</tr>
			</c:forEach>
		</tbody>
	</table>
前回、適当に取引情報を書いていたところを自動生成するように変更します。
<c:forEach var="transaction" items="${transactionList}"> … </c:forEach> は囲まれた内容を繰り返して出力する JSTL の記述方法となります。
HttpServletRequest オブジェクトに setAttribute メソッドで保存されたコレクションもしくは配列型のオブジェクトの属性名を items 属性の値として設定します。コレクションまたは配列の要素数だけ forEach 要素の内容が繰り返され、繰り返された内容からはコレクションまたは配列の各要素を var 属性の値で指定された名前で参照できるようになります。
上の例では transactionList に保存されたコレクションの各要素が transaction という名前で参照されて、テーブルの各行に値として出力されるようになっています。
また、「修正」と「削除」のボタンには非表示 (type="hidden") の入力要素 (<input>) を使用して、どの取引を修正・削除するかを指定できるようにしています。
さて、しれっと設計判断を行っているので、その辺も見ておきます。
JSTL の forEach では通常一つのコレクションまたは配列だけを扱うので、今回のように複数の値が並ぶ表を作る場合には各行の値を保持するクラスを準備する必要があります。
ということで取引情報を保持するクラスを用意しました。
package cashbook;

import java.time.LocalDate;

public class Transaction {
	private int id;
	private LocalDate date;
	private String type;
	private String description;
	private String tradeTo;
	private int amount;

	// アクセサ
	public int getId() {
		return id;
	}
	public void setId(int id) {
		this.id = id;
	}
	public LocalDate getDate() {
		return date;
	}
	public void setDate(LocalDate date) {
		this.date = date;
	}
	public String getType() {
		return type;
	}
	public void setType(String type) {
		this.type = type;
	}
	public String getDescription() {
		return description;
	}
	public void setDescription(String description) {
		this.description = description;
	}
	public String getTradeTo() {
		return tradeTo;
	}
	public void setTradeTo(String tradeTo) {
		this.tradeTo = tradeTo;
	}
	public int getAmount() {
		return amount;
	}
	public void setAmount(int amount) {
		this.amount = amount;
	}

}
ここではとりあえず値を保持して渡すだけでいいので、上に示した POJO (Plain Old Java Object) にしました。
また、取引情報の修正や削除には修正する取引情報を特定する必要がありますので、取引情報を特定するための ID を上の値保持用オブジェクトに持たせるとともに、JSP 上で非表示入力項目に反映させています。
ここで念のためテストを行うことにします。前回示した例と同じ取引情報を表示するテスト用のサーブレットを用意します。
とりあえずの動作確認ですので、取引情報のリストを用意して JSP ファイルにフォワードするだけのコードです。
package cashbook;

import java.io.IOException;
import java.time.LocalDate;
import java.util.ArrayList;
import java.util.List;

import jakarta.servlet.RequestDispatcher;
import jakarta.servlet.ServletException;
import jakarta.servlet.http.HttpServlet;
import jakarta.servlet.http.HttpServletRequest;
import jakarta.servlet.http.HttpServletResponse;

/**
 * Servlet implementation class TestTransactionShowJsp
 */
public class TestTransactionShowJsp extends HttpServlet {
	private static final long serialVersionUID = 1L;

    /**
     * @see HttpServlet#HttpServlet()
     */
    public TestTransactionShowJsp() {
        super();
        // TODO Auto-generated constructor stub
    }

	/**
	 * @see HttpServlet#doGet(HttpServletRequest request, HttpServletResponse response)
	 */
	protected void doGet(HttpServletRequest request, HttpServletResponse response) throws ServletException, IOException {
		List<Transaction> transactionList = new ArrayList<>();
		Transaction transaction = new Transaction();
		transaction.setId(1);
		transaction.setDate(LocalDate.of(2024, 4, 1));
		transaction.setType("支払");
		transaction.setDescription("食料品購入");
		transaction.setTradeTo("スーパー○○");
		transaction.setAmount(1247);
		transactionList.add(transaction);
		transaction = new Transaction();
		transaction.setId(3);
		transaction.setDate(LocalDate.of(2024, 4, 1));
		transaction.setType("支払");
		transaction.setDescription("日用品購入");
		transaction.setTradeTo("○○商店");
		transaction.setAmount(528);
		transactionList.add(transaction);
		transaction = new Transaction();
		transaction.setId(17);
		transaction.setDate(LocalDate.of(2024, 4, 3));
		transaction.setType("振替");
		transaction.setDescription("カード利用代金");
		transaction.setTradeTo("○○カード");
		transaction.setAmount(12365);
		transactionList.add(transaction);
		transaction = new Transaction();
		transaction.setId(6);
		transaction.setDate(LocalDate.of(2024, 4, 4));
		transaction.setType("収入");
		transaction.setDescription("フリマ");
		transaction.setTradeTo("○○マーケット");
		transaction.setAmount(6000);
		transactionList.add(transaction);
		request.setAttribute("transactionList", transactionList);
		RequestDispatcher rd = request.getRequestDispatcher("transaction_show.jsp");
		rd.forward(request, response);
	}

	/**
	 * @see HttpServlet#doPost(HttpServletRequest request, HttpServletResponse response)
	 */
	protected void doPost(HttpServletRequest request, HttpServletResponse response) throws ServletException, IOException {
		// TODO Auto-generated method stub
		doGet(request, response);
	}

}
これを実行して、表示の確認とページのソースを表示して hidden 属性でしていた値の確認を行います。
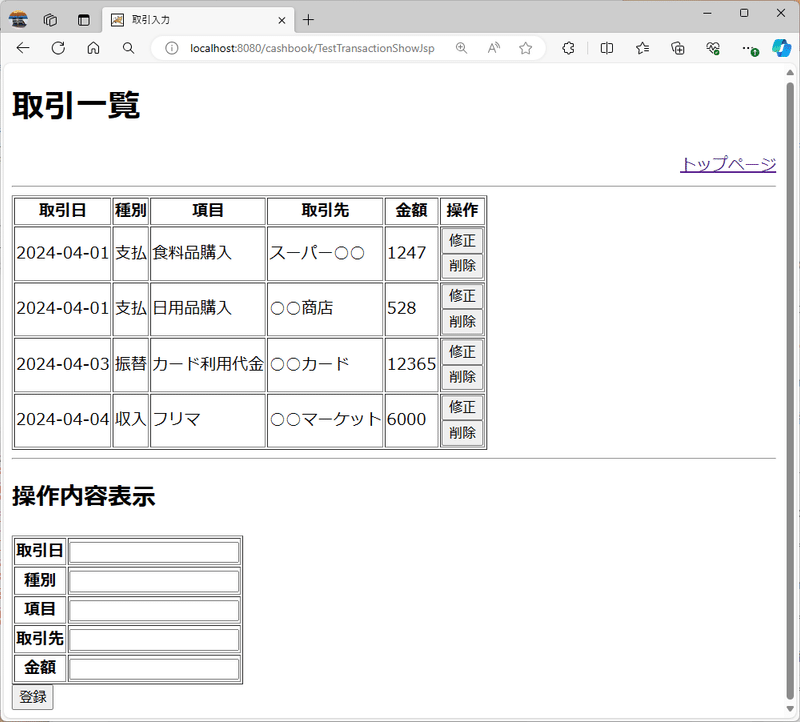
何となくそれらしくできていますが、ボタンが前回の例のように横並びではなく縦並びとなってしまいました。
この辺は後ほど直すということにします。
続いて入力部分を作っていきます。
といってもあまり難しいところはなく、入力用の表をformで囲って、各入力項目にname属性を付加するだけです。
	<form action="transaction_add" method="post">
		<table border="1">
			<tr>
				<th>取引日</th>
				<td><input type="text" name="date"></td>
			</tr>
			<tr>
				<th>種別</th>
				<td><input type="text" name="type"></td>
			</tr>
			<tr>
				<th>項目</th>
				<td><input type="text" name="description"></td>
			</tr>
			<tr>
				<th>取引先</th>
				<td><input type="text" name="tradeTo"></td>
			</tr>
			<tr>
				<th>金額</th>
				<td><input type="text" name="amount"></td>
			</tr>
		</table>
		<button>登録</button>
	</form>
さて、ここで入力項目がきちんとコーディングされているかを確認したいと思います。そのために入力されたパラメータを表示するだけのサーブレットを作ってみました。
package cashbook;

import java.io.IOException;
import java.io.PrintWriter;
import java.util.Enumeration;

import jakarta.servlet.ServletException;
import jakarta.servlet.http.HttpServlet;
import jakarta.servlet.http.HttpServletRequest;
import jakarta.servlet.http.HttpServletResponse;

/**
 * Servlet implementation class TestParameters
 */
public class TestParameters extends HttpServlet {
	private static final long serialVersionUID = 1L;

    /**
     * @see HttpServlet#HttpServlet()
     */
    public TestParameters() {
        super();
        // TODO Auto-generated constructor stub
    }

	/**
	 * @see HttpServlet#doGet(HttpServletRequest request, HttpServletResponse response)
	 */
	protected void doGet(HttpServletRequest request, HttpServletResponse response) throws ServletException, IOException {
		Enumeration<String> parameterNames = request.getParameterNames();
		PrintWriter writer = response.getWriter();
		writer.println("<!DOCTYPE html>");
		writer.println("<html lang='ja'>");
		writer.println("<head>");
		writer.println("<meta charset='utf-8'>");
		writer.println("<title>パラメータ一覧</title>");
		writer.println("</head>");
		writer.println("<body>");
		writer.println("<h1>パラメータ一覧</h1>");
		writer.println("<p>" + request.getRequestURI() + "</p>");
		writer.println("<hr>");
		writer.println("<table border='1'>");
		writer.println("<tr>");
		writer.println("<th>名前</th>");
		writer.println("<th>値</th>");
		writer.println("</tr>");
		while (parameterNames.hasMoreElements()) {
			String name = parameterNames.nextElement();
			String value = request.getParameter(name);
			writer.println("<tr>");
			writer.println("<td>" + name + "</td>");
			writer.println("<td>" + value + "</td>");
			writer.println("</tr>");
		}
		writer.println("</table>");
		writer.println("</body>");
		writer.println("</html>");
	}

	/**
	 * @see HttpServlet#doPost(HttpServletRequest request, HttpServletResponse response)
	 */
	protected void doPost(HttpServletRequest request, HttpServletResponse response) throws ServletException, IOException {
		// TODO Auto-generated method stub
		doGet(request, response);
	}

}
見た通り入力されたパラメータのパラメータ名と入力された値を表示するだけのサーブレットです。
これを使うことでパラメータ名が間違っていないか、パラメータと値の関係が正しいかを目視でですけど確認することができます。
JSPとサーブレットとの間はパラメータ名が文字列で渡されるため、パラメータ名や属性名の間違いがあると期待通りの入力、表示が行われません。
ある程度プログラムができてくると表示されない、入力がされないといった現象の原因を特定することが難しくなります。
ので、今回のように簡単なテスト用サーブレットを作成して、JSP単体で確認を行うことが大切と考えています。
ということで、今回はJSPを作ったところで終わりにし、次回はサーブレットの作成に進みたいと思います。
この記事が気に入ったらサポートをしてみませんか?