ビットコインの自動売買アプリの作り方 (うねり取り売買が出来るまで) ②【価格取得編】

Visual Studio 2017を起動
Visual Studio 2017をクリックします。

フォーム画面の作成
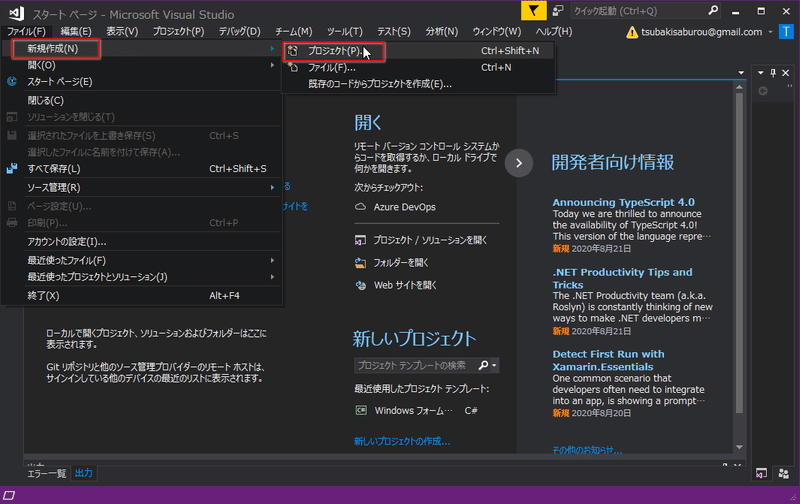
[ファイル] > [新規作成] > [プロジェクト] の順にクリック
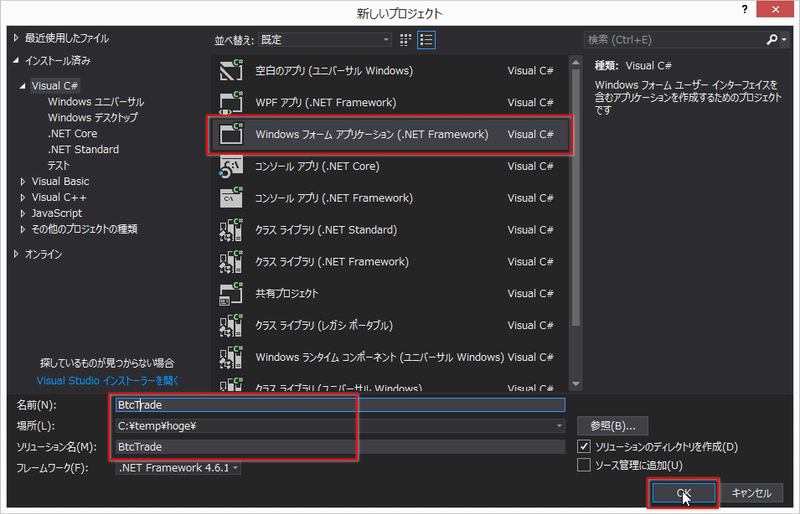
左上の[Visual C#]を選択し、[Windows フォームアプリケーション(.NET Framework)を選択。
下部の[名前][場所][ソリューション]は任意ですが、初めての方同じ値にした方が無難です。
名前:BtcTrade
場所:C:¥temp¥hoge¥
ソリューション名:BtcTrade
[フレームワーク]は変更なしです。
[OK]ボタンをクリック。
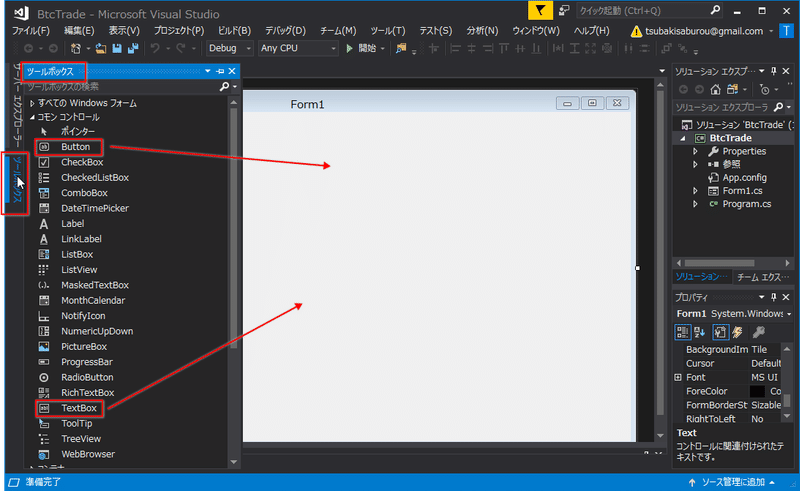
ツールボックスから[Button]と[TextBox]をフォームへドラッグ。
(ツールボックスが見つからなければ[表示] > [ツールボックス]
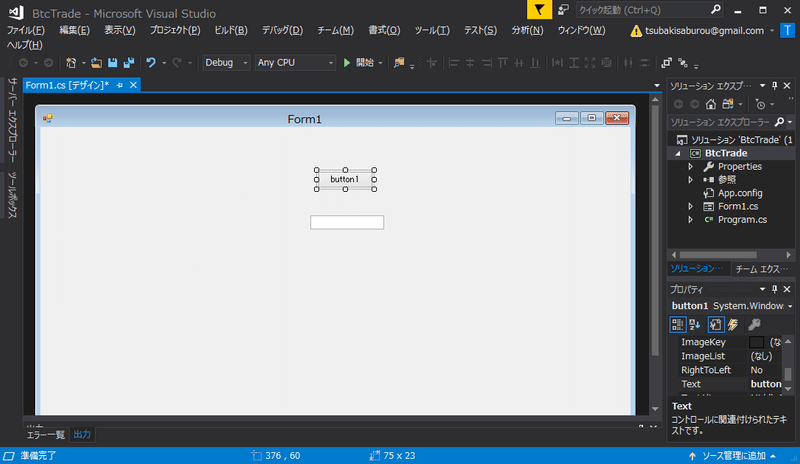
こんな感じの画面が出来上がります。
bitFlyer から提供される APIを利用
bitFlyerはビットコインの自動売買を作る為の部品を無償で提供してます。その部品をAPIと言います。APIはbitFlyer Lightning API Playgroundから確認できます。
最終価格を取得できる部品は Get /v1/ticker です。
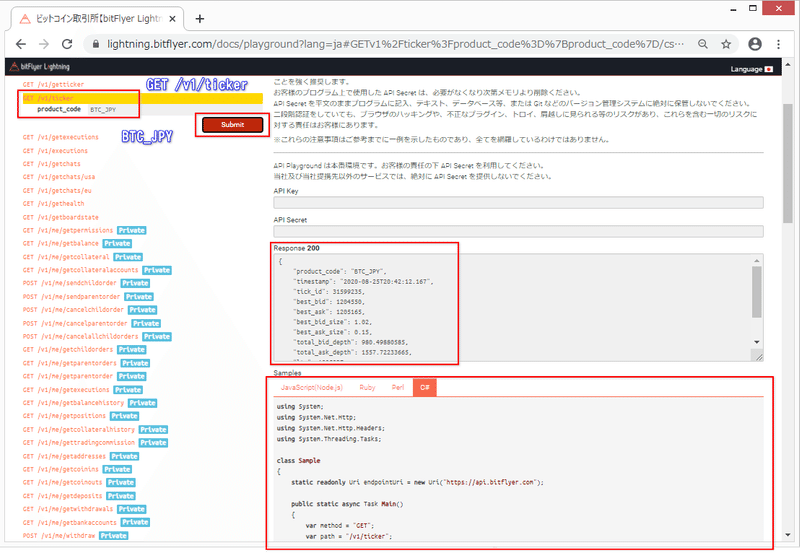
[Submit]ボタンをクリックすると受け取れる値が[Response 200]の欄に表示されます。"ltp"が最終取引価格になります。それ以外にも現在日時("timestamp")なども取得できることが分かります。
{
   "product_code": "BTC_JPY",
   "timestamp": "2020-08-29T01:19:06.317",
   "tick_id": 2618074,
   "best_bid": 1212042,
   "best_ask": 1212599,
   "best_bid_size": 0.002,
   "best_ask_size": 0.3379,
   "total_bid_depth": 870.04651798,
   "total_ask_depth": 1540.47373917,
   "ltp": 1212511,
   "volume": 82828.38177294,
   "volume_by_product": 3294.92454207
}
[Samples] > [C#] に利用できるサンプルソースが確認できます。
using System;
using System.Net.Http;
using System.Net.Http.Headers;
using System.Threading.Tasks;

class Sample
{
   static readonly Uri endpointUri = new Uri("https://api.bitflyer.com");

   public static async Task Main()
   {
       var method = "GET";
       var path = "/v1/ticker";
       var query = "";

       using (var client = new HttpClient())
       using (var request = new HttpRequestMessage(new HttpMethod(method), path + query))
       {
           client.BaseAddress = endpointUri;
           var message = await client.SendAsync(request);
           var response = await message.Content.ReadAsStringAsync();

           Console.WriteLine(response);
       }
   }
}
ボタンを押して 現在値(最終取引価格)を取得するC#コード
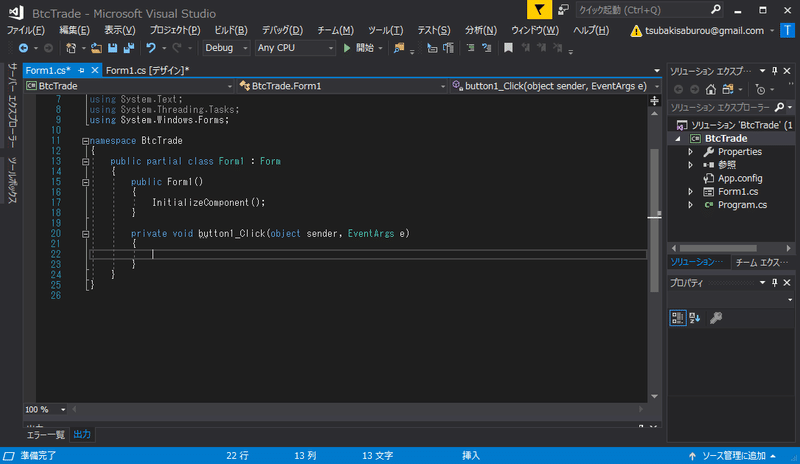
フォームに作成した[button1]をダブルクリック。
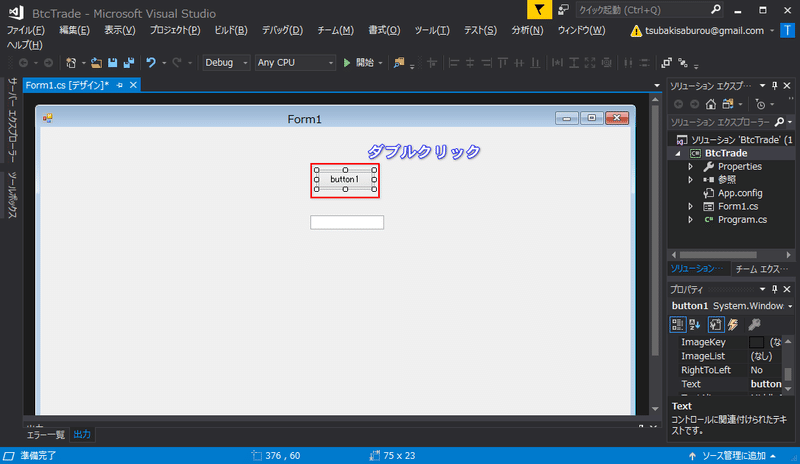
[button1]がクリックされた時のコードが自動生成されます。
bitFlyerのAPIで受け取るデータは以下の形式です。必要な値は"ltp"(最終取引価格)の為、分解し必要な部分のみ取得するようにします。
このようなデータ形式をJSON形式と言います。
{
"product_code": "BTC_JPY",
"timestamp": "2020-08-29T01:19:06.317",
"tick_id": 2618074,
"best_bid": 1212042,
"best_ask": 1212599,
"best_bid_size": 0.002,
"best_ask_size": 0.3379,
"total_bid_depth": 870.04651798,
"total_ask_depth": 1540.47373917,
"ltp": 1212511, /* ← 必要な値(最終取引価格)*/
"volume": 82828.38177294,
"volume_by_product": 3294.92454207
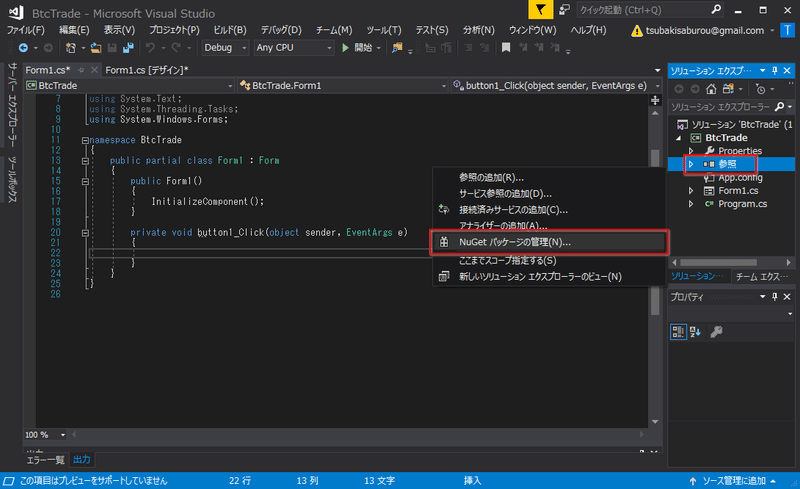
}JSON形式のデータを分解/利用できるパッケージをインストールします。
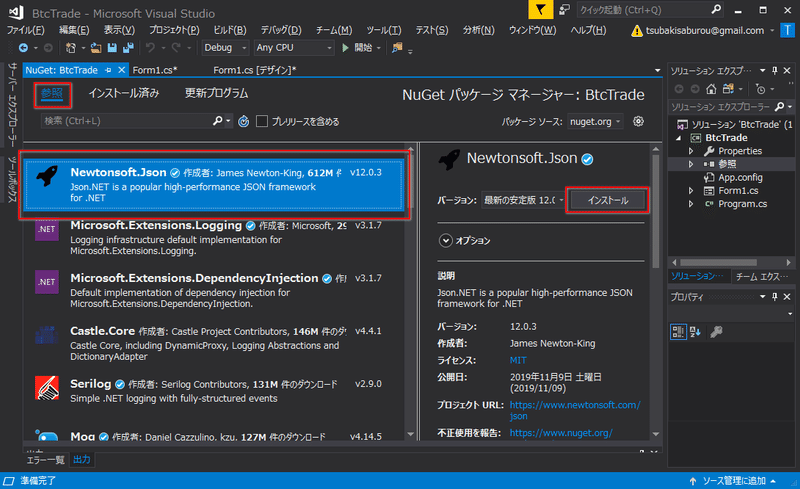
[ソリューション エクスプローラー] > [参照] > [Nugetパッケージの管理]をクリック。
左上の[参照]を選択、[Newtonsoft_Json]を選択して[インストール]をクリック。
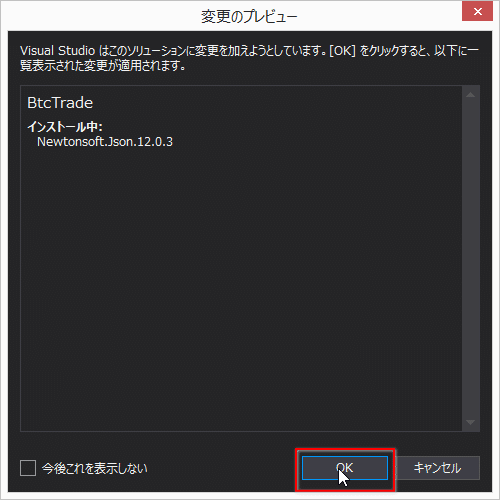
[OK]ボタンをクリック。
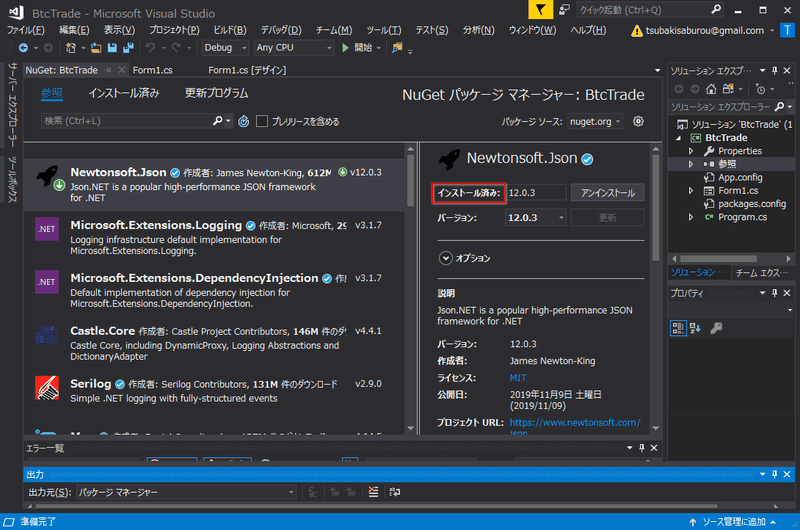
[インストール済み]と表示されます。
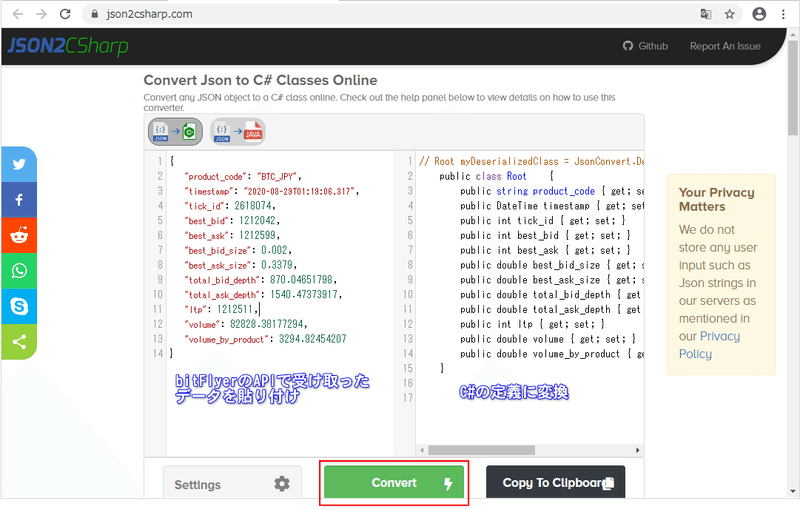
JSON形式のデータを分解/使用できるように、C#の定義に変換してくれる便利なサイト(JSON2CSharp)があります。このサイトを利用してbitFlyerのAPIで受け取るJSON形式のデータをC#の定義に変換します。
bitFlyerのAPIで受け取ったデータ
{
   "product_code": "BTC_JPY",
   "timestamp": "2020-08-29T01:19:06.317",
   "tick_id": 2618074,
   "best_bid": 1212042,
   "best_ask": 1212599,
   "best_bid_size": 0.002,
   "best_ask_size": 0.3379,
   "total_bid_depth": 870.04651798,
   "total_ask_depth": 1540.47373917,
   "ltp": 1212511,
   "volume": 82828.38177294,
   "volume_by_product": 3294.92454207
}JSON2CSharpのサイトで変換
    public class Root    {
       public string product_code { get; set; }
       public DateTime timestamp { get; set; }
       public int tick_id { get; set; }
       public int best_bid { get; set; }
       public int best_ask { get; set; }
       public double best_bid_size { get; set; }
       public double best_ask_size { get; set; }
       public double total_bid_depth { get; set; }
       public double total_ask_depth { get; set; }
       public int ltp { get; set; }
       public double volume { get; set; }
       public double volume_by_product { get; set; }
   }
左側の欄にbitFlyerのAPIで受け取ったデータを貼り付けて、[Convert]ボタンをクリックすると、右側の欄にC#の定義が表示される。
bifFlyerのAPIのサンプルコード、JSON2CSharpのサイトで取得したJsonデータの定義を元に作成したコード。
ソリューション名が同じであればForm1.csファイルにコピペすれば動作します。
using System;
using System.Collections.Generic;
using System.ComponentModel;
using System.Data;
using System.Drawing;
using System.Linq;
using System.Text;
using System.Threading.Tasks;
using System.Windows.Forms;
using System.Net.Http; // biFlyer API Sample Code
using System.Net.Http.Headers; // biFlyer API Sample Code
using Newtonsoft.Json; // Newtonsoft

namespace BtcTrade
{
   public partial class Form1 : Form
   {
       // Json C#の定義 start ▼▼▼▼▼
       public class JsonTicker
       {
           public string product_code { get; set; }
           public DateTime timestamp { get; set; }
           public int tick_id { get; set; }
           public double best_bid { get; set; }
           public double best_ask { get; set; }
           public double best_bid_size { get; set; }
           public double best_ask_size { get; set; }
           public double total_bid_depth { get; set; }
           public double total_ask_depth { get; set; }
           public double ltp { get; set; }
           public double volume { get; set; }
           public double volume_by_product { get; set; }
       }
       // Json C#の定義 end ▲▲▲▲▲

       // bitFlyer API Sample Code start ▼▼▼▼▼
       static readonly Uri endpointUri = new Uri("https://api.bitflyer.com");

       // public static async Task Main()
       public async Task GetBtcPrice() // "static"を削除、"Main"から"GetBtcPrice"に変更
       {
           var method = "GET";
           var path = "/v1/ticker";
           var query = "?product_code=BTC_JPY"; // "?product_code=BTC_JPY"を設定

           using (var client = new HttpClient())
           using (var request = new HttpRequestMessage(new HttpMethod(method), path + query))
           {
               client.BaseAddress = endpointUri;
               var message = await client.SendAsync(request);
               var response = await message.Content.ReadAsStringAsync();

               //Console.WriteLine(response);
               var DesirializedResponse = JsonConvert.DeserializeObject<JsonTicker>(response); // Json形式に変換
               textBox1.Text = "価格:" + DesirializedResponse.ltp; // Jsonデータを分解し、最終取引価格をテキストボックスに表示
           }
       }
       // bitFlyer API Sample Code end ▲▲▲▲▲

       public Form1()
       {
           InitializeComponent();
       }

       private void button1_Click(object sender, EventArgs e)
       {
           Task task1 = GetBtcPrice(); // ボタンがクリックされた時に、処理を呼び出し
       }
   }
}
Form1.csのファイル
プログラムを実行
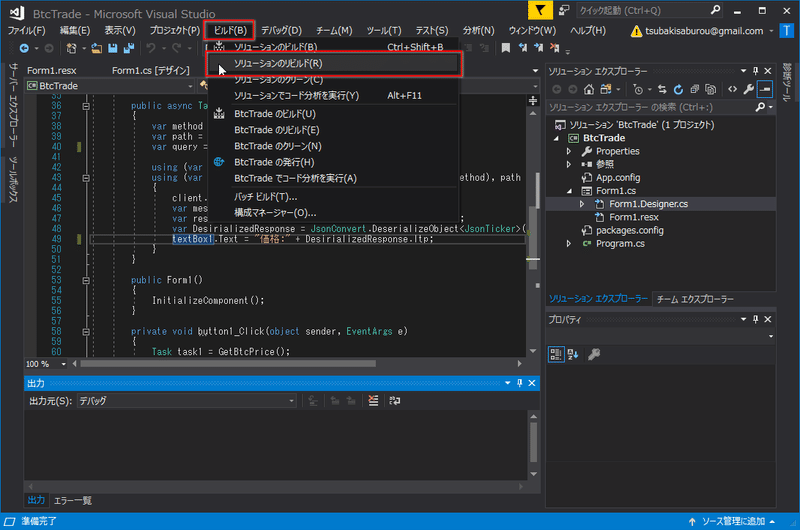
[ビルド] > [ソリューションのリビルド]をクリック
コードに問題が無ければ、出力蘭に以下の内容が表示
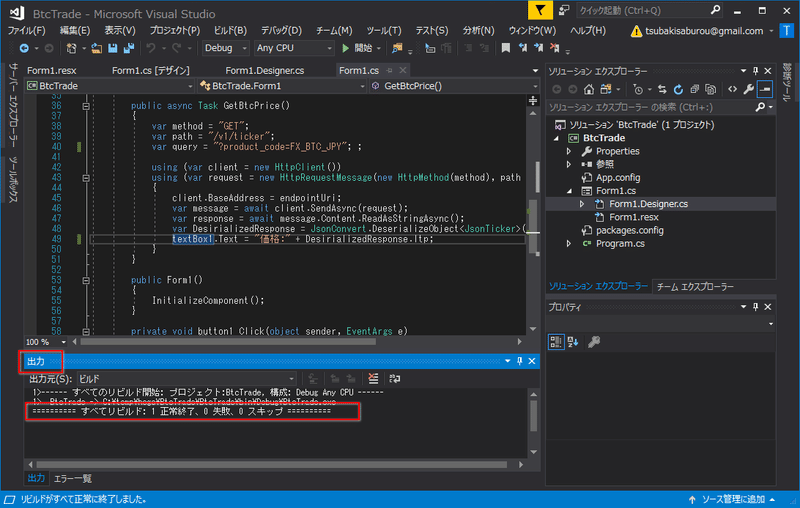
1>------ すべてのリビルド開始: プロジェクト:BtcTrade, 構成: Debug Any CPU ------
1> BtcTrade -> C:\temp\hoge\BtcTrade\BtcTrade\bin\Debug\BtcTrade.exe
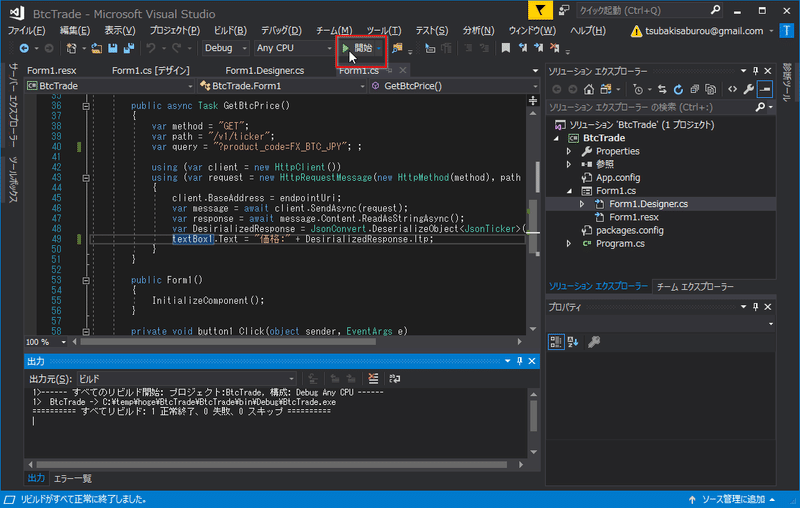
========== すべてリビルド: 1 正常終了、0 失敗、0 スキップ ==========[実行]ボタンをクリック
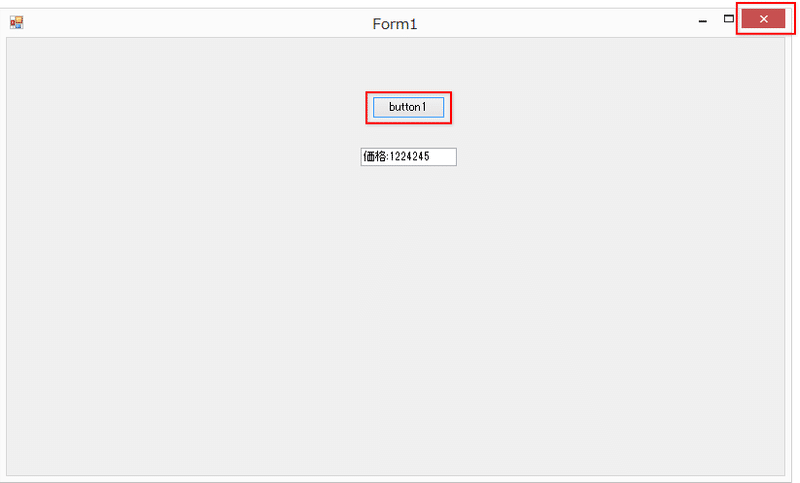
フォーム画面が表示されます。[button1]をクリックすると、最新価格が表示されます。フォームを終了する場合は右上の[×]をクリック。
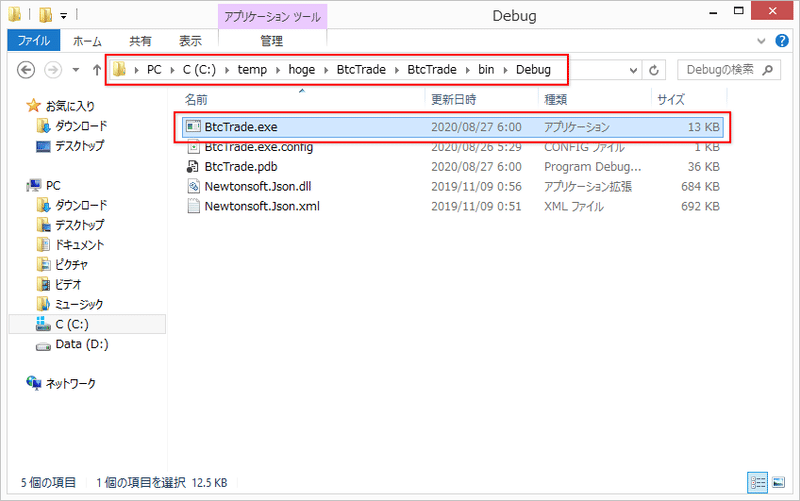
実行ファイル(EXEファイル)は、「...¥bin¥Debug」にあります。
このファイルをクリックするとアプリが実行されます。
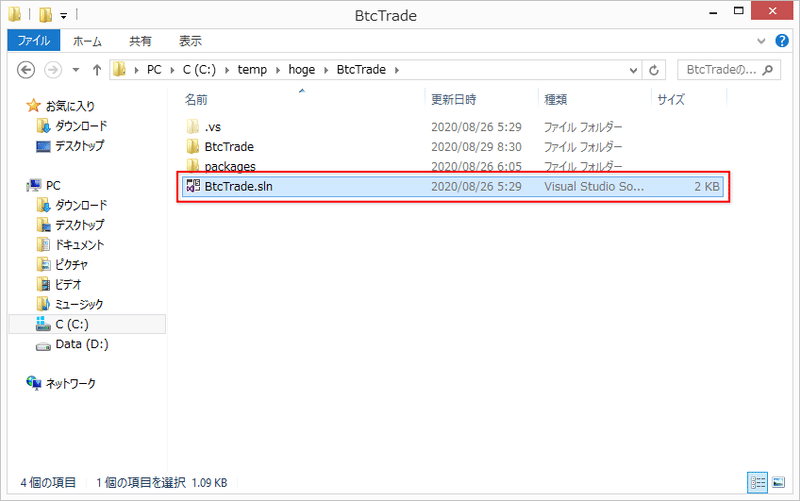
Visual Studioを再度立ち上げて作業の続きを行いたい場合は、slnファイル(ソリューションファイル)をクリックすることで、Visual Studioが立ち上がります。
この記事が気に入ったらサポートをしてみませんか?