UnityでAndroid/iOSのギャラリーを操作する方法

UnityでAndroid/iOSのギャラリーを操作する方法をまとめました。
1. Native Gallery for Android & iOS
UnityでAndroid/iOSのギャラリーを操作するには、「Native Gallery for Android & iOS」が便利です。
主な機能は、次の2つです。
・画像/動画をギャラリーに保存
・画像/動画をギャラリーから読み込む
2. セットアップ
セットアップ手順は次のとおりです。
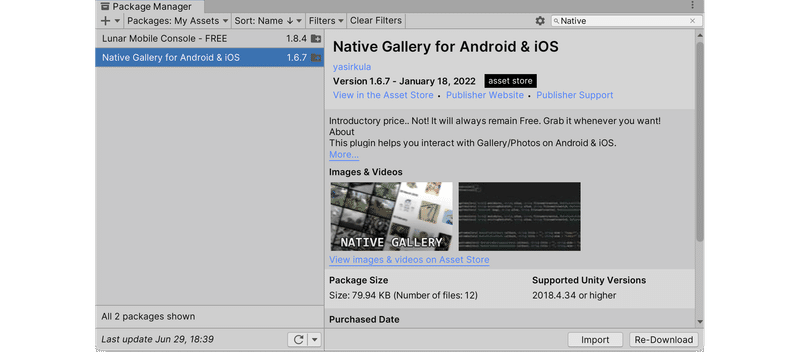
◎ パッケージのインポート
AssetStoreから「Native Gallery for Android & iOS」をインポート。
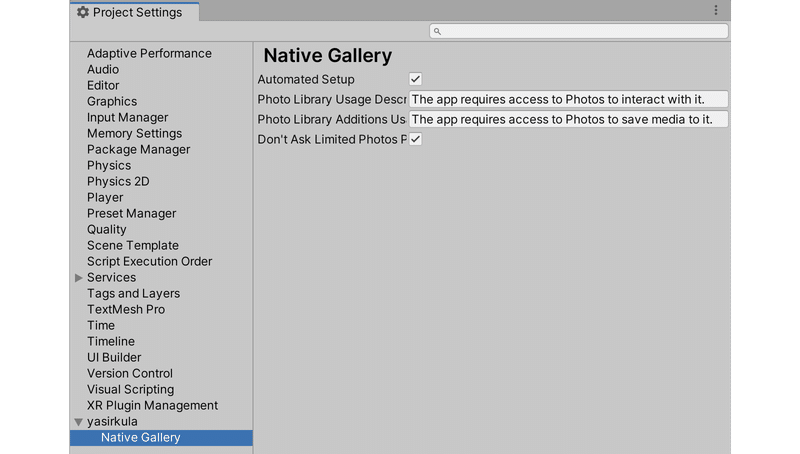
◎ iOSのセットアップ
メニュー「Edit → Project Settings → yasirkula → Native Gallery」で、以下の説明を編集。(そのままでもOK)
・Photo Library Usage Description : 写真/動画の読み込み時の説明文
・Photo Library Additions Usage Description : 写真/動画の保存時の説明文
◎ Androidのセットアップ
「Player Settings」で「Write Permission」を「External (SDCard)」に変更。
3. 画像をギャラリーに保存
画面をタップすることで、画像(スクリーンショット)をギャラリーに保存するアプリを作成します。
(1) Unityのプロジェクトを作成。
(2) Hierarchyウィンドウに空GameObjectを配置し、新規スクリプト「Main.cs」を追加し、以下のように編集。
using System.Collections;
using System.Collections.Generic;
using UnityEngine;

public class Main : MonoBehaviour
{
    void Update()
    {
        // タッチ時に呼ばれる
        if (Input.GetMouseButtonDown(0))
        {
            // スクリーンショットをギャラリーに保存
            StartCoroutine(TakeScreenshotAndSave());
        }
    }

    // スクリーンショットをギャラリーに保存
    private IEnumerator TakeScreenshotAndSave()
    {
        yield return new WaitForEndOfFrame();

        // スクリーンショットの取得
        Texture2D ss = new Texture2D(Screen.width, Screen.height, TextureFormat.RGB24, false);
        ss.ReadPixels(new Rect(0, 0, Screen.width, Screen.height), 0, 0);
        ss.Apply();

        // スクリーンショットをギャラリーに保存
        NativeGallery.Permission permission = NativeGallery.SaveImageToGallery(
            ss, "GalleryTest", "Image.png",
            ( success, path ) => Debug.Log( "Media save result: " + success + " " + path )
        );
        Debug.Log("Permission result: " + permission);

        // メモリリークの回避
        Destroy( ss );
    }
}
(3) Android/iOSでアプリを起動し、画面をタップ。
スクリーンショットがギャラリーに保存されます。

4. 画像をギャラリーから読み込む
画面をタップすることで、ギャラリーを呼び出し、選択した画像を画面に表示するアプリを作成します。
(1) Unityのプロジェクトを作成。
(2) HierarchyウィンドウにRawImageを配置し、位置を調整。
(3) Hierarchyウィンドウに空GameObjectを配置し、新規スクリプト「Main.cs」を追加し、以下のように編集。
using System.Collections;
using System.Collections.Generic;
using UnityEngine;
using UnityEngine.UI;

public class Main : MonoBehaviour
{
    public RawImage rawImage;

    void Update()
    {
        // タッチ時に呼ばれる
        if (Input.GetMouseButtonDown(0))
        {
            // 別のメディア選択操作がすでに進行中の場合
            if(NativeGallery.IsMediaPickerBusy())
                return;

            // 画像の読み込み (512ピクセル以上の場合は縮小)
            PickImage( 512 );
        }
    }

    // 画像の読み込み
    private void PickImage(int maxSize)
    {
        // 画像の読み込み
        NativeGallery.Permission permission = NativeGallery.GetImageFromGallery((path) =>
        {
            Debug.Log("Image path: " + path);
            if (path != null)
            {
                // 画像パスからTexture2Dを生成
                Texture2D texture = NativeGallery.LoadImageAtPath(path, maxSize);
                if( texture == null )
                {
                    Debug.Log("Couldn't load texture from " + path);
                    return;
                }

                // RawImageの元テクスチャを破棄
                Destroy(rawImage.texture);

                // RawImageで新規テクスチャを表示
                rawImage.texture = texture;
            }
        } );
        Debug.Log( "Permission result: " + permission );
    }
}
(4) MainのRawImage属性に配置したRawImageを関連付け。
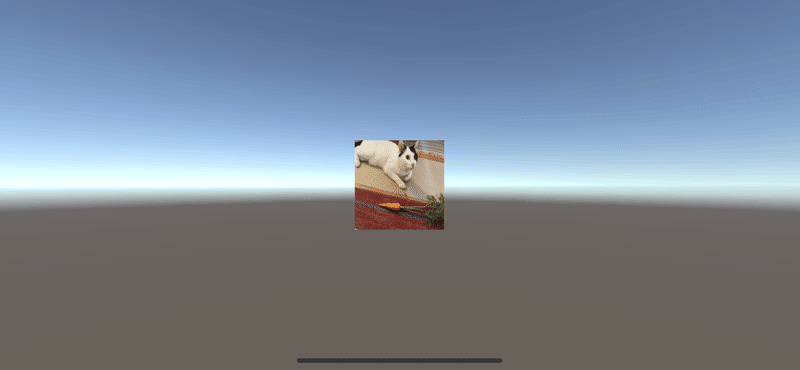
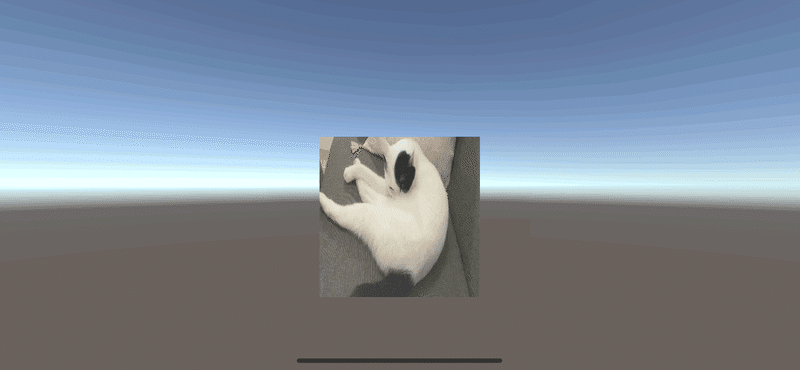
(5) Android/iOSでアプリを起動し、画面をタップし、ギャラリーで写真を選択。
読み込んだ写真が表示されます。
5. 動画をギャラリーから読み込む
画面をタップすることで、ギャラリーを呼び出し、選択した動画を画面に表示するアプリを作成します。
(1) Unityのプロジェクトを作成。
(2) HierarchyウィンドウにPlaneを配置し、VideoPlayerを追加し、位置を調整。
(3) Hierarchyウィンドウに空GameObjectを配置し、新規スクリプト「Main.cs」を追加し、以下のように編集。
using System.Collections;
using System.Collections.Generic;
using UnityEngine;
using UnityEngine.Video;

public class Main : MonoBehaviour
{
    public VideoPlayer videoPlayer;

    void Update()
    {
        // タッチ時に呼ばれる
        if (Input.GetMouseButtonDown(0))
        {
            // 別のメディア選択操作がすでに進行中の場合
            if (NativeGallery.IsMediaPickerBusy())
                return;

            // 動画の読み込みと再生
            PickVideo();
        }
    }

    // 動画の読み込みと再生
    private void PickVideo()
    {
        NativeGallery.Permission permission = NativeGallery.GetVideoFromGallery((path) =>
        {
            Debug.Log("Video path: " + path);
            if (path != null)
            {
                // 動画の再生
                videoPlayer.url = path;
                videoPlayer.Play();
            }
        }, "Select a video" );
        Debug.Log( "Permission result: " + permission );
    }
}
(4) MainのVideoPlayer属性に配置したVideoPlayerを関連付け。
(5) Android/iOSでアプリを起動し、画面をタップし、ギャラリーで動画を選択。
読み込んだ動画が表示されます。
この記事が気に入ったらサポートをしてみませんか?