爆速でチョクメを作るための前座のAmplifyのチュートリアル
爆速でチョクメを作成します。Web画面のベースを作ってとりあえずテンションを上げる作戦。
メール送信/受信
(まだ未着手なのでできたらリンク貼ります)
画面
AmplifyのTODOを参考にします。今回はclassmethodを参考にするのでReact使います
Cloud9で準備します
$npm install -g @aws-amplify/cli


npm notice New minor version of npm available! 8.1.2 -> 8.3.1
npm notice Changelog: https://github.com/npm/cli/releases/tag/v8.3.1
npm notice Run npm install -g npm@8.3.1 to update!
npm notice


$ npm audit fix

up to date, audited 4 packages in 1s

found 0 vulnerabilities
installとIAMユーザを作成
$ amplify configure
Follow these steps to set up access to your AWS account:

Sign in to your AWS administrator account:
https://console.aws.amazon.com/
Press Enter to continue

Specify the AWS Region
? region:  ap-northeast-1
Specify the username of the new IAM user:
? user name:  amplify
Complete the user creation using the AWS console
https://console.aws.amazon.com/iam/home?region=ap-northeast-1#/users$new?step=final&accessKey&userNames=amplify&permissionType=policies&policies=arn:aws:iam::aws:policy%2FAdministratorAccess-Amplify
Press Enter to continue

Enter the access key of the newly created user:
? accessKeyId:  ********************
? secretAccessKey:  ****************************************
This would update/create the AWS Profile in your local machine
? Profile Name:  chokume

Successfully set up the new user.
$
Amplify用のユーザがあるように見える・・・TODOアプリ作るなら権限強いAdministratorAccessがいいのか?とりあえずAdministratorAccessは与えない
$ npx create-react-app chokume
$ cd chokume


 $ amplify init
Note: It is recommended to run this command from the root of your app directory
? Enter a name for the project chokume
The following configuration will be applied:

Project information
| Name: chokume
| Environment: dev
| Default editor: Visual Studio Code
| App type: javascript
| Javascript framework: react
| Source Directory Path: src
| Distribution Directory Path: build
| Build Command: npm run-script build
| Start Command: npm run-script start

? Initialize the project with the above configuration? Yes
Using default provider  awscloudformation
? Select the authentication method you want to use: AWS access keys
? accessKeyId:  ********************
? secretAccessKey:  ****************************************
? region:  ap-northeast-1
Adding backend environment dev to AWS Amplify app: XXXXXXXXXXXXX
⠦ Initializing project in the cloud...

CREATE_IN_PROGRESS amplify-chokume-dev-XXXXX AWS::CloudFormation::Stack Sun Jan 16 2022 06:14:30 GMT+0000 (Coordinated Universal Time) User Initiated
CREATE_IN_PROGRESS AuthRole                  AWS::IAM::Role             Sun Jan 16 2022 06:14:34 GMT+0000 (Coordinated Universal Time)
CREATE_IN_PROGRESS DeploymentBucket          AWS::S3::Bucket            Sun Jan 16 2022 06:14:34 GMT+0000 (Coordinated Universal Time)
CREATE_IN_PROGRESS UnauthRole                AWS::IAM::Role             Sun Jan 16 2022 06:14:35 GMT+0000 (Coordinated Universal Time)
⠏ Initializing project in the cloud...

CREATE_IN_PROGRESS AuthRole         AWS::IAM::Role  Sun Jan 16 2022 06:14:36 GMT+0000 (Coordinated Universal Time) Resource creation Initiated
CREATE_IN_PROGRESS UnauthRole       AWS::IAM::Role  Sun Jan 16 2022 06:14:37 GMT+0000 (Coordinated Universal Time) Resource creation Initiated
CREATE_IN_PROGRESS DeploymentBucket AWS::S3::Bucket Sun Jan 16 2022 06:14:37 GMT+0000 (Coordinated Universal Time) Resource creation Initiated
⠦ Initializing project in the cloud...

CREATE_COMPLETE AuthRole   AWS::IAM::Role Sun Jan 16 2022 06:14:54 GMT+0000 (Coordinated Universal Time)
CREATE_COMPLETE UnauthRole AWS::IAM::Role Sun Jan 16 2022 06:14:55 GMT+0000 (Coordinated Universal Time)
⠇ Initializing project in the cloud...

CREATE_COMPLETE DeploymentBucket AWS::S3::Bucket Sun Jan 16 2022 06:14:58 GMT+0000 (Coordinated Universal Time)
⠙ Initializing project in the cloud...

CREATE_COMPLETE amplify-chokume-dev-XXXXXX AWS::CloudFormation::Stack Sun Jan 16 2022 06:15:01 GMT+0000 (Coordinated Universal Time)
✔ Successfully created initial AWS cloud resources for deployments.
✔ Initialized provider successfully.
Initialized your environment successfully.

Your project has been successfully initialized and connected to the cloud!

Some next steps:
"amplify status" will show you what you've added already and if it's locally configured or deployed
"amplify add <category>" will allow you to add features like user login or a backend API
"amplify push" will build all your local backend resources and provision it in the cloud
"amplify console" to open the Amplify Console and view your project status
"amplify publish" will build all your local backend and frontend resources (if you have hosting category added) and provision it in the cloud

Pro tip:
Try "amplify add api" to create a backend API and then "amplify push" to deploy everything
とりあえずセットアップができたのかな?
$ npm install aws-amplify @aws-amplify/ui-react@1.x.x
npm ERR! code ENOSPC
npm ERR! syscall write
npm ERR! errno -28
npm ERR! nospc ENOSPC: no space left on device, write
npm ERR! nospc There appears to be insufficient space on your system to finish.
npm ERR! nospc Clear up some disk space and try again.

$ df -h
Filesystem      Size  Used Avail Use% Mounted on
devtmpfs        3.8G     0  3.8G   0% /dev
tmpfs           3.8G     0  3.8G   0% /dev/shm
tmpfs           3.8G  512K  3.8G   1% /run
tmpfs           3.8G     0  3.8G   0% /sys/fs/cgroup
/dev/nvme0n1p1   10G   10G   21M 100% /
tmpfs           768M     0  768M   0% /run/user/1000
tmpfs           768M     0  768M   0% /run/user/0
容量が足りん。ので docker image を消し込む
$ docker image ls
REPOSITORY      TAG          IMAGE ID       CREATED         SIZE
lambci/lambda   python3.8    094248252696   11 months ago   524MB
lambci/lambda   nodejs12.x   22a4ada8399c   11 months ago   390MB
lambci/lambda   nodejs10.x   db93be728e7b   11 months ago   385MB
lambci/lambda   python3.7    22b4b6fd9260   11 months ago   946MB
lambci/lambda   python3.6    177c85a10179   11 months ago   894MB
lambci/lambda   python2.7    d96a01fe4c80   11 months ago   763MB
lambci/lambda   nodejs8.10   5754fee26e6e   11 months ago   813MB
$ docker image rm <IMAGE ID>
$ npm install aws-amplify @aws-amplify/ui-react@1.x.x
19 moderate severity vulnerabilities
問題ありそうだけどとりあえずエラーはなし
DB接続用のAPIセットアップ
$ amplify add api
amplify add api
? Select from one of the below mentioned services: GraphQL
? Here is the GraphQL API that we will create. Select a setting to edit or continue Continue
? Choose a schema template: Single object with fields (e.g., “Todo” with ID, name, description)

⚠️  WARNING: your GraphQL API currently allows public create, read, update, and delete access to all models via an API Key. To configure PRODUCT
GraphQL schema compiled successfully.
GraphQL schema compiled successfully.
Edit your schema at /home/ec2-user/environment/chokume/amplify/backend/api/chokume/schema.graphql or place .graphql files in a directory at /home/ec2-user/environment/chokume/amplify/backend/api/chokume/schema
✔ Do you want to edit the schema now? (Y/n) · yes
? Choose your default editor: Visual Studio Code
Couldn’t find selected code editor (vscode) on your machine.
? Try opening with system-default editor instead? Yes
✅ Successfully added resource chokume locally

✅ Some next steps:
"amplify push" will build all your local backend resources and provision it in the cloud
"amplify publish" will build all your local backend and frontend resources (if you have hosting category added) and provision it in the cloud
codeを開くまでもなくファイルが作られているからこのままでいいかな
$ amplify push
✔ Generated GraphQL operations successfully and saved at src/graphql
✔ All resources are updated in the cloud
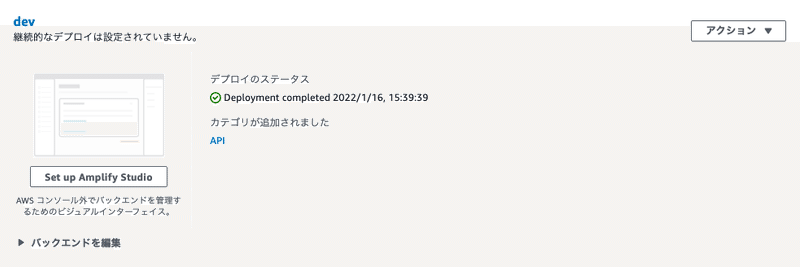
とりあえずプッシュできた。Amplifyのコンソールになにか出来てる


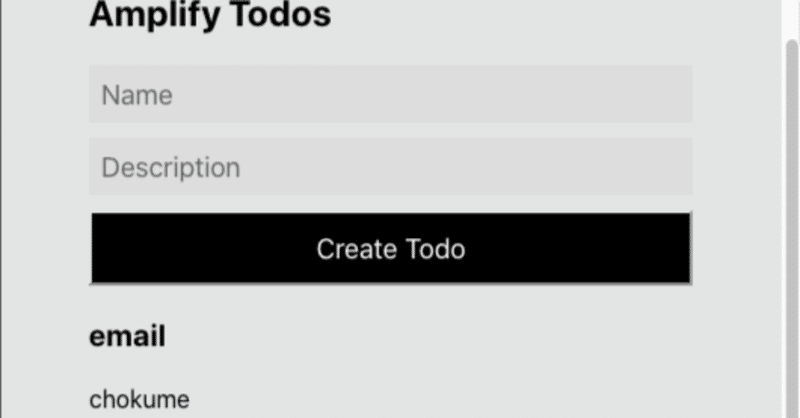
Connect frontend to API に従って src/App.jsをコピーして置換。 npm startしてPreviewで起動させる

Create Todoボタンを押すと下に追加される。
まずは送信するのに必要なのは emailとニックネームか
IDをemail,descriptionをニックネームと読み替えることにしよう。
次にホストするために認証を設定する

いや、認証 なんて文字列入れるわけ無いやろ。翻訳しちゃいけないとこしてる。
$ amplify add auth
Using service: Cognito, provided by: awscloudformation

 The current configured provider is Amazon Cognito.

 Do you want to use the default authentication and security configuration? Default configuration
 Warning: you will not be able to edit these selections.
 How do you want users to be able to sign in? Email
 Do you want to configure advanced settings? No, I am done.
✅ Successfully added auth resource chokume1d4e31f5 locally

✅ Some next steps:
"amplify push" will build all your local backend resources and provision it in the cloud
"amplify publish" will build all your local backend and frontend resources (if you have hosting category added) and provision it in the cloud
$ amplify push
なんとなくログインに使うのはemailにしておく
コードをsrc/App.jsに追加
import { withAuthenticator } from '@aws-amplify/ui-react'

//export default App
export default withAuthenticator(App)
npm startするとログイン画面がでた。これでホスティングする
$ amplify add hosting
? Select the plugin module to execute Hosting with Amplify Console (Managed hosting with custom domain
s, Continuous deployment)
? Choose a type Manual deployment

You can now publish your app using the following command:

Command: amplify publish
Gitするほうが楽な気がするけど 管理するものは減らしたいので一旦manual
publishしたらエラーがでた
/home/ec2-user/environment/chokume/node_modules/react-scripts/config/webpack.config.js:664
        new MiniCssExtractPlugin({
        ^

TypeError: MiniCssExtractPlugin is not a constructor
    at module.exports (/home/ec2-user/environment/chokume/node_modules/react-scripts/config/webpack.config.js:664:9)
    at Object.<anonymous> (/home/ec2-user/environment/chokume/node_modules/react-scripts/scripts/build.js:58:16)
    at Module._compile (node:internal/modules/cjs/loader:1101:14)
    at Object.Module._extensions..js (node:internal/modules/cjs/loader:1153:10)
    at Module.load (node:internal/modules/cjs/loader:981:32)
    at Function.Module._load (node:internal/modules/cjs/loader:822:12)
    at Function.executeUserEntryPoint [as runMain] (node:internal/modules/run_main:81:12)
    at node:internal/main/run_main_module:17:47
An error occurred during the publish operation: Unknown error occurred.
触っとらんところでエラーになる。というか最初のpublishではエラーにならなかったのに。
npm/npx 8.1.2
node v16.13.1
overridesがうまく効いてないかも
package.jsonを編集 "mini-css-extract-plugin": "^2.4.5",を追記
{
  "name": "chokume",
  "version": "0.1.0",
  "private": true,
  "dependencies": {
    "@aws-amplify/ui-react": "^1.2.26",
    "@testing-library/jest-dom": "^5.16.1",
    "@testing-library/react": "^12.1.2",
    "@testing-library/user-event": "^13.5.0",
    "aws-amplify": "^4.3.12",
    "mini-css-extract-plugin": "^2.4.5",
    "react": "^17.0.2",
    "react-dom": "^17.0.2",
    "react-scripts": "5.0.0",
    "web-vitals": "^2.1.3"
  },
  "scripts": {
    "start": "react-scripts start",
    "build": "react-scripts build",
    "test": "react-scripts test",
    "eject": "react-scripts eject"
  },
  "eslintConfig": {
    "extends": [
      "react-app",
      "react-app/jest"
    ]
  },
  "browserslist": {
    "production": [
      ">0.2%",
      "not dead",
      "not op_mini all"
    ],
    "development": [
      "last 1 chrome version",
      "last 1 firefox version",
      "last 1 safari version"
    ]
  }
}
$ npm install mini-css-extract-plugin@2.4.5これでとりあえず再度成功
$ amplify publish
⠴ Fetching updates to backend environment: dev from the cloud.
⚠️  WARNING: your GraphQL API currently allows public create, read, update, and delete access to all models via an API Key. To configure PRODUCTION-READY authorization rules, review: https://docs.amplify.aws/cli/graphql/authorization-rules

⠦ Fetching updates to backend environment: dev from the cloud.GraphQL schema compiled successfully.

Edit your schema at /home/ec2-user/environment/chokume/amplify/backend/api/chokume/schema.graphql or place .graphql files in a directory at /home/ec2-user/environment/chokume/amplify/backend/api/chokume/schema
✔ Successfully pulled backend environment dev from the cloud.

    Current Environment: dev

┌──────────┬─────────────────┬───────────┬───────────────────┐
│ Category │ Resource name   │ Operation │ Provider plugin   │
├──────────┼─────────────────┼───────────┼───────────────────┤
│ Api      │ chokume         │ No Change │ awscloudformation │
├──────────┼─────────────────┼───────────┼───────────────────┤
│ Auth     │ XXXXXXXXXXXXXXX │ No Change │ awscloudformation │
├──────────┼─────────────────┼───────────┼───────────────────┤
│ Hosting  │ amplifyhosting  │ No Change │ awscloudformation │
└──────────┴─────────────────┴───────────┴───────────────────┘

No changes detected
Publish started for amplifyhosting

> chokume@0.1.0 build
> react-scripts build

Creating an optimized production build...
Compiled successfully.

File sizes after gzip:

  <省略>

The project was built assuming it is hosted at /.
You can control this with the homepage field in your package.json.

The build folder is ready to be deployed.
You may serve it with a static server:

  npm install -g serve
  serve -s build

Find out more about deployment here:

  https://cra.link/deployment

✔ Zipping artifacts completed.
✔ Deployment complete!
https://dev.XXXXX.amplifyapp.com
とりあえずWeb画面の準備できた。メインのバックエンド作成はこれから
(ここまで3時間かかった)
GraphQLのエンドポイント何も認証かかってないのどうすればよいのかはまだわかっていない
よろしければサポートお願いします。プロデュース代になります
