DjangoでShopifyの商品を売る

前回の記事で紹介したShopifyAPIでは、Shopifyの管理機能が提供されているShopify Admin APIを利用することができました。
しかし、Shopifyで顧客用の機能を提供するためには、Shopify Storefront APIと呼ばれるAPIを利用する必要があります。
この記事では、Storefront APIの使い方について紹介します。
Django側の準備
Storefront APIを利用するだけ場合、Django側の設定はほとんど必要ありません。Djangoをインストールして、アプリケーションを作成するだけで十分です。
shopify_frontアプリケーションを作成して、基本的な設定だけ行いましょう。
django-admin startproject shopify_store
cd shopify_store
python manage.py startapp front
settings.pyにfrontのアプリケーションを登録します。
# settings.py

INSTALLED_APPS = [
  ...省略...

  'front.apps.FrontConfig',
]
ルーティングの設定も行っておきます。
# shopify_store/urls.py

from django.contrib import admin
from django.urls import path, include

urlpatterns = [
   path('admin/', admin.site.urls),
   path('', include('front.urls')),
]
# front/urls.py (新規作成)
from django.urls import path
from . import views
urlpatterns = [
path('', views.FrontIndexView.as_view(), name='index'),
]そして、Viewには単純にテンプレートを表示するだけのViewを作成しておきます。
# front/views.py

from django.shortcuts import render
from django.views import generic

class FrontIndexView(generic.TemplateView):
  template_name = 'front/index.html'
最後に、front/templates/front/index.htmlを作成しておきます。この後、ここでStorefront APIを使っていきますが、まずは適当に作成します。
# front/index.html
this is index pageこの時点で、開発用サーバーを立ち上げて、正常に動いているか確認しておきましょう。
python manage.py runserver
↓
http://localhost:8000 にアクセス
index.htmlに書いた内容が表示されていたら準備完了です!
![]()
Shopify側の準備
Shopify Storefront APIを利用するには、Shopifyアプリが必要です。
publicとprivateアプリのどちらでも良いのですが、今回はより簡単に使えるprivateアプリを作成しておきます。この記事の内容は、development storeで行ってください。
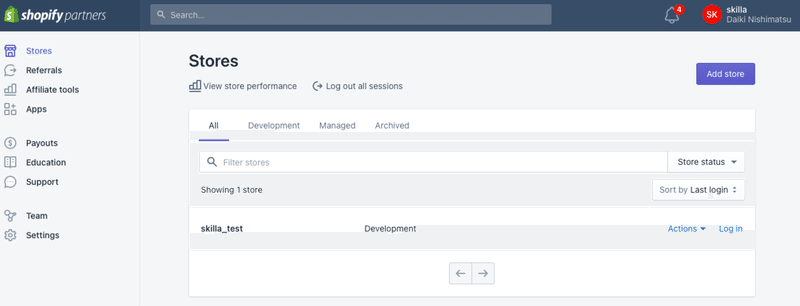
まずは、Storeにアクセスします。Storeの作り方は前回の記事を参照してください。
Storefront APIでアクセスしたいストアの右側にある[Log in]をクリックして、Storeの管理画面に入ります。
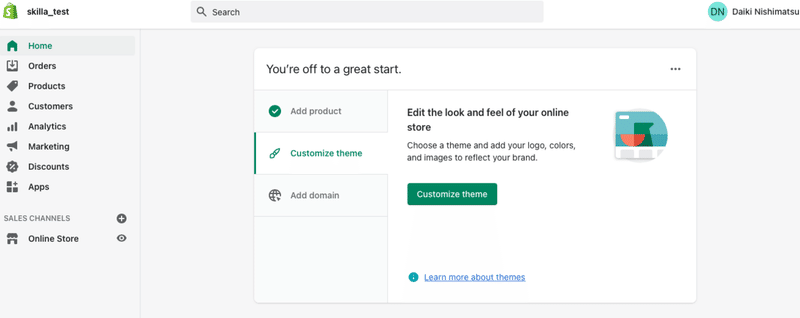
メニューの左側にあるAppsをクリックして、Appsの管理画面に移動します。

この画面の一番下にある、[manage private apps]をクリックします。

[Enable private app development]をクリックします。
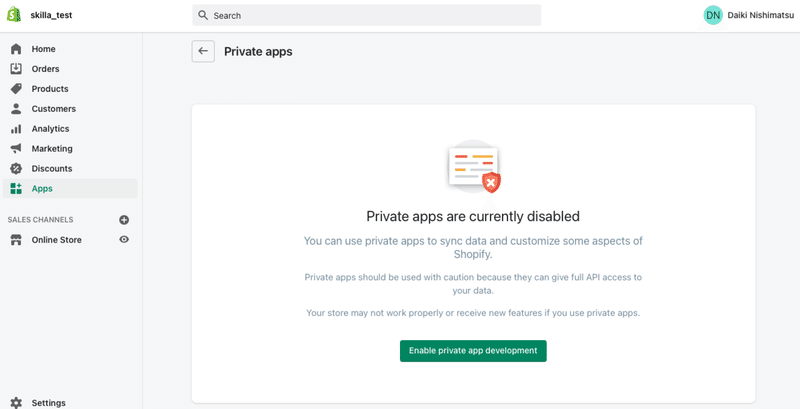
書かれている諸注意を読んで、[Enable private app development]を押します。
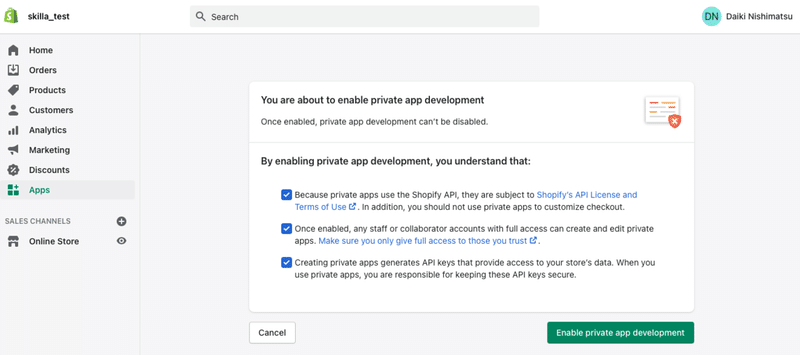
これでprivate appが作れるようになりました。

早速、[Create private app]から作成します。
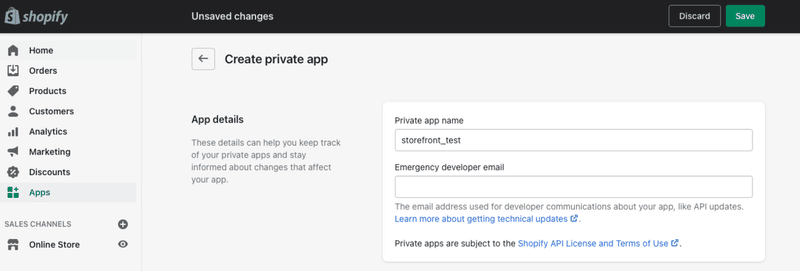
適当に情報を埋めていきます。
Admin APIは今回は不要なので、なしのままで大丈夫です。
Storefront APIにはちゃんとチェックを入れておきましょう。
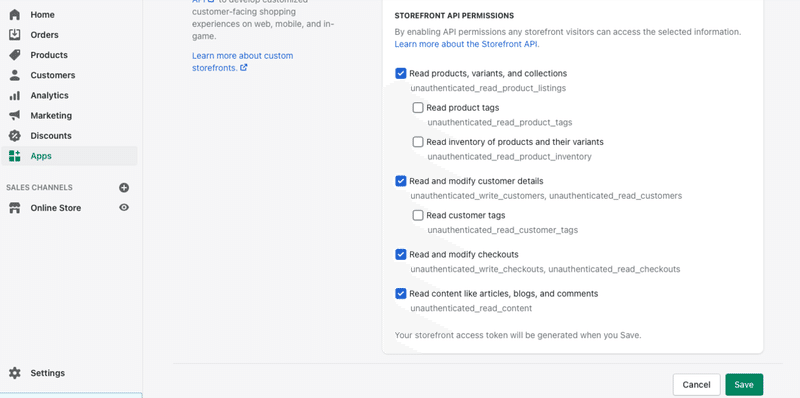
最後に、[Save]を押してprivate appを作成完了します。
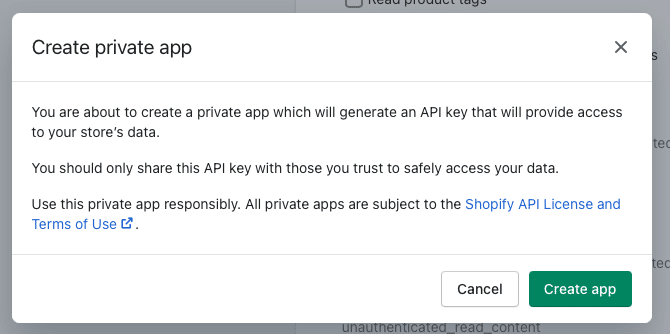
また注意が出ますので、確認して[Create app]を押します。
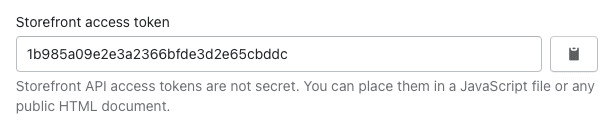
作成が終わると、画面下の方にあった、Storefront APIの一番下に、Storefront access tokenが生成されます。これを後で利用するので、控えておきましょう。
Shopify Storefront APIの使い方
ShopifyにはStorefront APIを扱えるいくつかのライブラリがあります。
Javascript Buy SDK
BuyButton.js
Android Buy SDK
iOS Buy SDK
Unity Buy SDK
フロントエンドにjavascriptを使うのであればJavascript Buy SDKを利用しますが、今回は単純にBuyButton.jsを利用してみましょう。
BuyButton.jsの使い方は簡単で、まず最初にindex.htmlにスクリプトを追加します。コードは後で全部まとめて紹介します。
https://sdks.shopifycdn.com/buy-button/latest/buy-button-storefront.min.jsこれだけでもう使える状態なので、早速BuyButton.jsを利用するスクリプトを書いていきます。
BuyButton.jsの使い方
まずはShopifyに接続できるクライアントを作成します。
ここには、先ほどprivate appを作成したStoreの名前と、private appにあったstorefront access tokenを追加します。
そして、このクライアントを利用して、UIを作成するインスタンスを作成します。
var client = ShopifyBuy.buildClient({
 domain: 'skilla_test.myshopify.com',
 storefrontAccessToken: '1b985a09e2e3a2366bfde3d2e65cbddc',
});

var ui = ShopifyBuy.UI.init(client);
これで準備は完了したので、あとはUIを設置していくだけです。
商品を設置してみることにしましょう。まずは、StoreのProductsにアクセスして、どれか商品を1つクリックします。まだ商品がない方は、適当に作成しましょう。
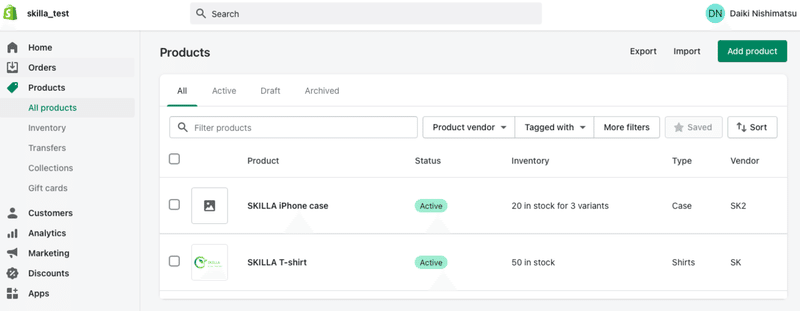
商品詳細ページに入ったら、そのページのURLをみて、一番最後の部分をコピーしてください。
僕の場合は、
https://skilla-test.myshopify.com/admin/products/6605389693104
となっていたので、6605389693104をコピーしておきます。
そして、この部分を以下の関数のidの部分に入力します。
ui.createComponent('product', {
 id: 6605389693104,
 node: document.getElementById('skilla-tshirt')
});
これだけです。
以下の記事内にあったコードを参考にして、index.htmlは最終的に以下のようになりました。
# front/index.html
<!DOCTYPE html>
<html>
<head>
<title>Shopify BuyButton Test</title>
</head>
<body>
<h1>Products</h1>
<div id="skilla_tshirt"></div>
<script type="text/javascript">
/*<![CDATA[*/
(function () {
var scriptURL = 'https://sdks.shopifycdn.com/buy-button/latest/buy-button-storefront.min.js';
if (window.ShopifyBuy) {
if (window.ShopifyBuy.UI) {
ShopifyBuyInit();
} else {
loadScript();
}
} else {
loadScript();
}
function loadScript() {
var script = document.createElement('script');
script.async = true;
script.src = scriptURL;
(document.getElementsByTagName('head')[0] || document.getElementsByTagName('body')[0]).appendChild(script);
script.onload = ShopifyBuyInit;
}
function ShopifyBuyInit() {
var client = ShopifyBuy.buildClient({
domain: 'skilla-test.myshopify.com',
apiKey: '1b985a09e2e3a2366bfde3d2e65cbddc',
});
ShopifyBuy.UI.onReady(client).then(function (ui) {
ui.createComponent('product', {
id: [6605389693104],
node: document.getElementById('skilla_tshirt'),
});
});
}
})();
/*]]>*/
</script>
</body>
</html>
これでどのように表示されるかみてみましょう。
python manage.py runserver
↓
http://localhost:8000 にアクセス
以下のように商品が表示され、[ADD TO CART]をクリックすると、 Cartに商品が追加されます。
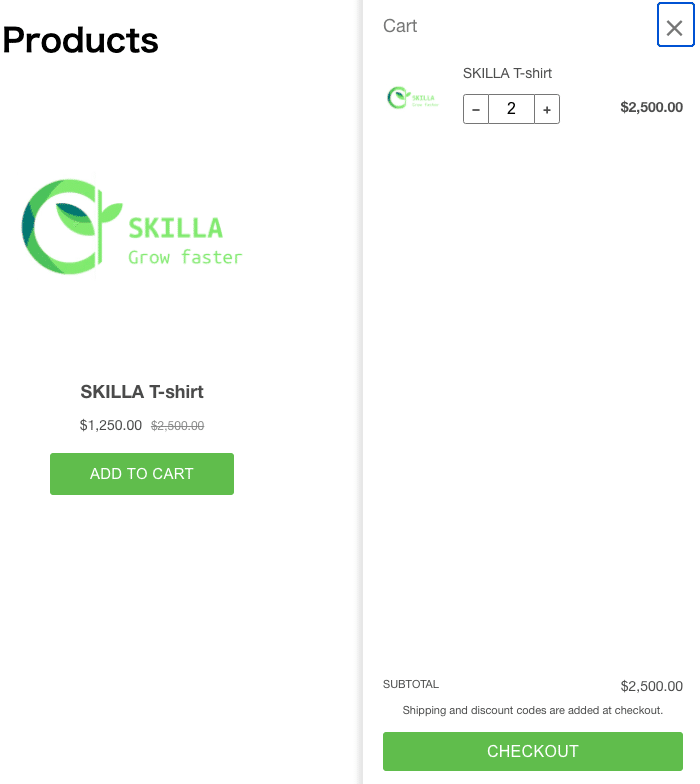
[CHECKOUT]をクリックすると、注文画面が表示されます。
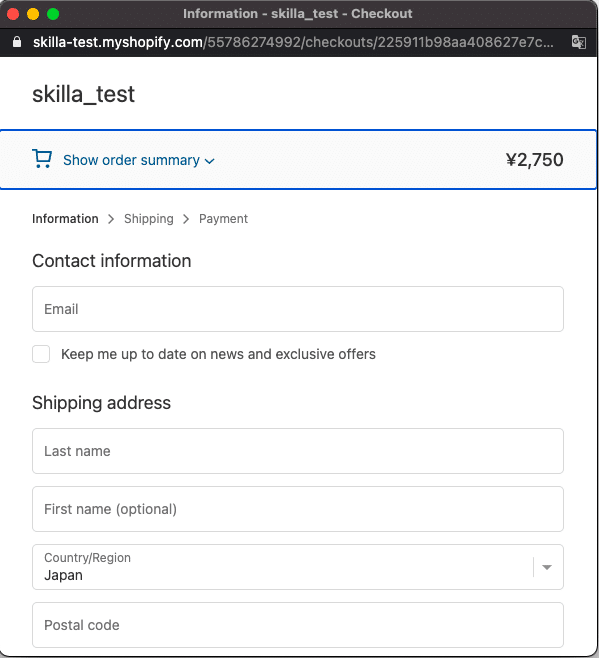
ただ、完全に英語表記なので日本人向けだと、怖がられて逃げられてしまうのではないでしょうか。
というわけで日本語に変えてみましょう。
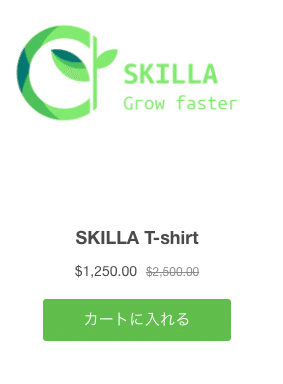
ADD TO CARTボタンの日本語化
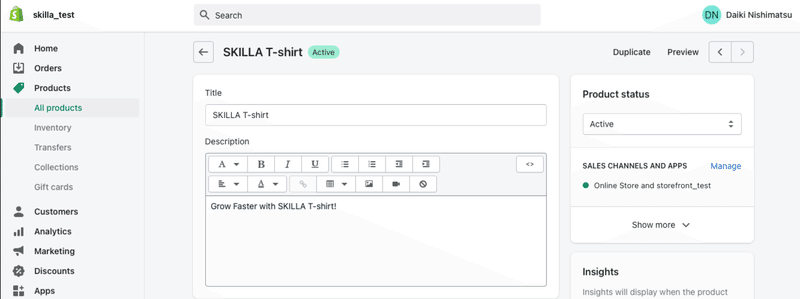
下の画像部分の文字列を変更します。ちなみに商品名は、Product登録を英語でしているだけなので、管理ページで変更できます。

以下のように指定することで、文字列を変更できます。
ui.createComponent('product', {
 id: 6605389693104,
 node: document.getElementById('skilla_tshirt'),
 options: {
   product: {
     text: {
       button: 'カートに入れる',
     }
   }
 }
});

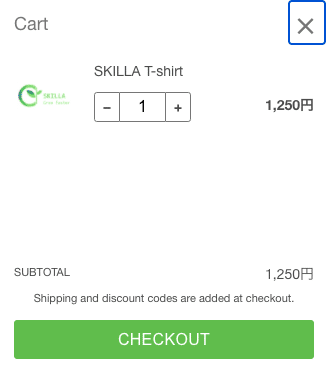
カートの日本語化
下の画像部分の文字列を変更します。特に下の部分は日本語化したいですよね。
ui.createComponent('product', {
     id: 6605389693104,
     node: document.getElementById('skilla_tshirt'),
     options: {
       cart: {
         text: {
           title: 'カート',
           empty: 'カートは空です',
           button: '今すぐ購入!',
           total: '合計',
           notice: '配送と割引コードは次の画面で設定してください',
         }
       }
     }
この場合、optionでcart部分のtextを変更すれば反映されます。
金額の日本語化
Shopifyの日本円に設定しているのになぜかドル表記になっています。しかも円がそのままドル表示になっているので、100倍のぼったくり価格になっています。これはヤバい( ̄▽ ̄;)
なかなかうまくいかなかったのですが、moneyFormatを指定することで変更することができました。
ui.createComponent('product', {
     id: 6605389693104,
     node: document.getElementById('skilla_tshirt'),
     moneyFormat: '\{\{amount_no_decimals\}\}円',
}
まとめ
ここまで変更した結果が以下となります。
# front/index.html

<!DOCTYPE html>
<html>
<head>
 <title>Shopify BuyButton Test</title>
</head>
<body>
 <h1>Products</h1>

 <div id="skilla_tshirt"></div>

<script type="text/javascript">
 /*<![CDATA[*/

 (function () {
   var scriptURL = 'https://sdks.shopifycdn.com/buy-button/latest/buy-button-storefront.min.js';
   if (window.ShopifyBuy) {
     if (window.ShopifyBuy.UI) {
       ShopifyBuyInit();
     } else {
       loadScript();
     }
   } else {
     loadScript();
   }

   function loadScript() {
     var script = document.createElement('script');
     script.async = true;
     script.src = scriptURL;
     (document.getElementsByTagName('head')[0] || document.getElementsByTagName('body')[0]).appendChild(script);
     script.onload = ShopifyBuyInit;
   }

   function ShopifyBuyInit() {
     var client = ShopifyBuy.buildClient({
       domain: 'skilla-test.myshopify.com',
       apiKey: '1b985a09e2e3a2366bfde3d2e65cbddc',
     });

     ShopifyBuy.UI.onReady(client).then(function (ui) {
       ui.createComponent('product', {
         id: [6605389693104],
         node: document.getElementById('skilla_tshirt'),
         moneyFormat: '\{\{amount_no_decimals\}\}円',

         options: {

           product: {
             text: {
               button: 'カートに入れる',
             }
           },

           cart: {
             text: {
               title: 'カート',
               empty: 'カートは空です',
               button: '今すぐ購入!',
               total: '合計',
               notice: '配送と割引コードは次の画面で設定してください',
             }
           }
         }
       });
     });
   }
 })();
 /*]]>*/
 </script>
</body>
</html>
他にも変更したい場合は、以下が参考になります。
商品表示、カート、支払いの機能をすぐに導入することができました。Shopifyを使えばすぐにオンラインで商品を売れそうですね!
ここまで読んでいただけたなら、”スキ”ボタンを押していただけると励みになります!(*´ー`*)ワクワク
この記事が気に入ったらサポートをしてみませんか?