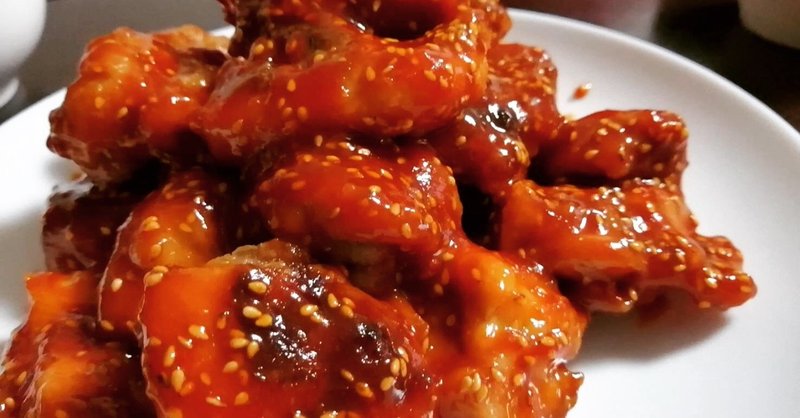
ヤンニョムチキン/Yangnyeon Chicken

皆さんこんにちは🍳
Hi guys🍳
今日は記念すべき1回目の公開レシピです!
Today, we are going to publish our memorable first recipe!
初めてなので分かりにくい部分もあるかと思いますが
Since it's first time, you might find some mistakes.
最後までお付き合い頂けると嬉しいです。
We'll try to do our best so please go easy on us.
さて、1回目となる最初の料理は.....
Well, the first dish is .....
APU生も大好きなヤンニョムチキンです!
Yangnyeon chicken we bet you guys love!
それでは早速紹介します→
Let's start →
〜ヤンニョムチキン〜
〜YANGNYEON CHICKEN〜

材料/Ingredients
鶏モモ肉 /Chicken leg:300g
●みりん/Mirin:大さじ1/ Tbsp 1
●塩こしょう/salt and pepper:少々/a bit
片栗粉/starch:大さじ3/ Tbsp 3
*コチュジャン/Gochujang:大さじ1 / Tbsp 1
*ケチャップ/ketchup:大さじ1.5 / Tbsp 1.5
*醤油/soy sauce:大さじ1 / Tbsp 1
*みりん/mirin:大さじ1 / Tbsp 1
*豆板醤/ Chinese chili bean sauce:小さじ1 / Tsp 1
*砂糖/sugar:小さじ1 / Tsp 1
*すりおろしニンニク/grated garlic:小さじ1 / Tsp 1
サラダ油/oil:大さじ3/ Tbsp 3
白いりゴマ/white sesame:適量/suitable amount
※豆板醤の量を変えることで辛さを調整できます
※If you change the amount of Chinese chili bean sauce, you can control spiciness.
作り方/Method
1. 鶏モモ肉は一口大に切りボウルに入れ●の材料を入れてもみ込み、10分程置く。
Cut chicken leg into the bite-sized chunk. Later, put this chicken, and condiments marked by ● into a Bowl and put about 10 min.
2. キッチンペーパーで水気を拭き取り、片栗粉を全体にしっかりとまぶす。
Remove wetness by Kitchen towel. Later, cover w/ starch.
3. 別のボウルに*の調味料を入れ、よく混ぜる。
Put the condiments marked by * into another bowl.
4. フライパンにサラダ油を入れ中火で熱し、2を入れ5分程揚げ焼きにする。
鶏もも肉に火が通ったら取り出す。
Put oil in a pan and cook over a medium flame.
After the oil was great up, put 2 and deep-fry and grill about 5 min.
After the chicken was cooked, take out from the pan.
5. 同じフライパンの余分な油を拭き取り弱火にして3を入れ
ひと煮立ちしたら4を入れ、全体に絡んだら火から下ろす。
Wipeout oil and turn heat lower.
And, put 3 into the pan. After it was boiled once, put 4 and caver.
6. 器に盛り付け、白いりゴマをちらして完成。
Put on a plate, and sprinkle onto it some sesame.
どうでしたか?
How was it?
とても簡単に作れるので
You can make yangnyeon chicken at home and
自分の好みの辛さで作ってみて下さいね!
you can also choose the level of spiciness!!
次回もお楽しみに🍳
See you next time🍳
この記事が気に入ったらサポートをしてみませんか?